Customer support assistant
Build one assistant that answers your customers on your website, on WhatsApp and by email. It looks up their orders in your own order system, refunds small amounts on its own, and asks a manager before it refunds anything over $500.
This guide builds it for Northwind, a shop that sells coffee equipment. Every step says where to click and what you will see. It takes about 20 minutes, and you do not need to write any code.
What you need
- An almyty account.
- A key for an AI model, for example from OpenAI. almyty uses it to run your assistant, and you pay the model maker for what it uses.
- The description of your order system’s API. An API is the way one piece of software talks to another; most order, shop and helpdesk systems have one, and its description is a file (or a link) that lists what the system can do. Your IT team or the system’s settings page has it, often under a name like “OpenAPI” or “Swagger”.
- For WhatsApp: a Twilio account with a WhatsApp number. For email: a Resend account with a receiving address. You can add these at the end, or skip them.
1. Connect an AI model
In the sidebar, open Models and click Connect a provider. (Later you will also find your connections under Credentials.) Pick OpenAI (or the model maker you use), paste your key into API key and click Save.
almyty checks the key and lists the models it gives you, with their prices. Leave them all ticked and click Done.
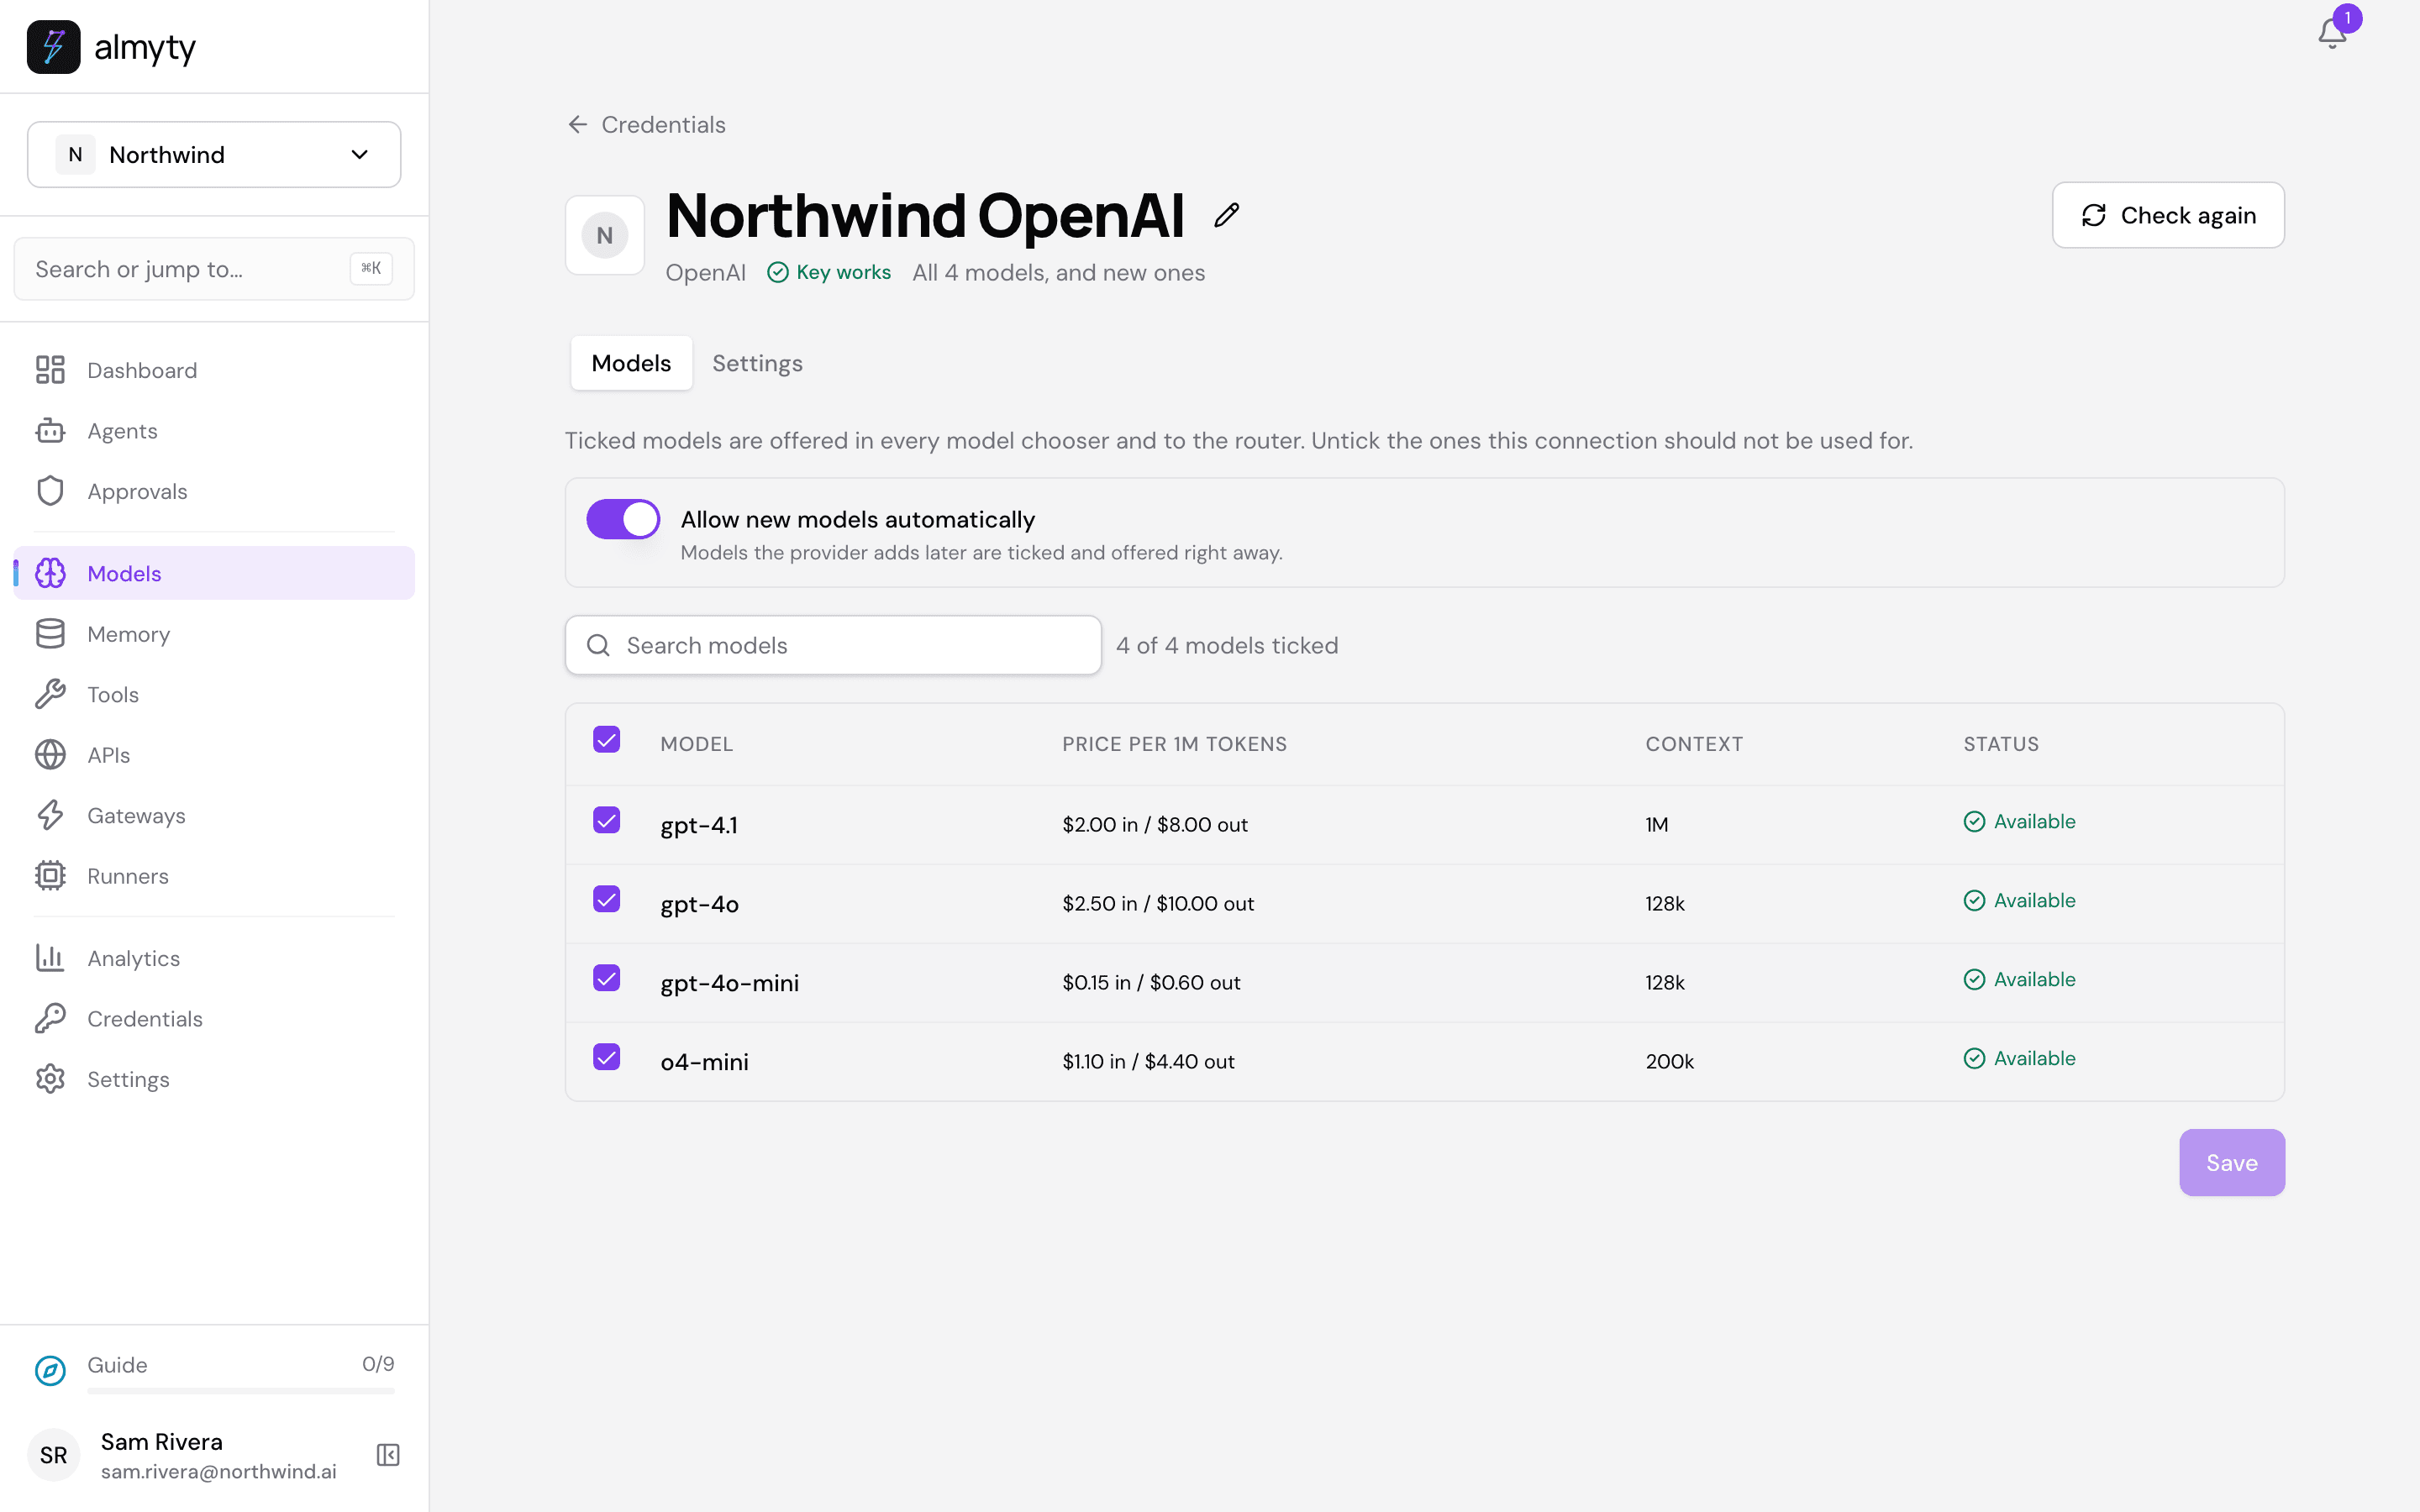
You only do this once. Every assistant in your organization can use these models, and you can switch an assistant to another model at any time.
2. Connect your order system
In the sidebar, open APIs and click Connect an API. Pick OpenAPI / Swagger. Under Description, paste the link to your order system’s description on Link, or pick File and upload the file.
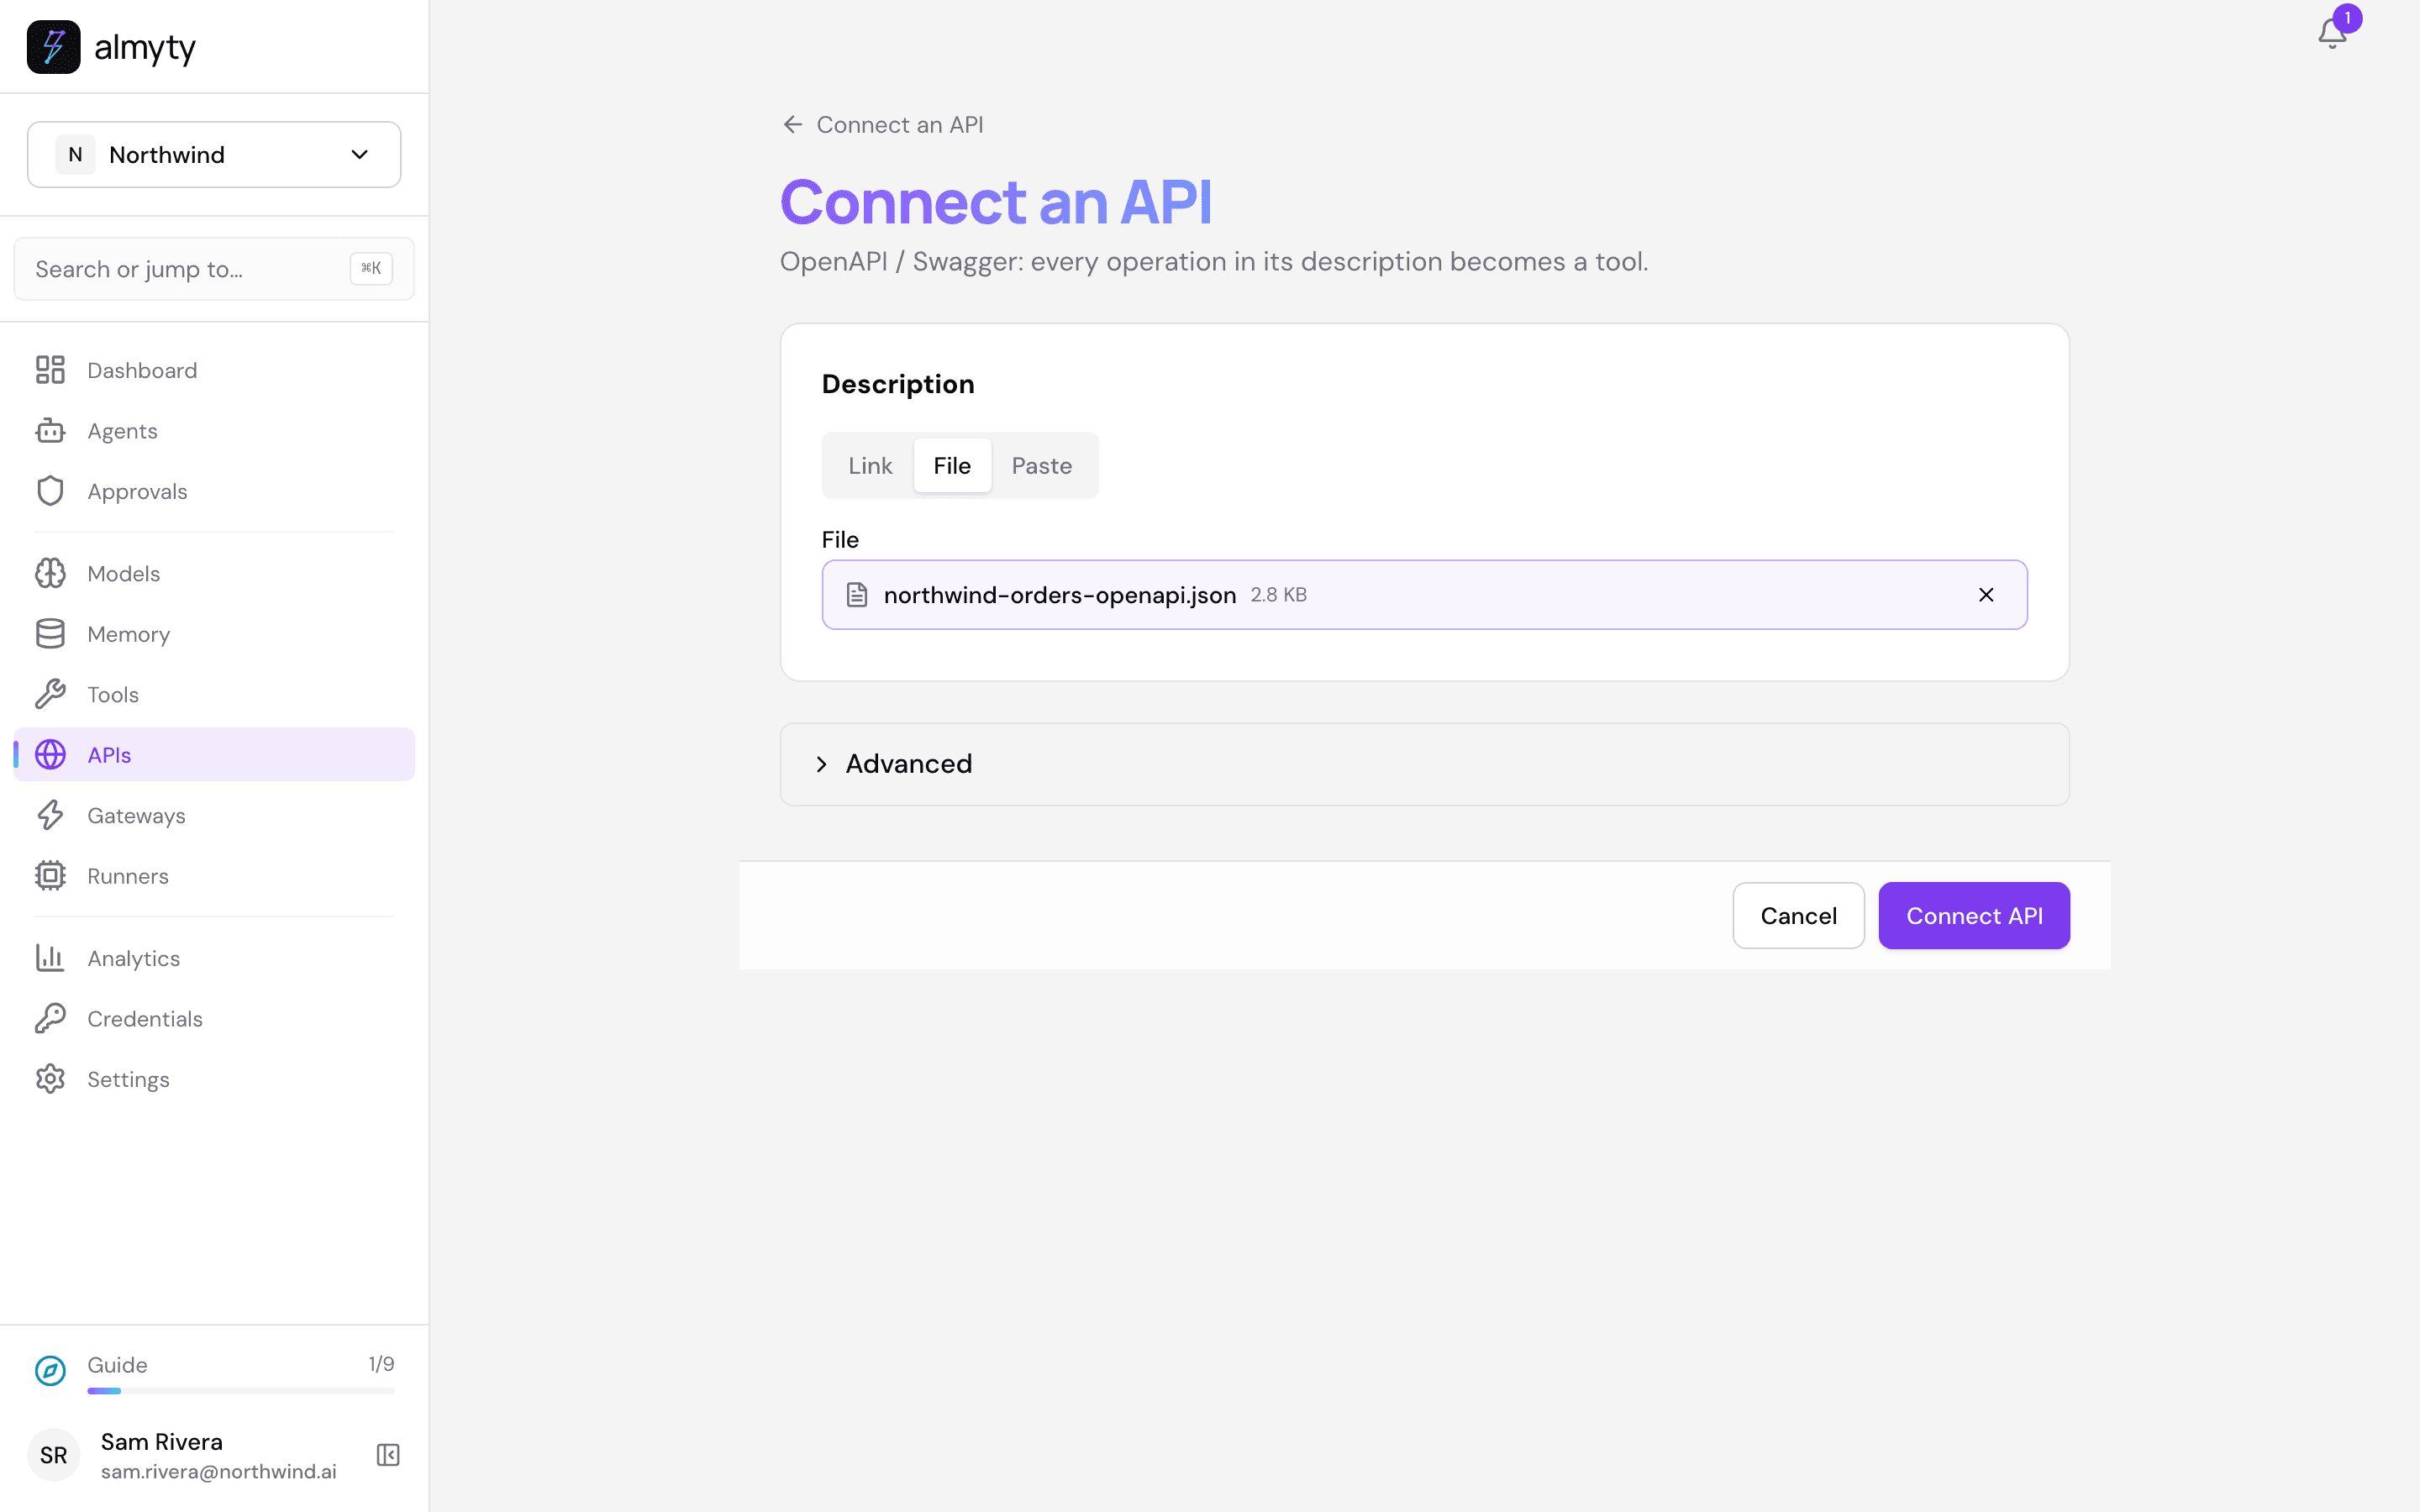
Click Connect API. almyty reads the description and works out what your system can do. Each thing becomes a tool your assistant can use: here “Get an order by number”, “Track the shipment for an order”, “Issue a refund for an order” and two more.
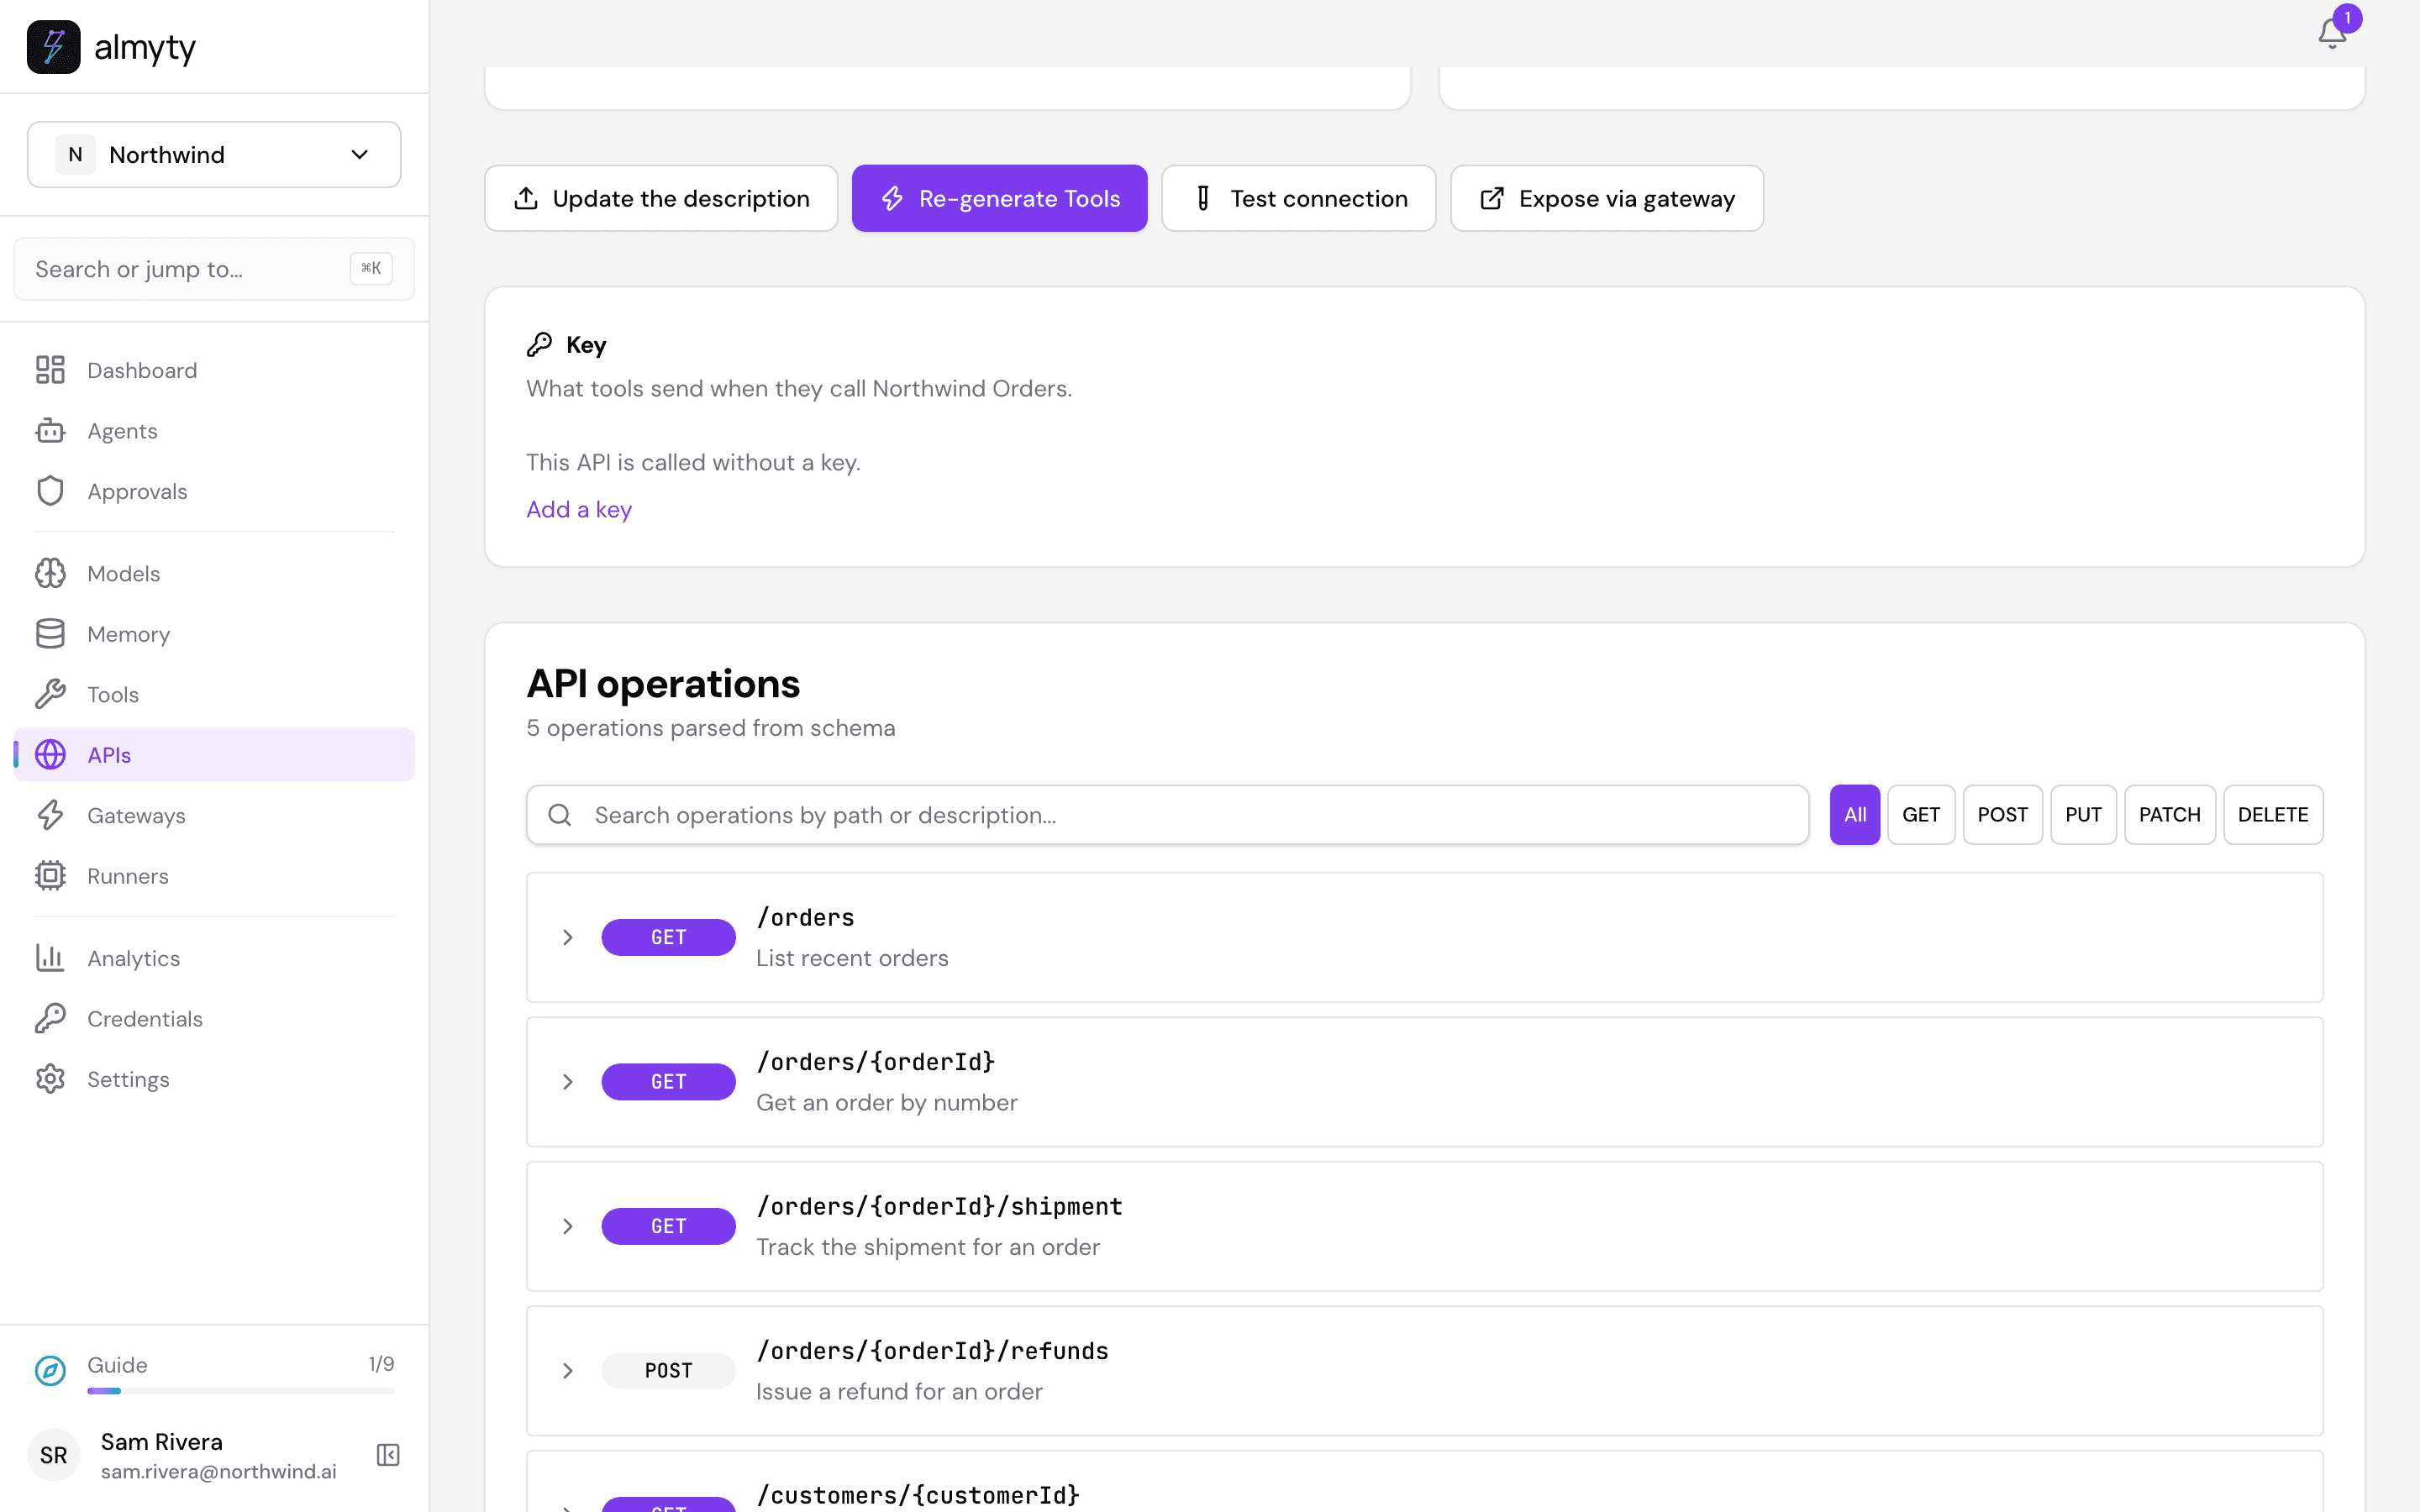
If your order system needs a key to be called, click Add a key on this page and paste it. almyty keeps it locked away and sends it only to your order system.
3. Create the assistant
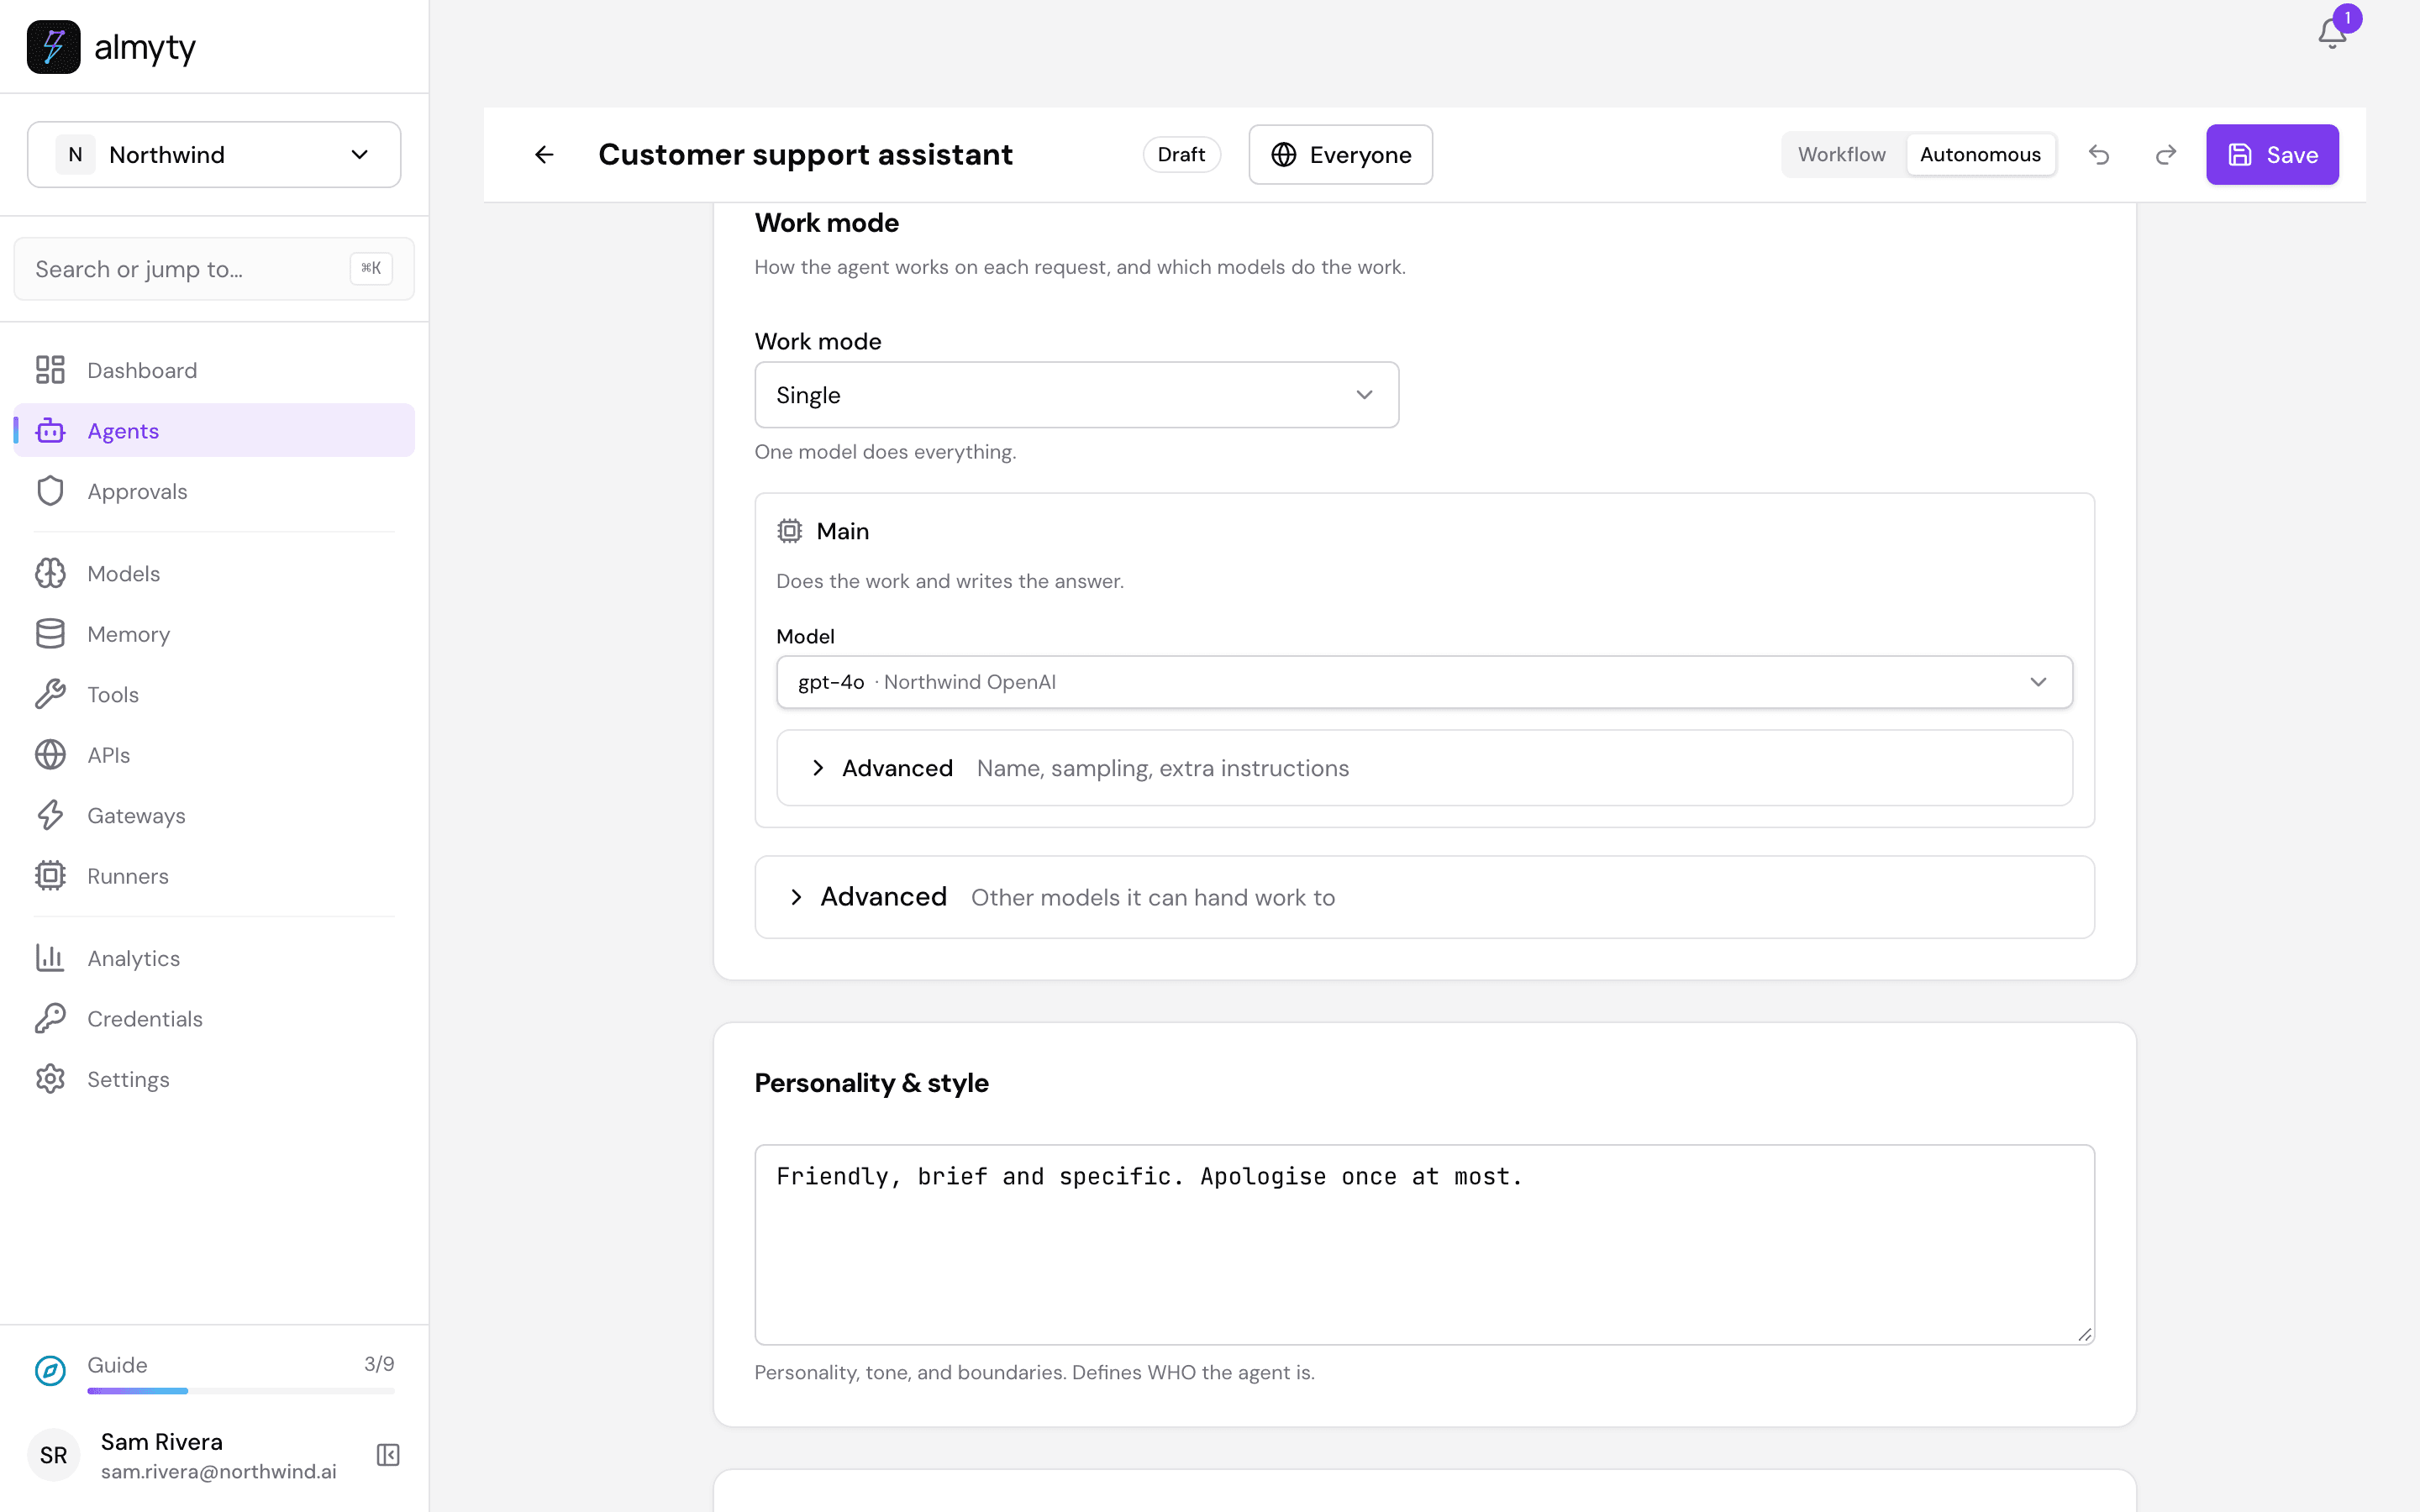
In the sidebar, open Agents and click Create agent. An agent is what almyty calls an assistant that does work for you. At the top, pick Autonomous: you tell it the goal in plain words and it works out the steps. (Workflow is for when you want to draw every step yourself.)
- At the top, click the name New agent and replace it with
Customer support assistant. - Under Work mode, open Model and pick a model, for example gpt-4o. The list shows each model’s price. You can come back and pick another model later without changing anything else. (The other work modes let several models share the work, for example a cheap one that answers first and a stronger one that checks it.)
- Under Personality & style, say how it should sound:
Friendly, brief and specific. Apologise once at most. - Under Instructions, say what it should do and where its limits are:
You answer Northwind customers about their orders. Always look the order up before you answer. You can issue refunds. When a refund waits for a manager, tell the customer a person will confirm it within one business day.
4. Pick what it may use
Scroll down to Capabilities. Under Tools and APIs, tick All tools next to Northwind Orders. The assistant may use those tools and nothing else: anything not ticked here is refused.
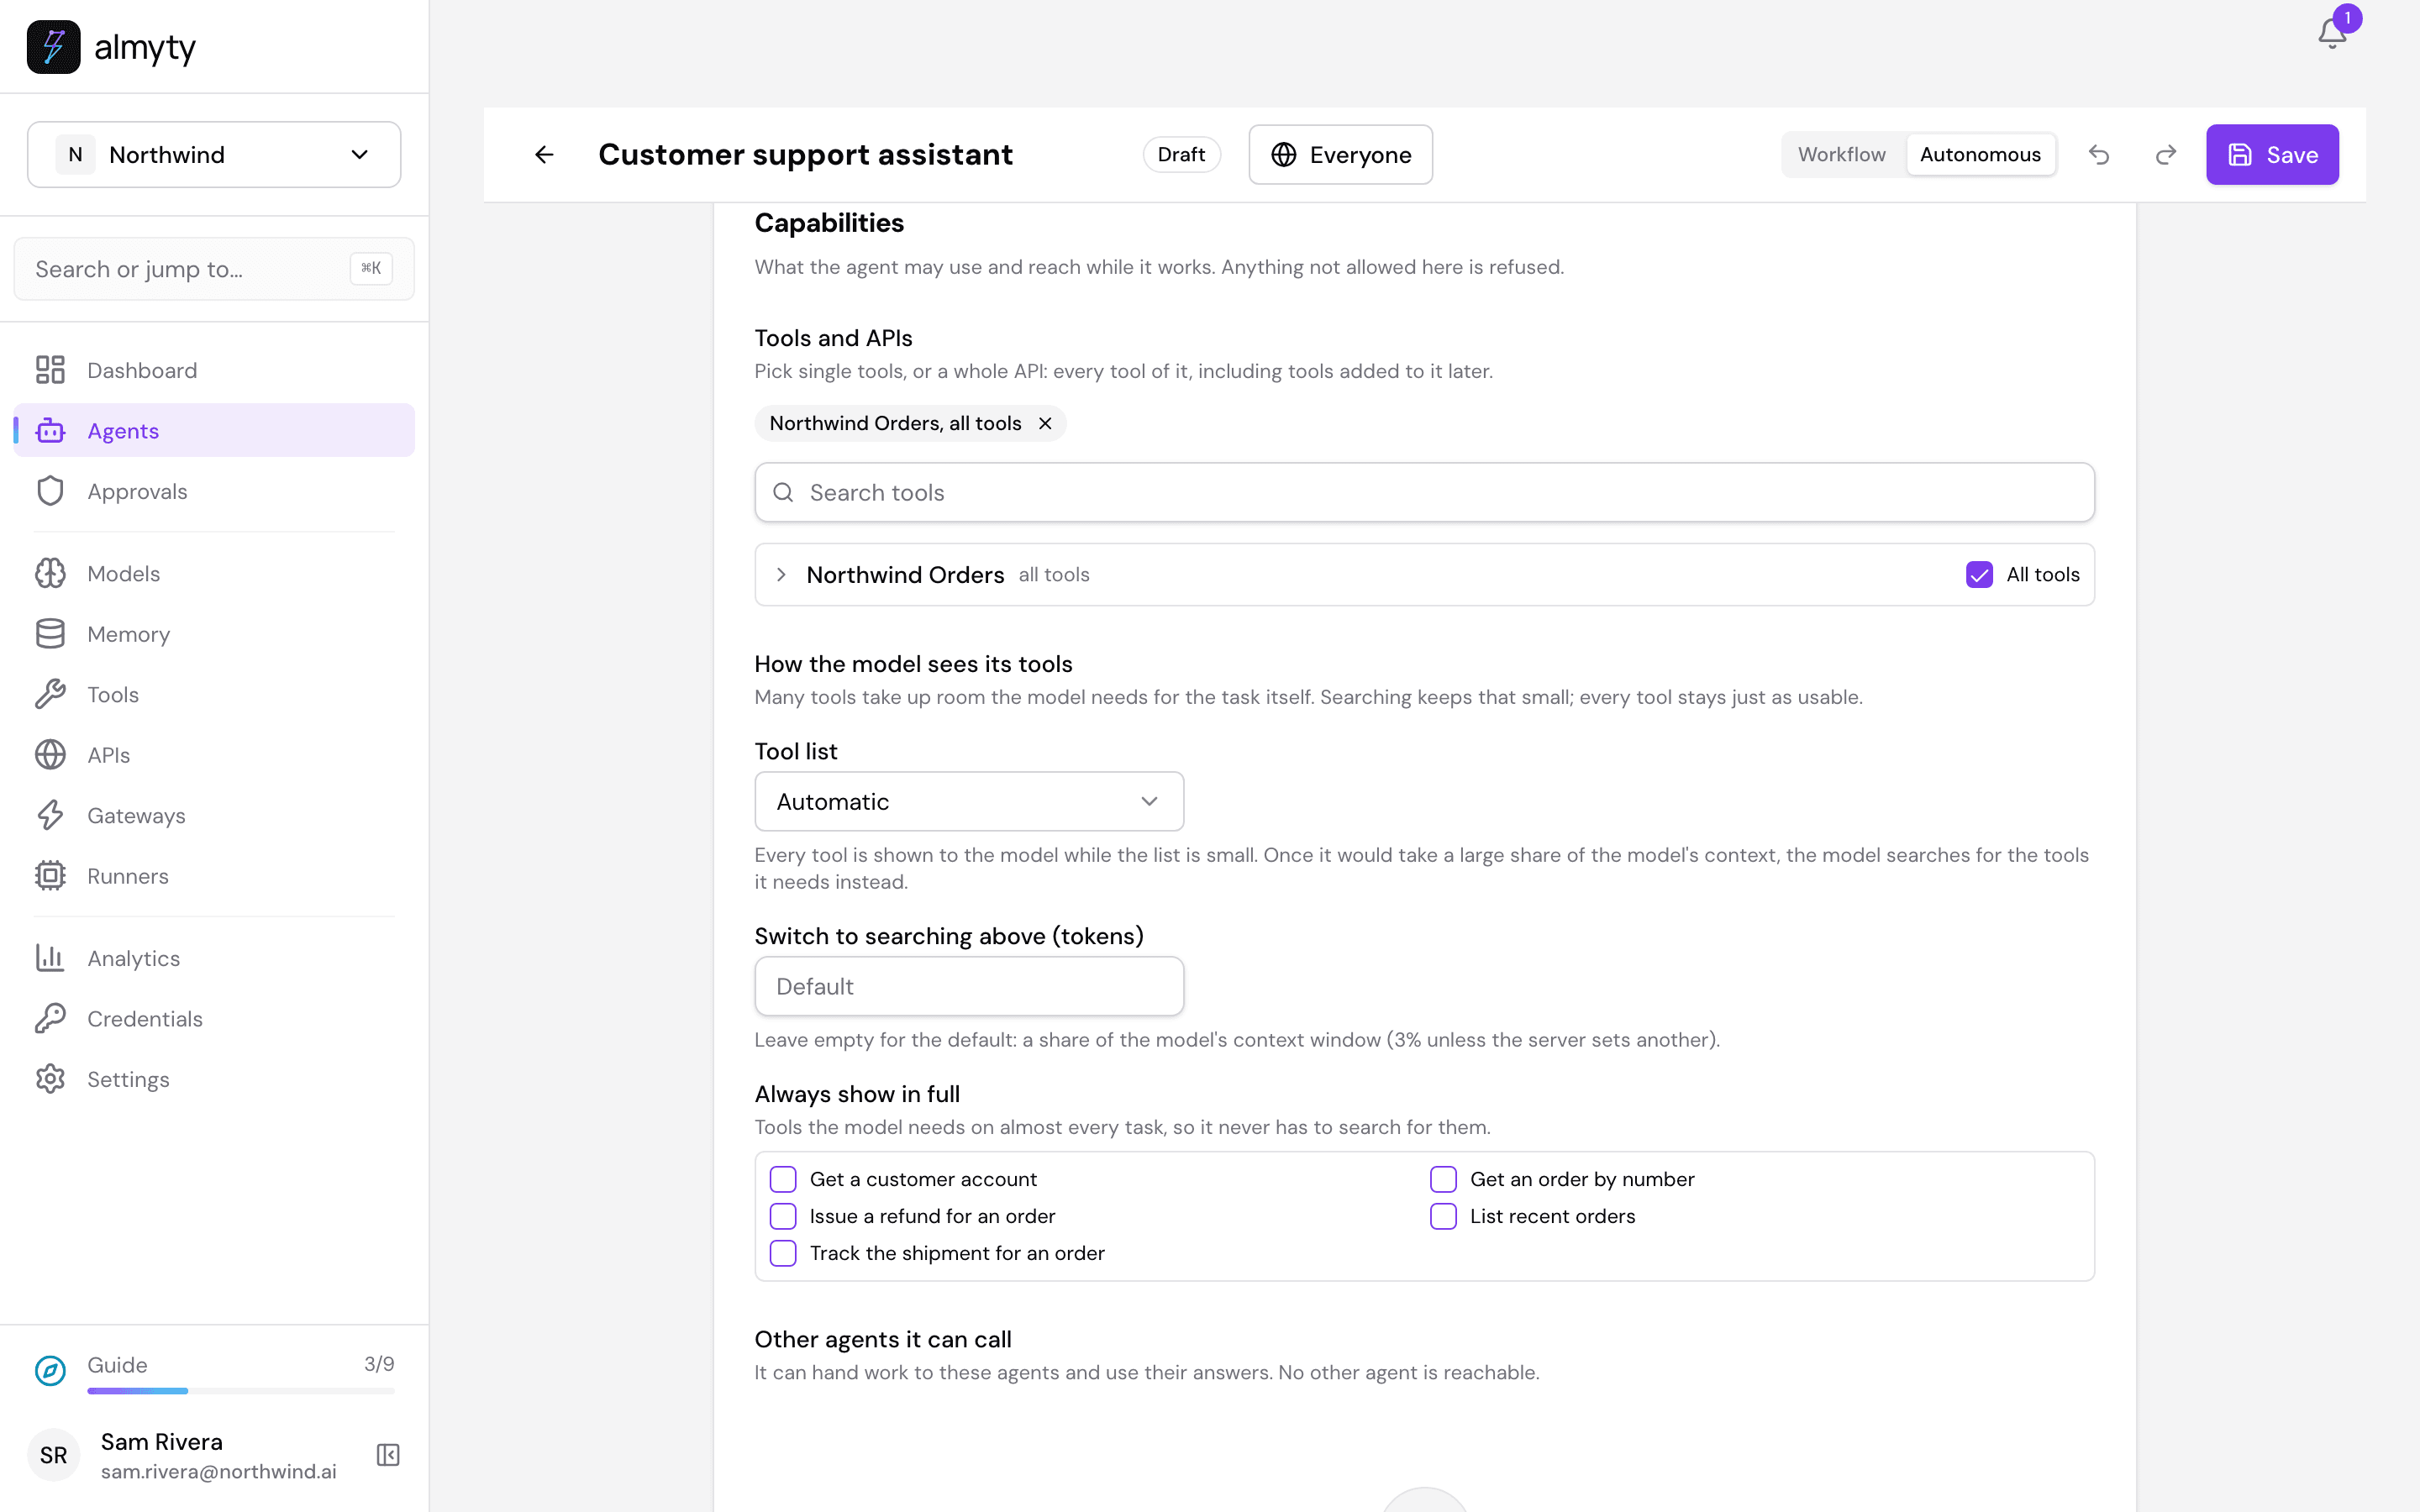
Click Save at the top right.
5. Turn it on and try it
Click the arrow at the top left to go back to Agents, and open Customer support assistant. A new assistant starts as a draft: click Activate at the top.
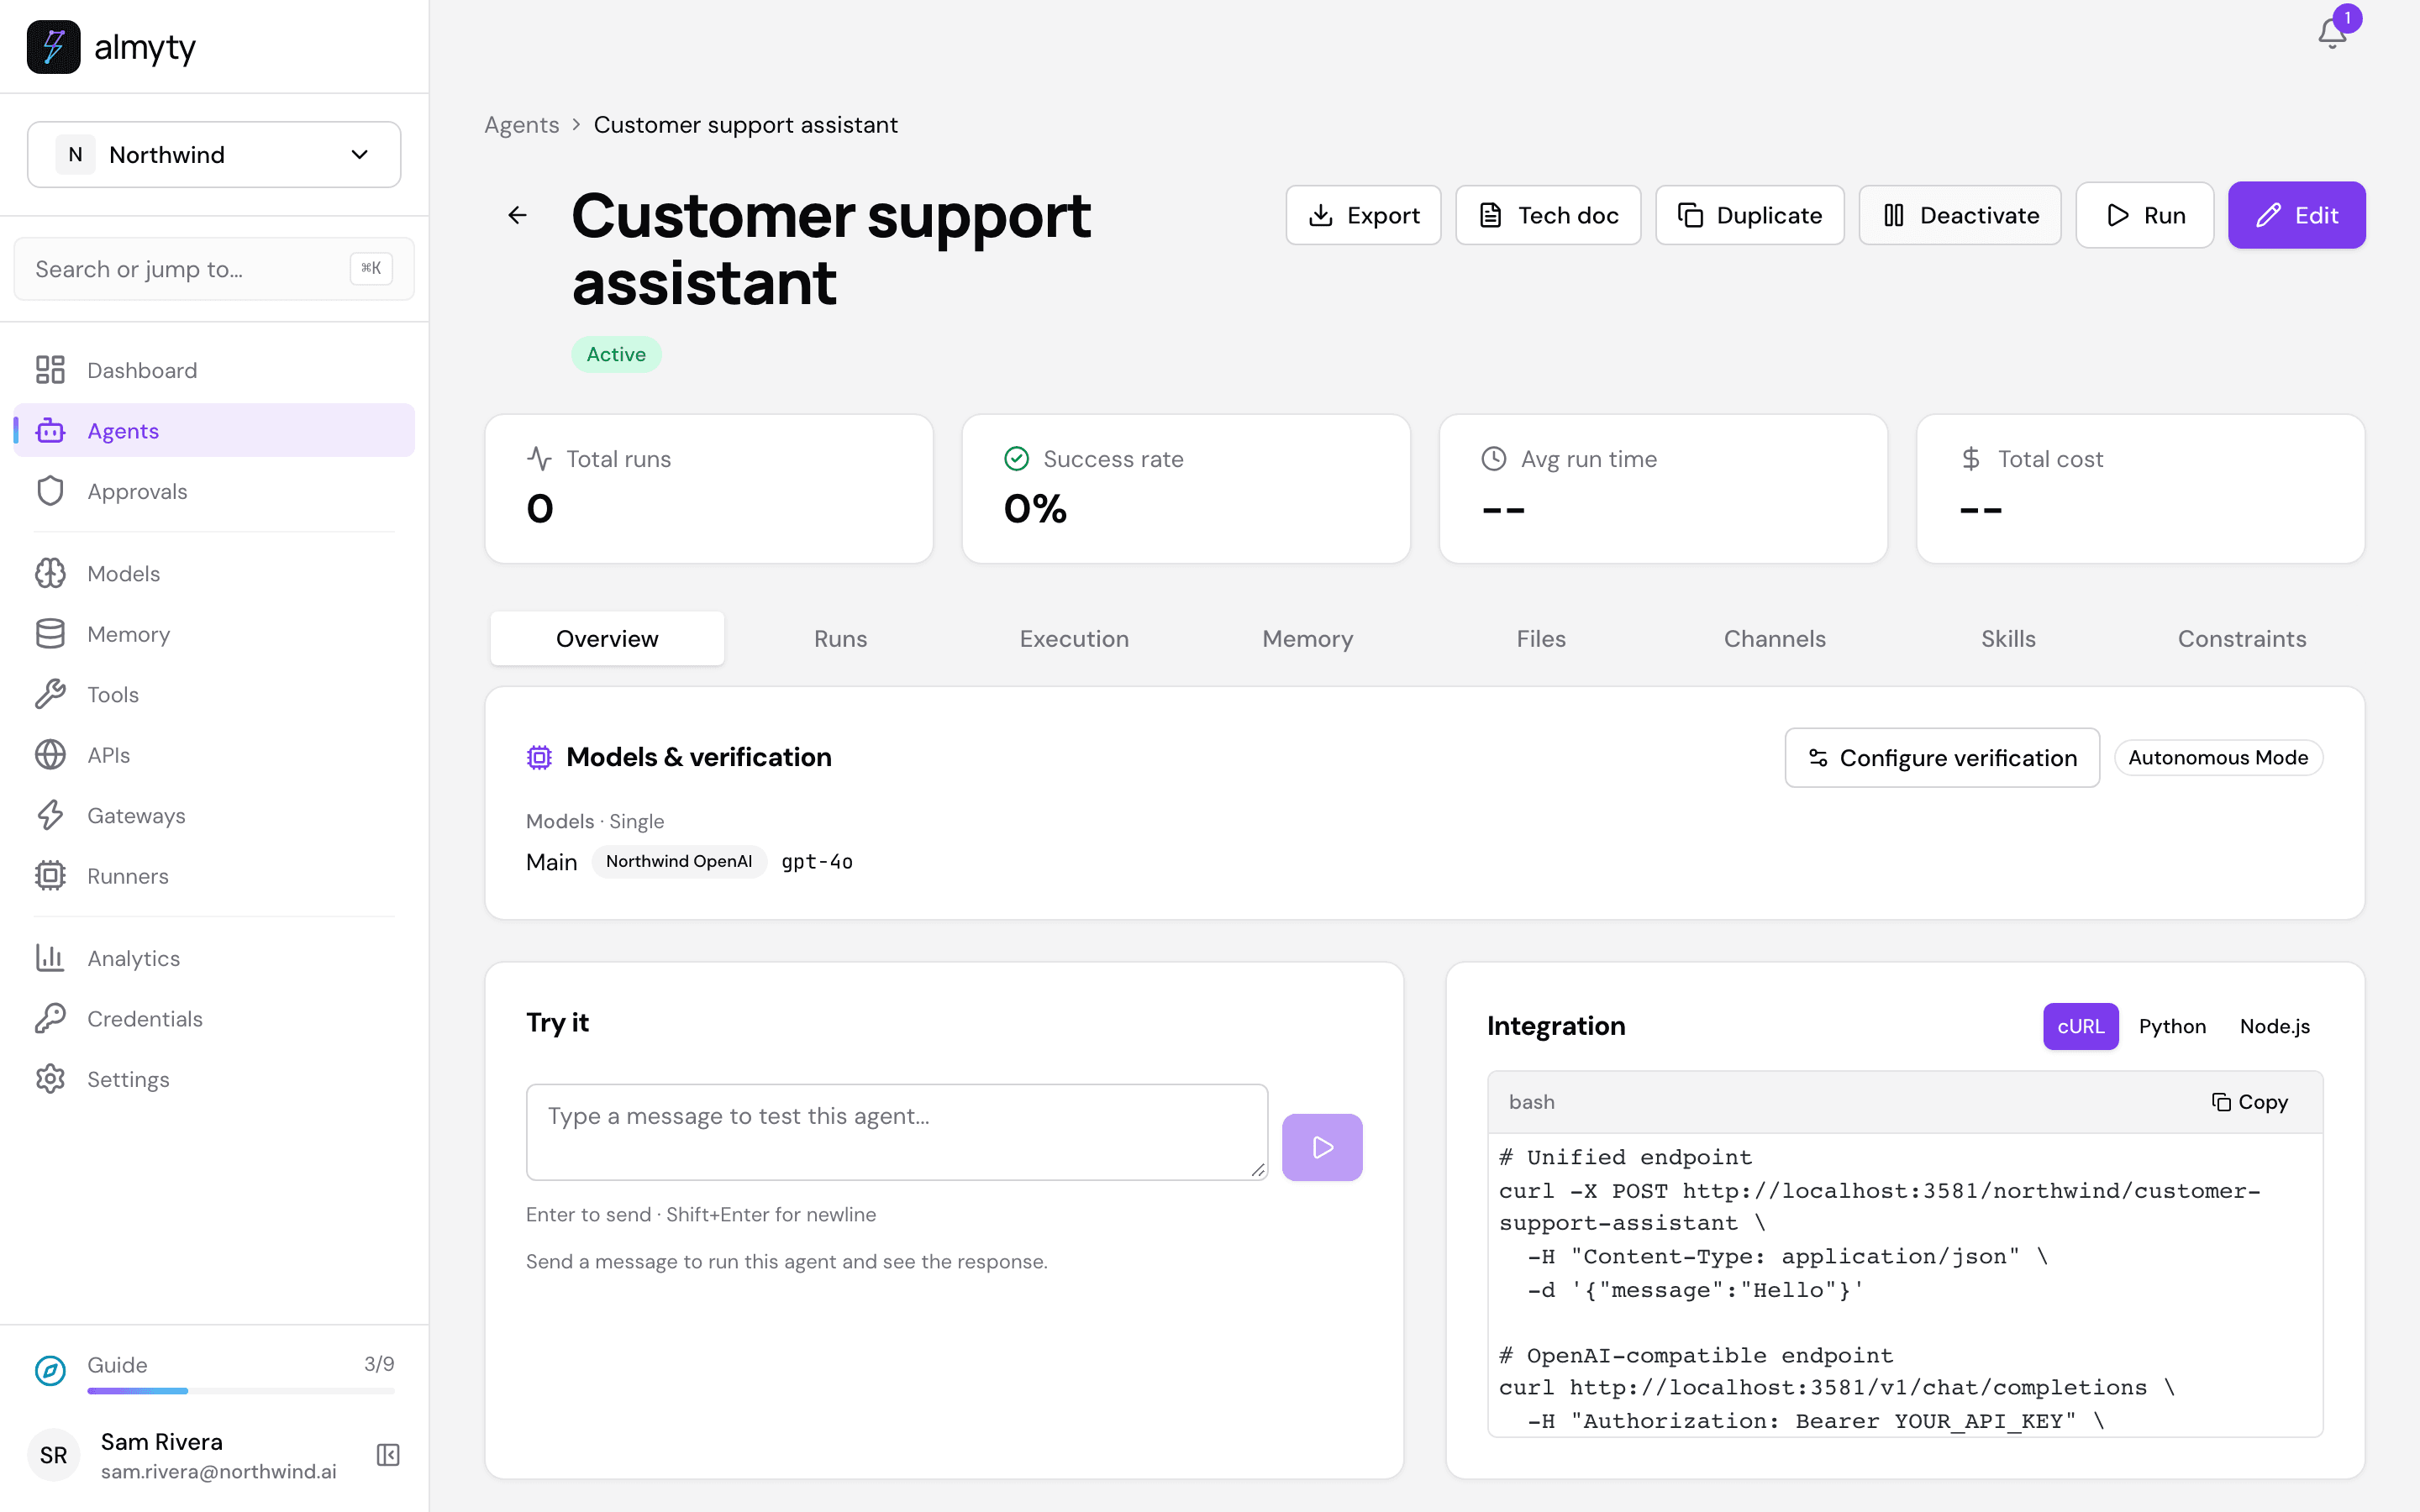
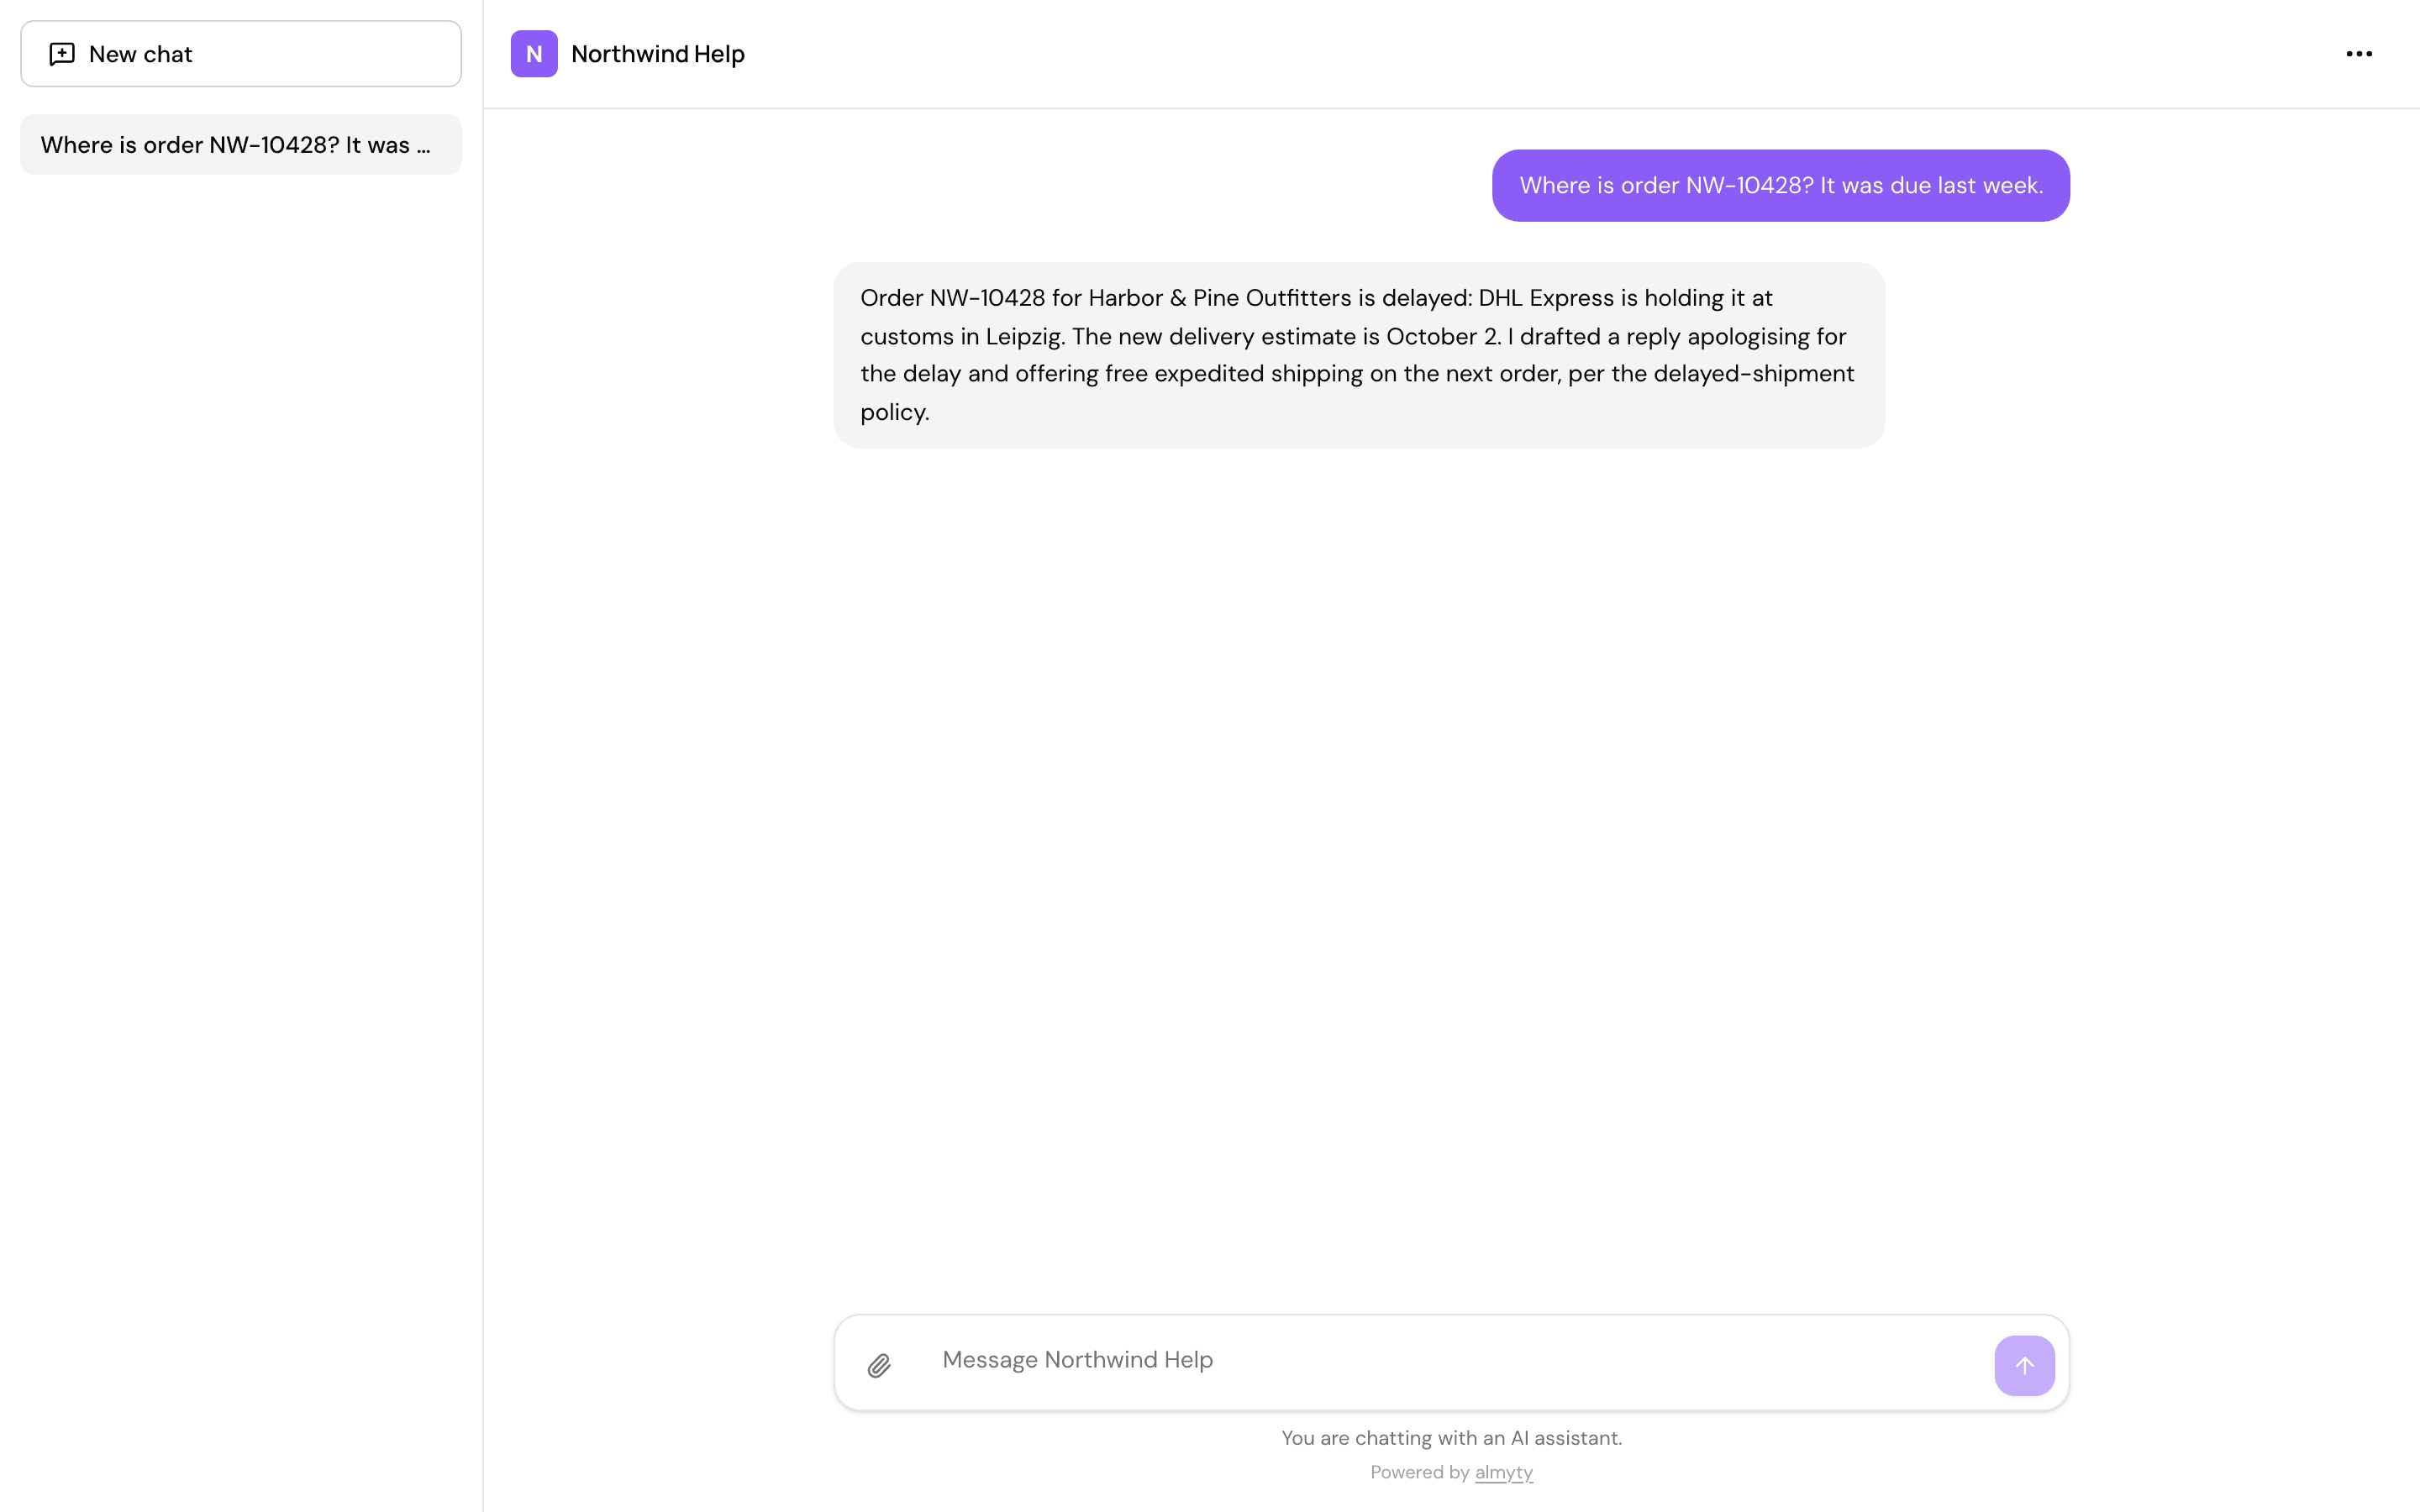
On the Overview tab, find Try it. Type a question a customer would ask, like Where is order NW-10428? It was due last week., and press Enter.
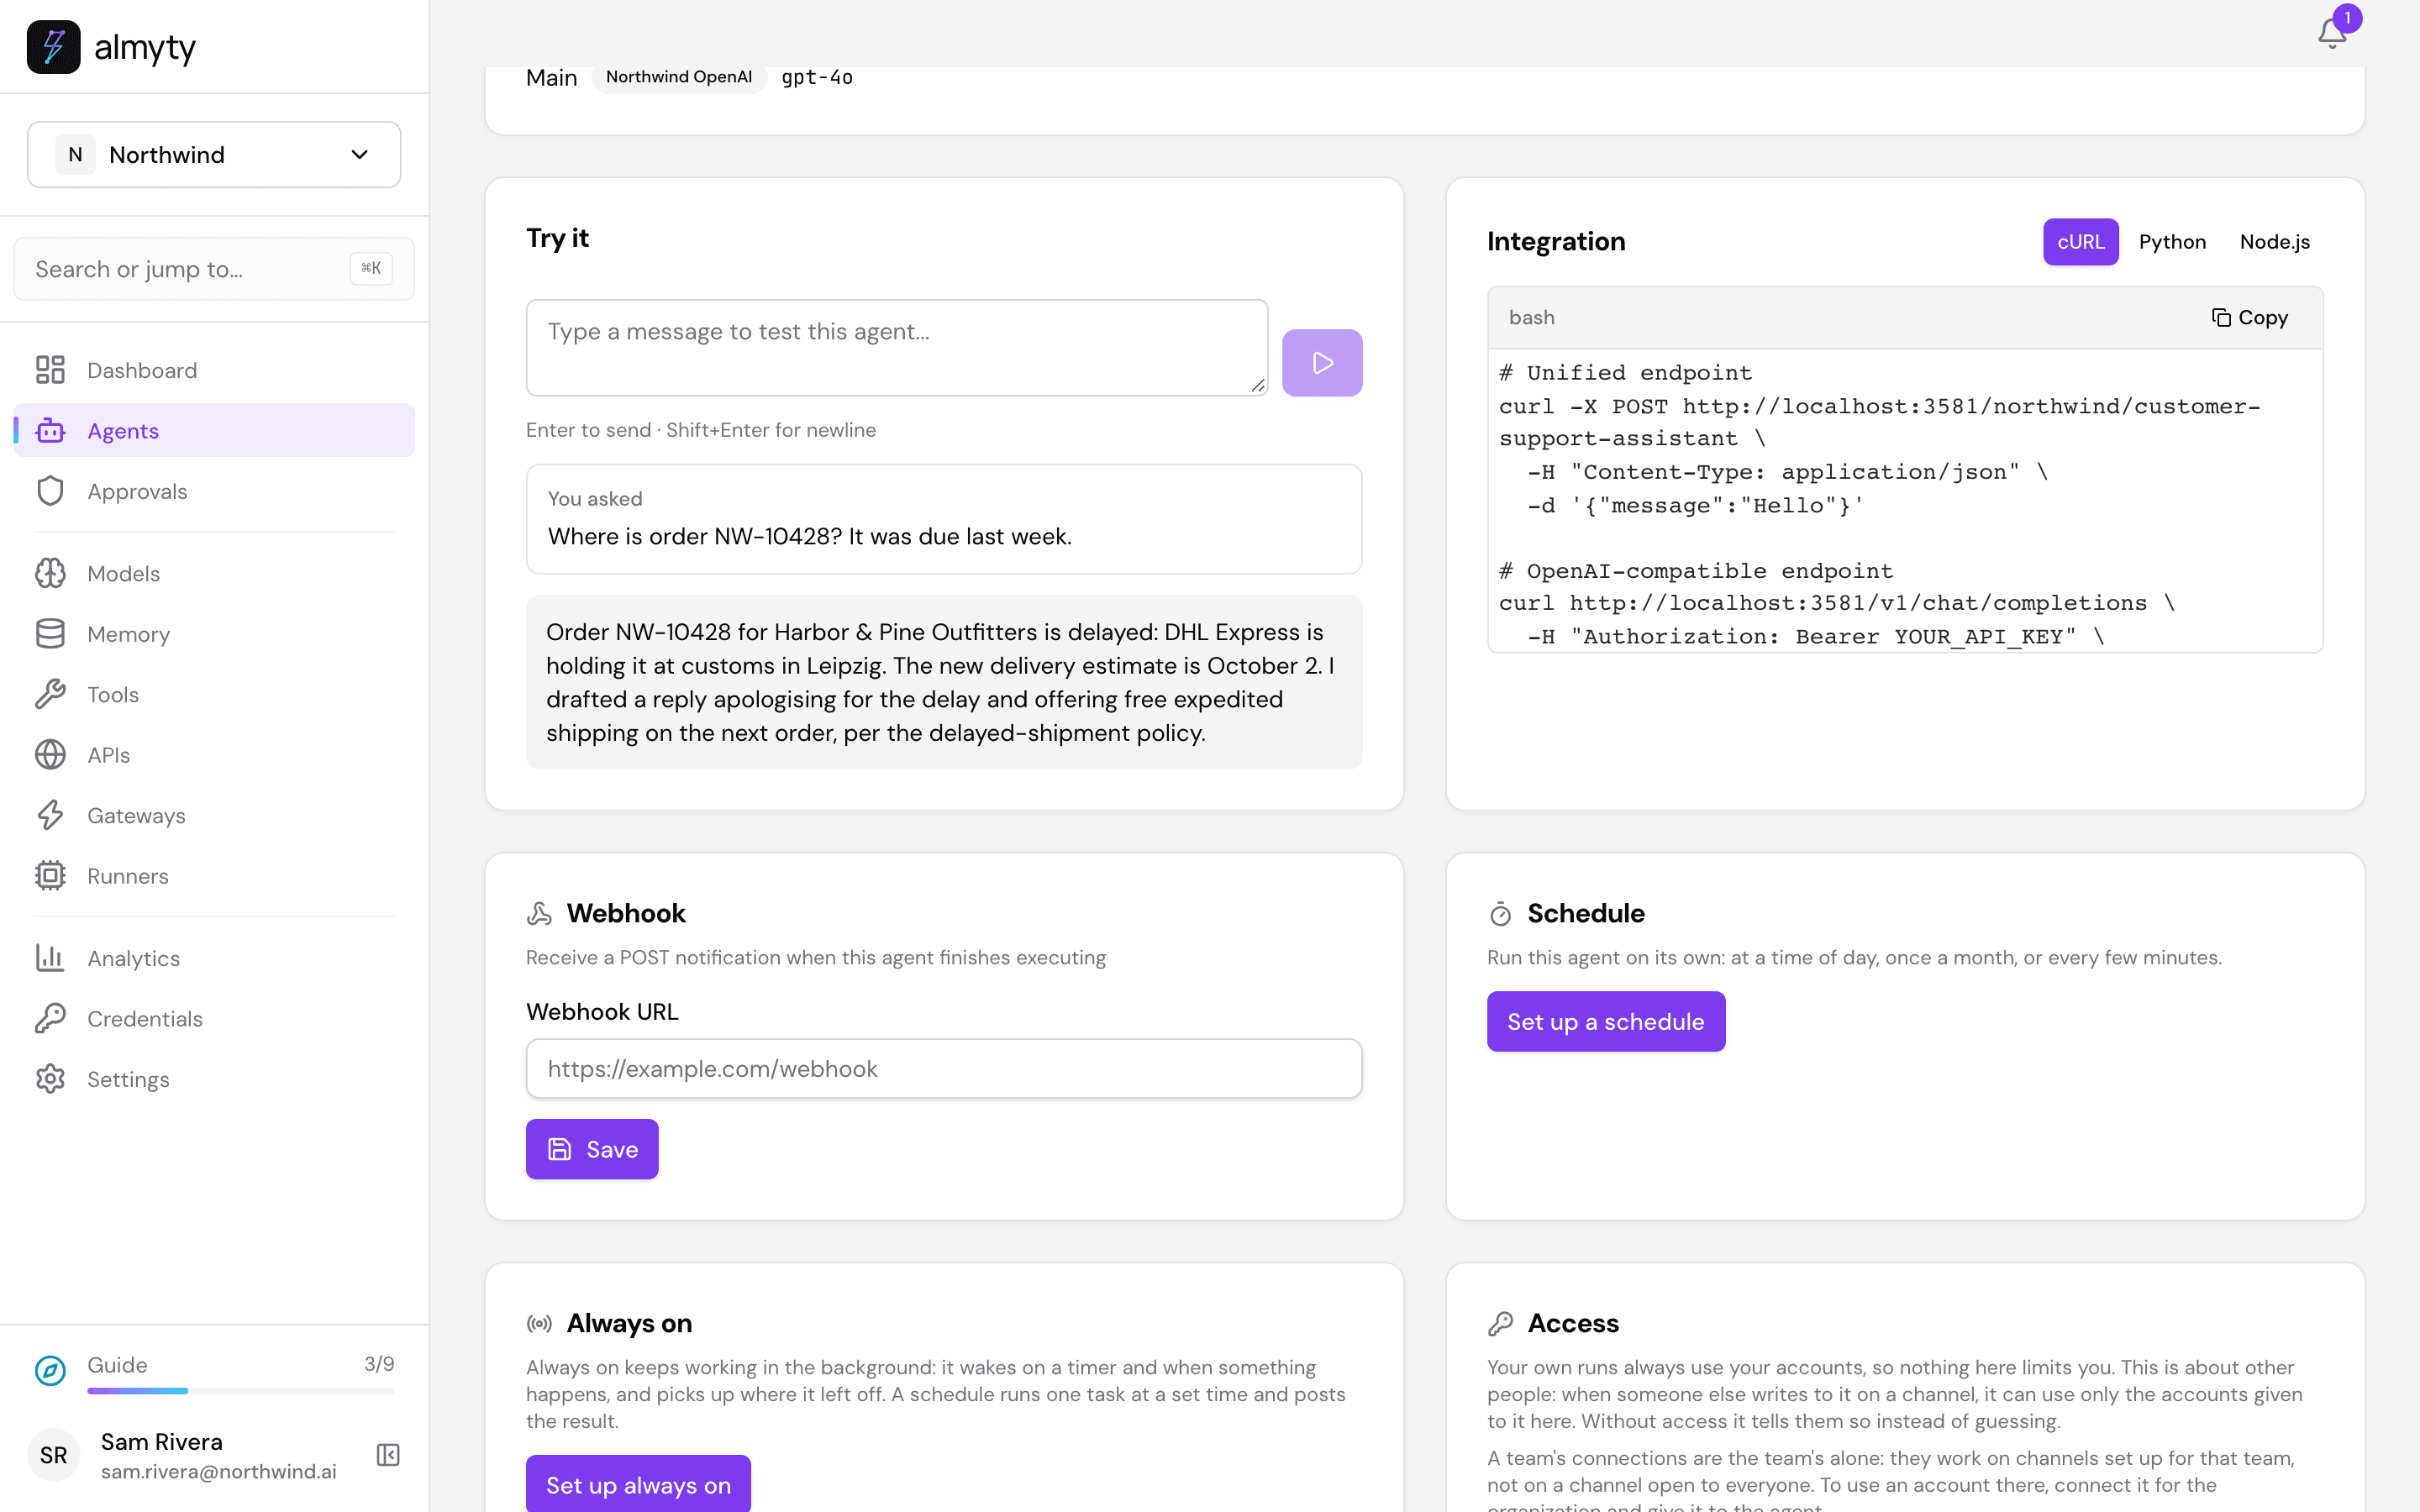
The assistant looked the order up in your system and answered with the carrier, where the parcel is and the new delivery date. Each question you try is kept under the Runs tab, with every step it took.
6. Ask before refunds over $500
Your instructions tell the assistant what to do, but for money you want a rule that holds whatever it does. Set one up so a person approves every refund over $500 before it is made.
In the sidebar, open Settings, click Advanced (it opens on Approvals) and, under Ask before large amounts, click New rule:
- Name:
Refunds over 500. - Tool: Issue a refund for an order, from your order system.
- The number: amount. Is: over. Amount:
500. The amount is just the number, in the currency your order system uses. - Leave Everyone ticked, so the rule covers every refund, whoever asks for it.
The page says the rule back in a sentence, so you can check it: Ask before “Issue a refund for an order” when amount is over 500. Refunds of $500 or less still go through on their own.
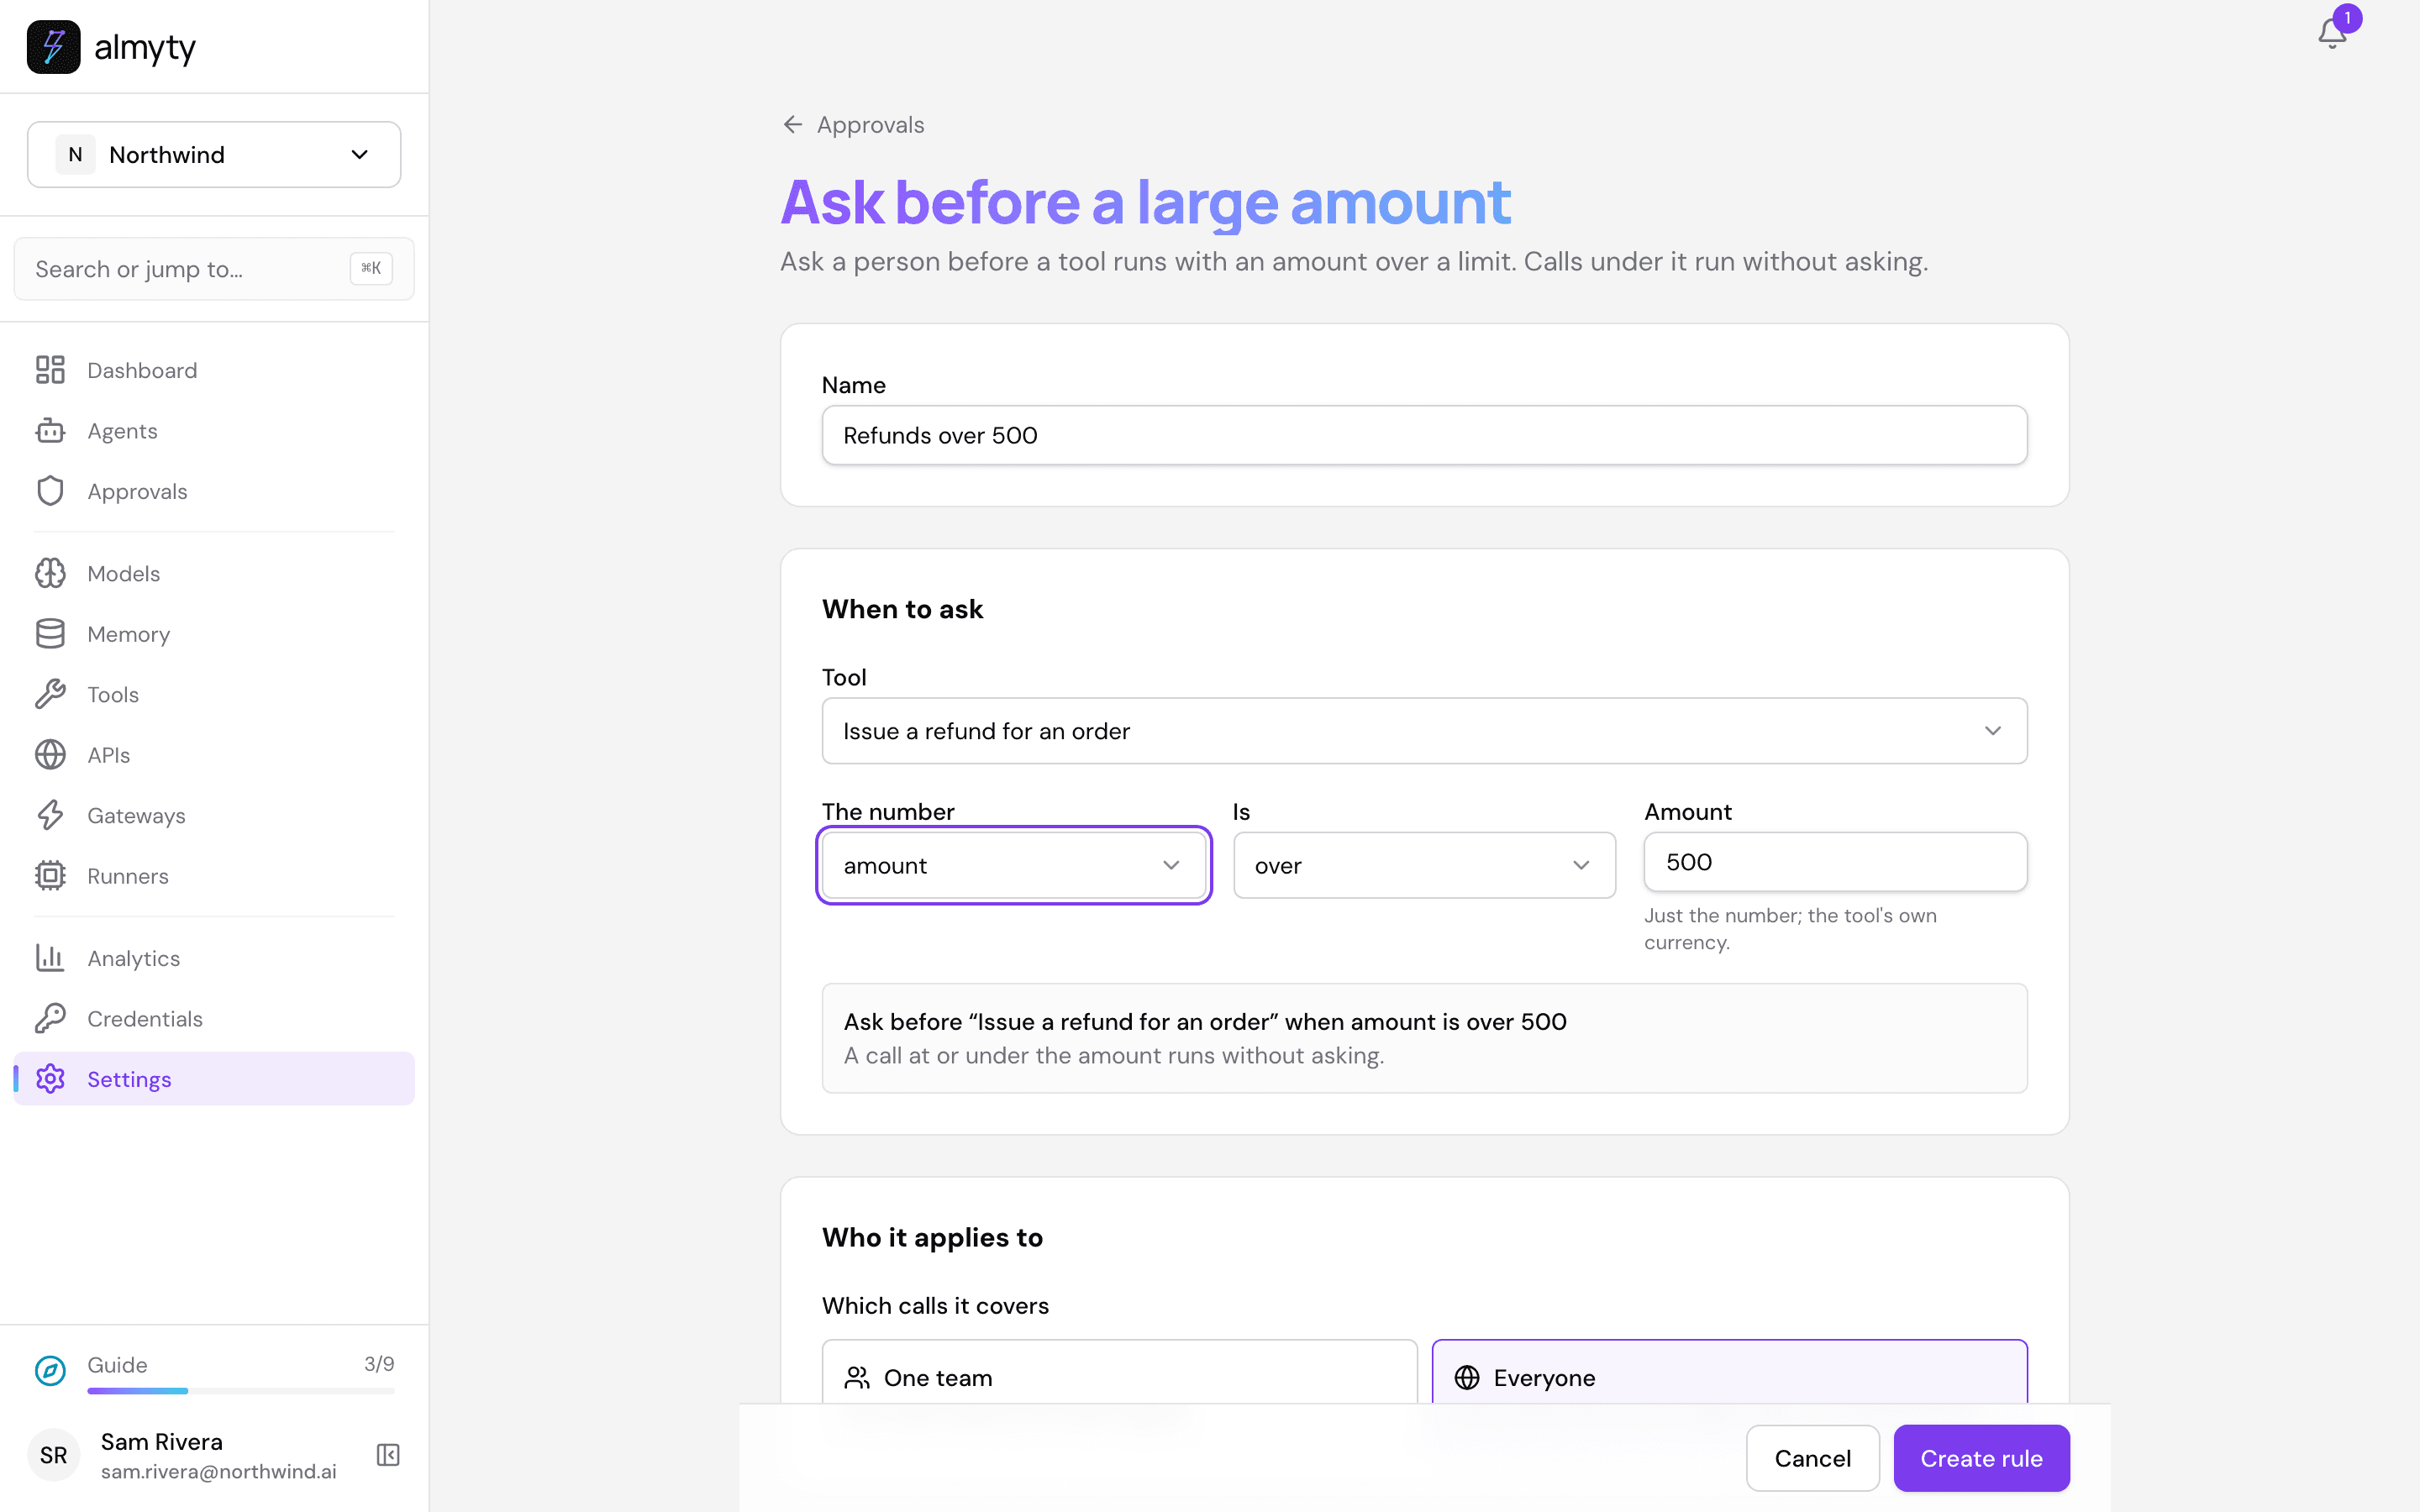
Click Create rule. Rules like this are included in every plan.
Now try a refund over the limit. Go back to the assistant and, under Try it, type: Brightway Logistics wants a refund of $820 on order NW-44120, it arrived defective.
The assistant goes to make the refund, and almyty holds it. Open Approvals in the sidebar: the refund is there, with the rule and the amount, waiting for a person. Owners and admins of your organization also get a notification.
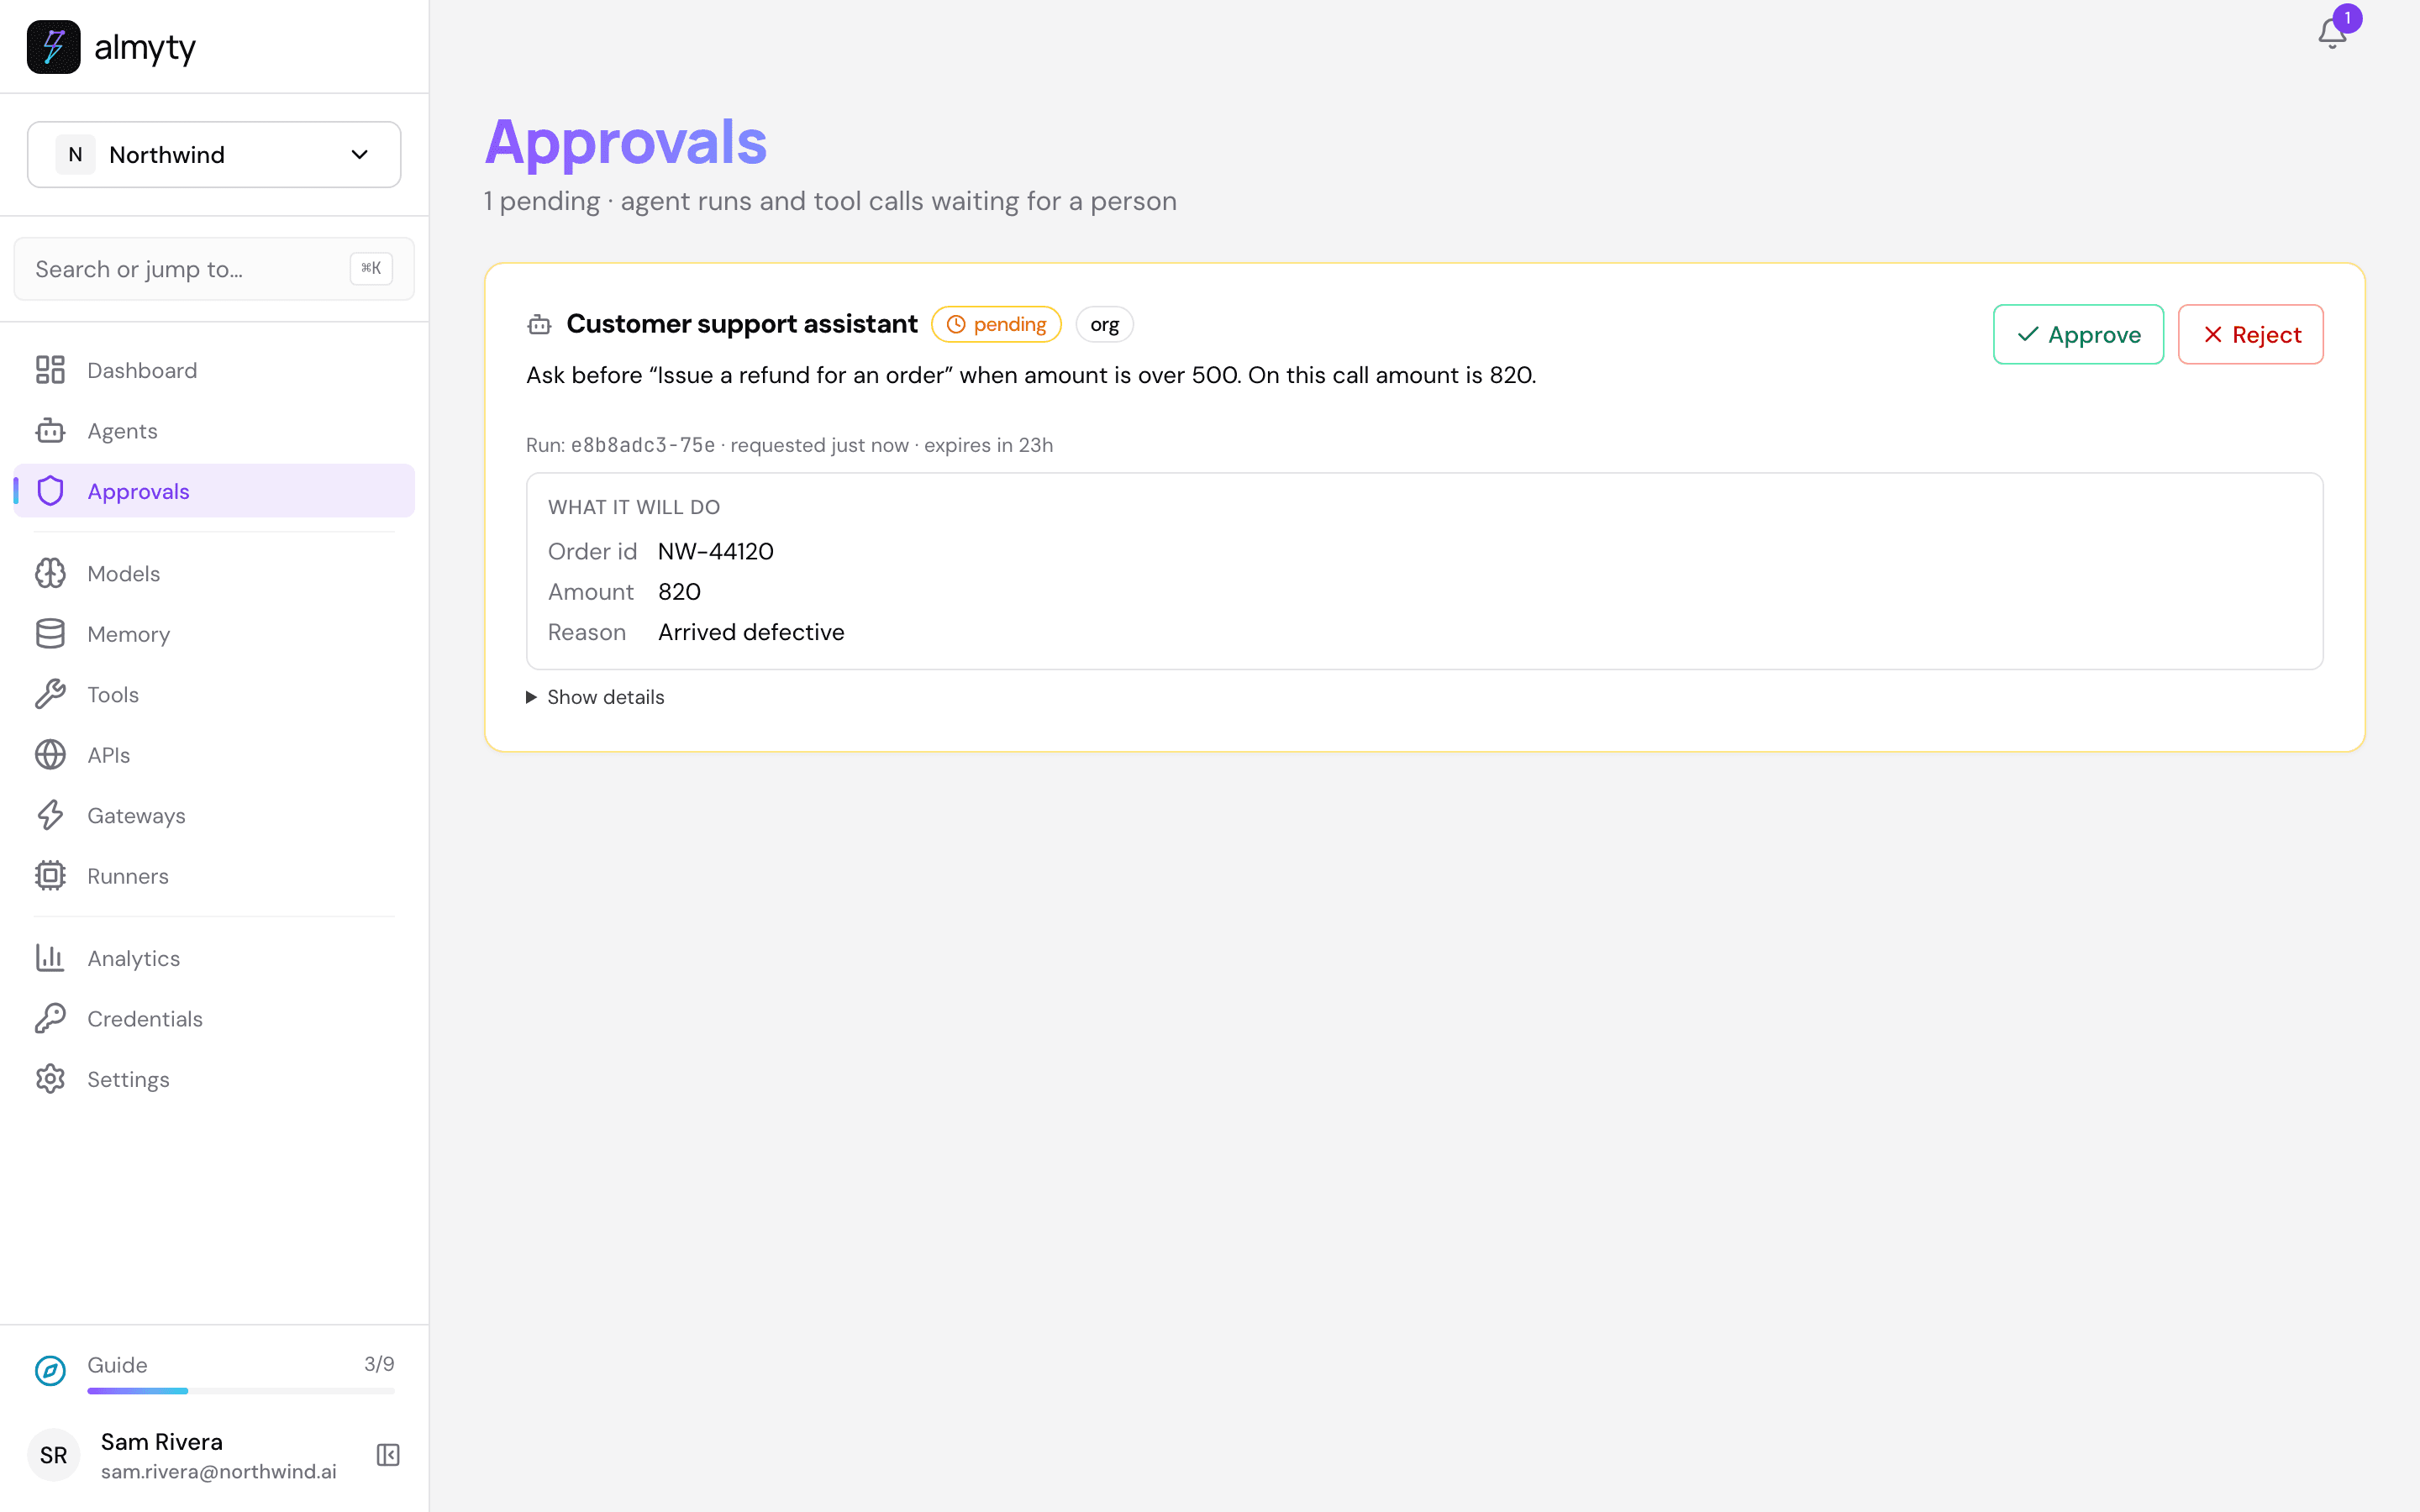
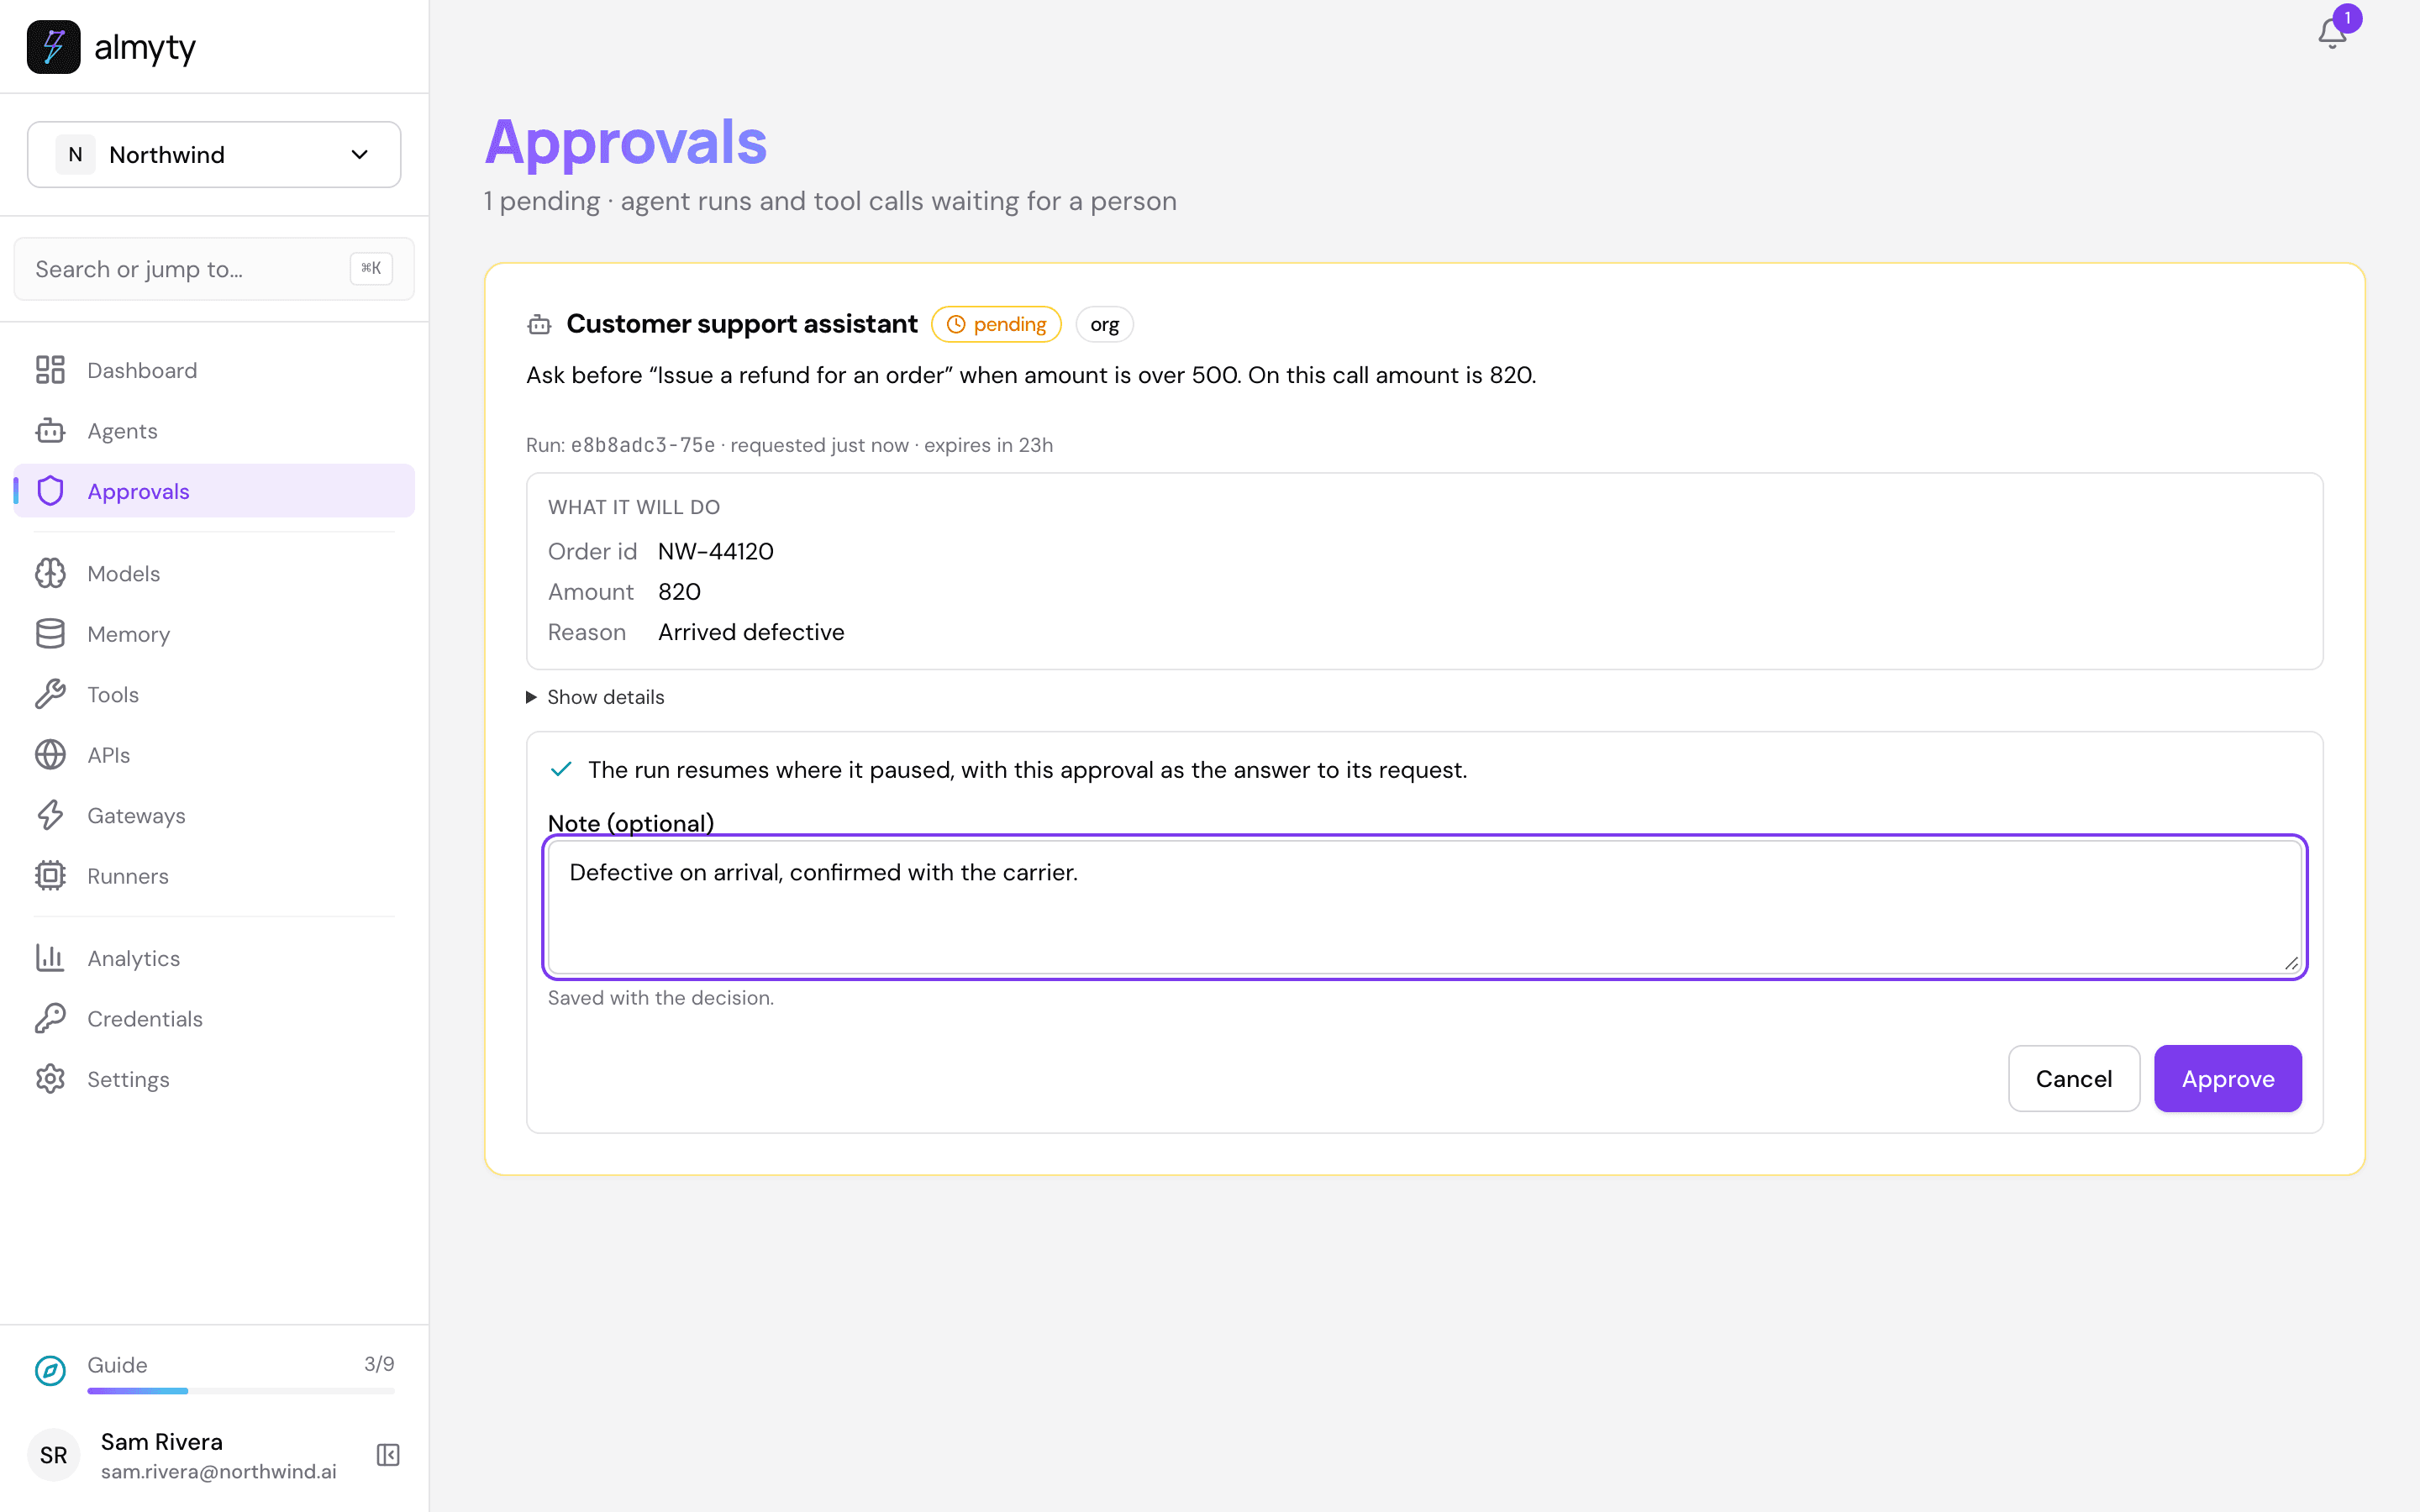
Click Approve, add a note if you like (it is saved with the decision) and click Approve again. Only then is the refund made, and the assistant carries on from where it stopped. Reject means the refund is not made. A request nobody decides expires after 24 hours.
On the Business plan you can go further on the same page: sign-off in several steps, such as “a support lead, then finance”, or “two people must approve”. See Approval rules.
7. Put it on your website
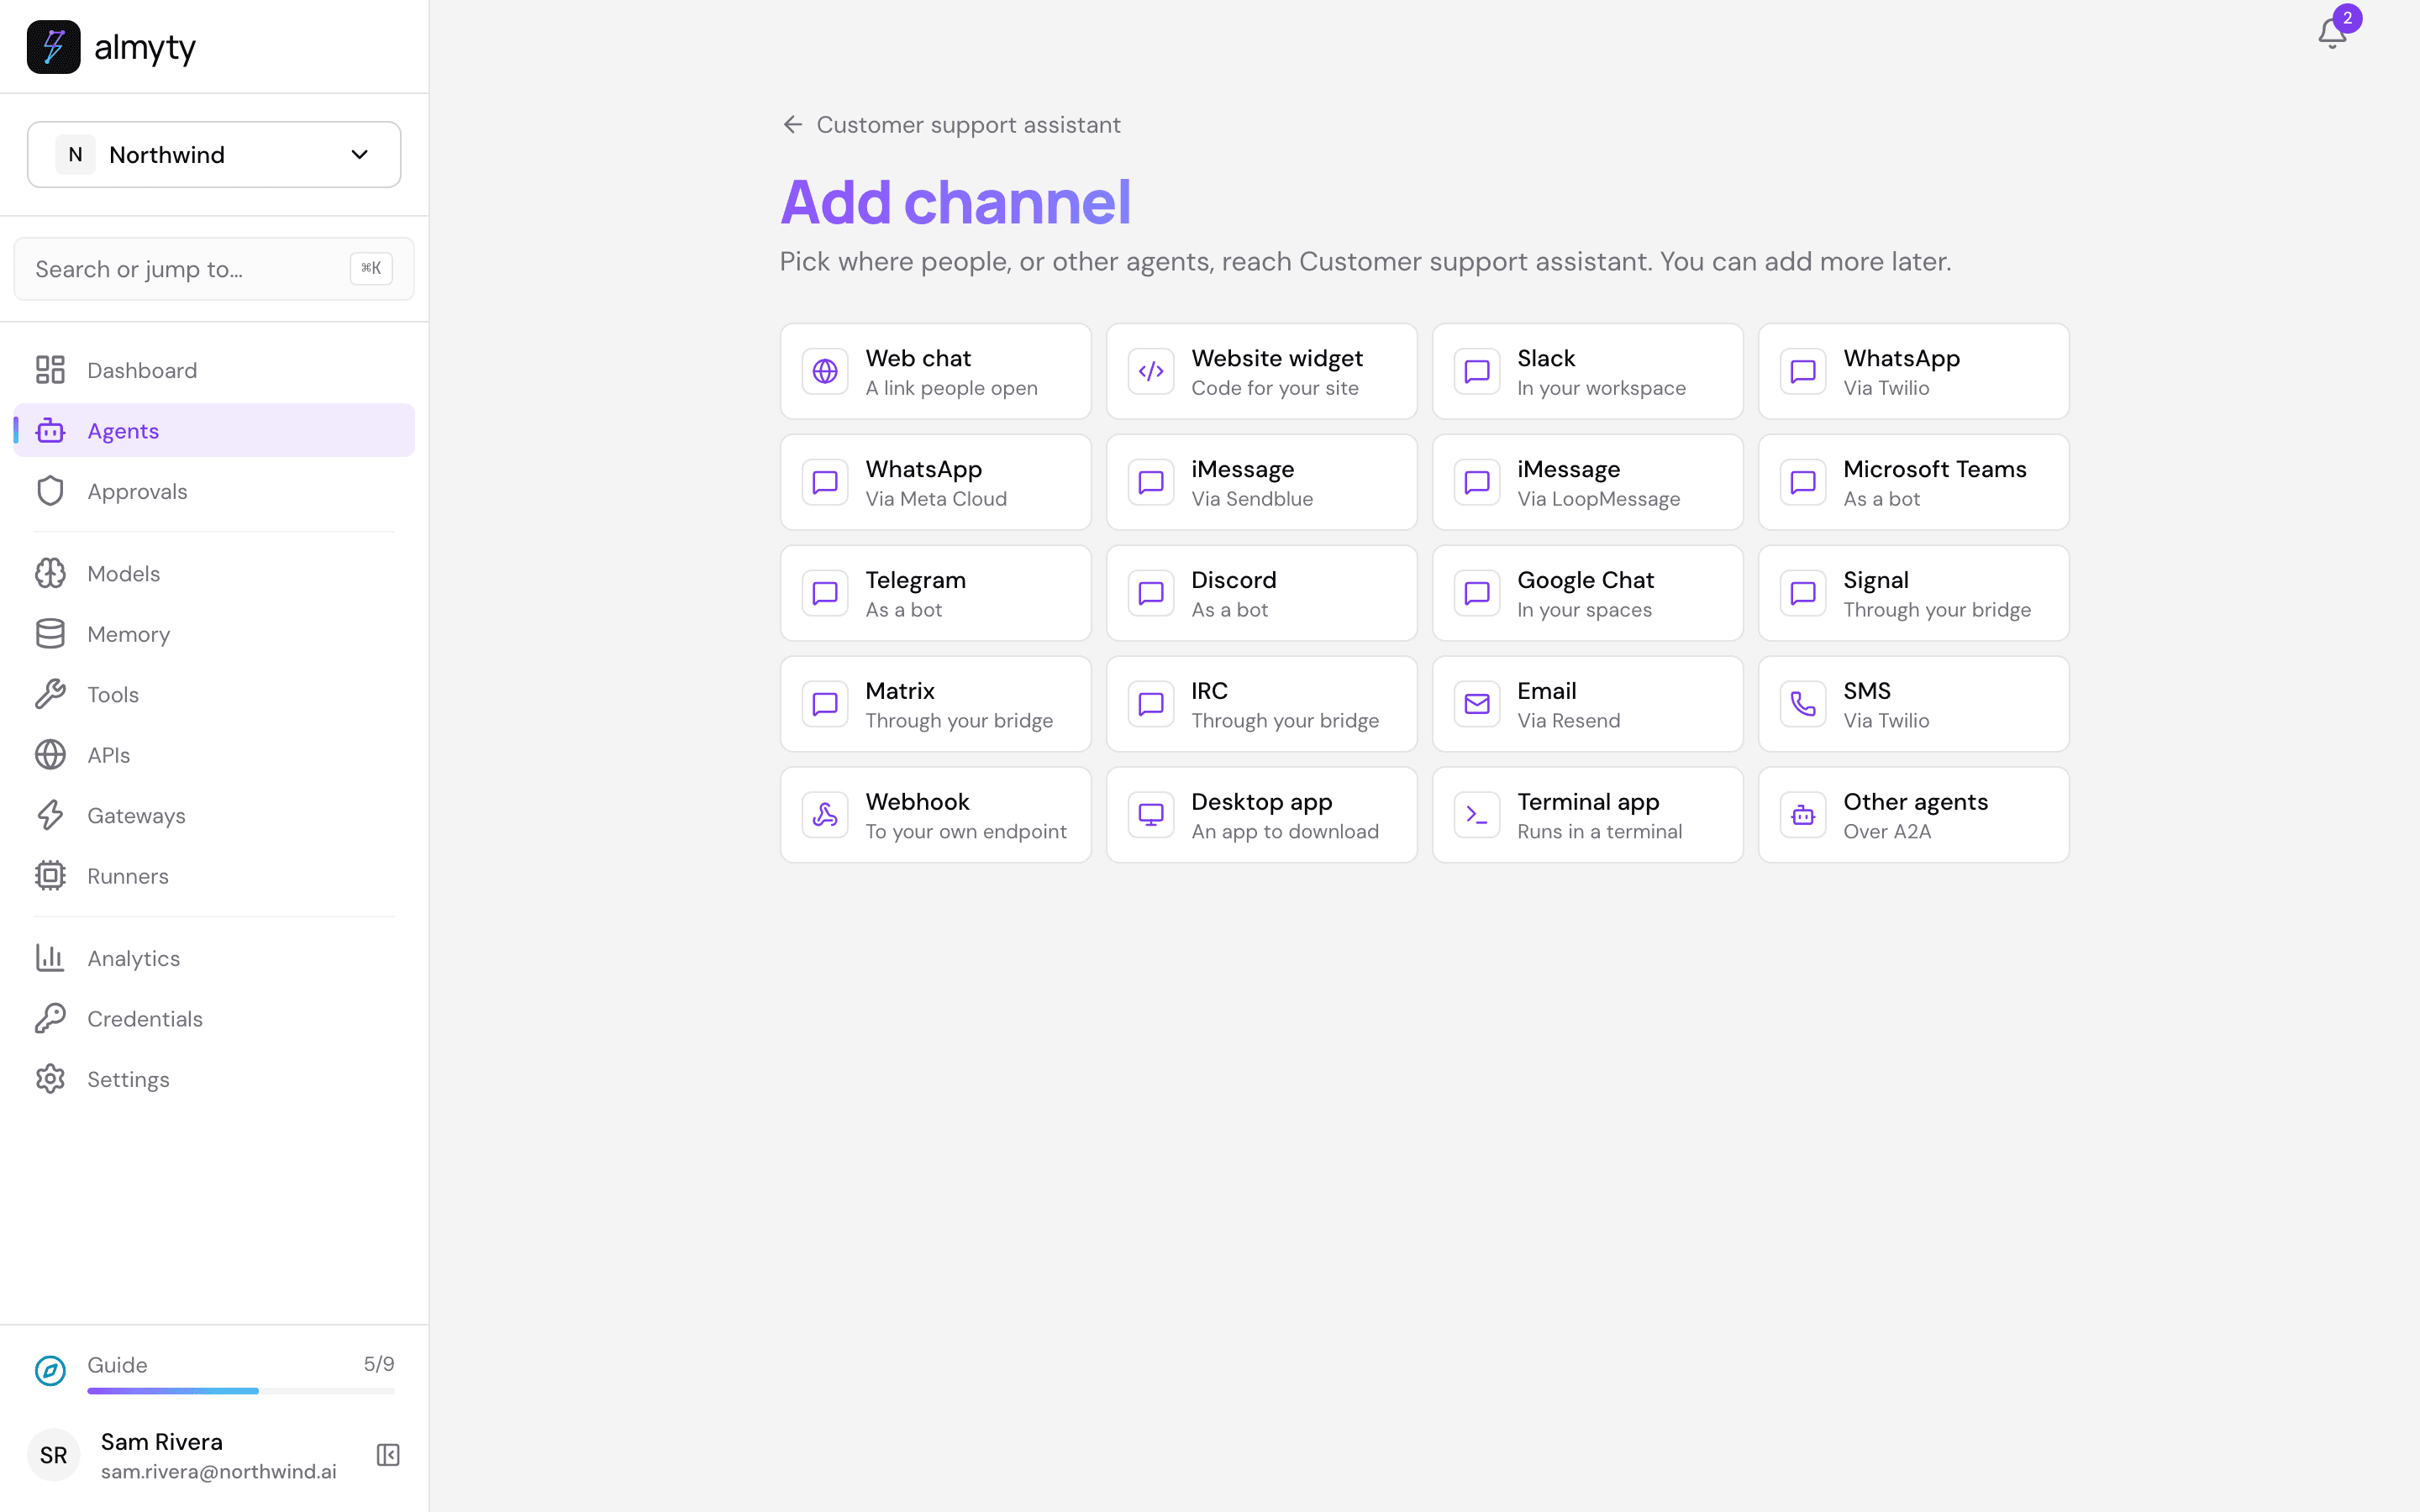
Go back to the assistant and open its Channels tab. A channel is a place where people can talk to the assistant. Click Add channel to see them all.
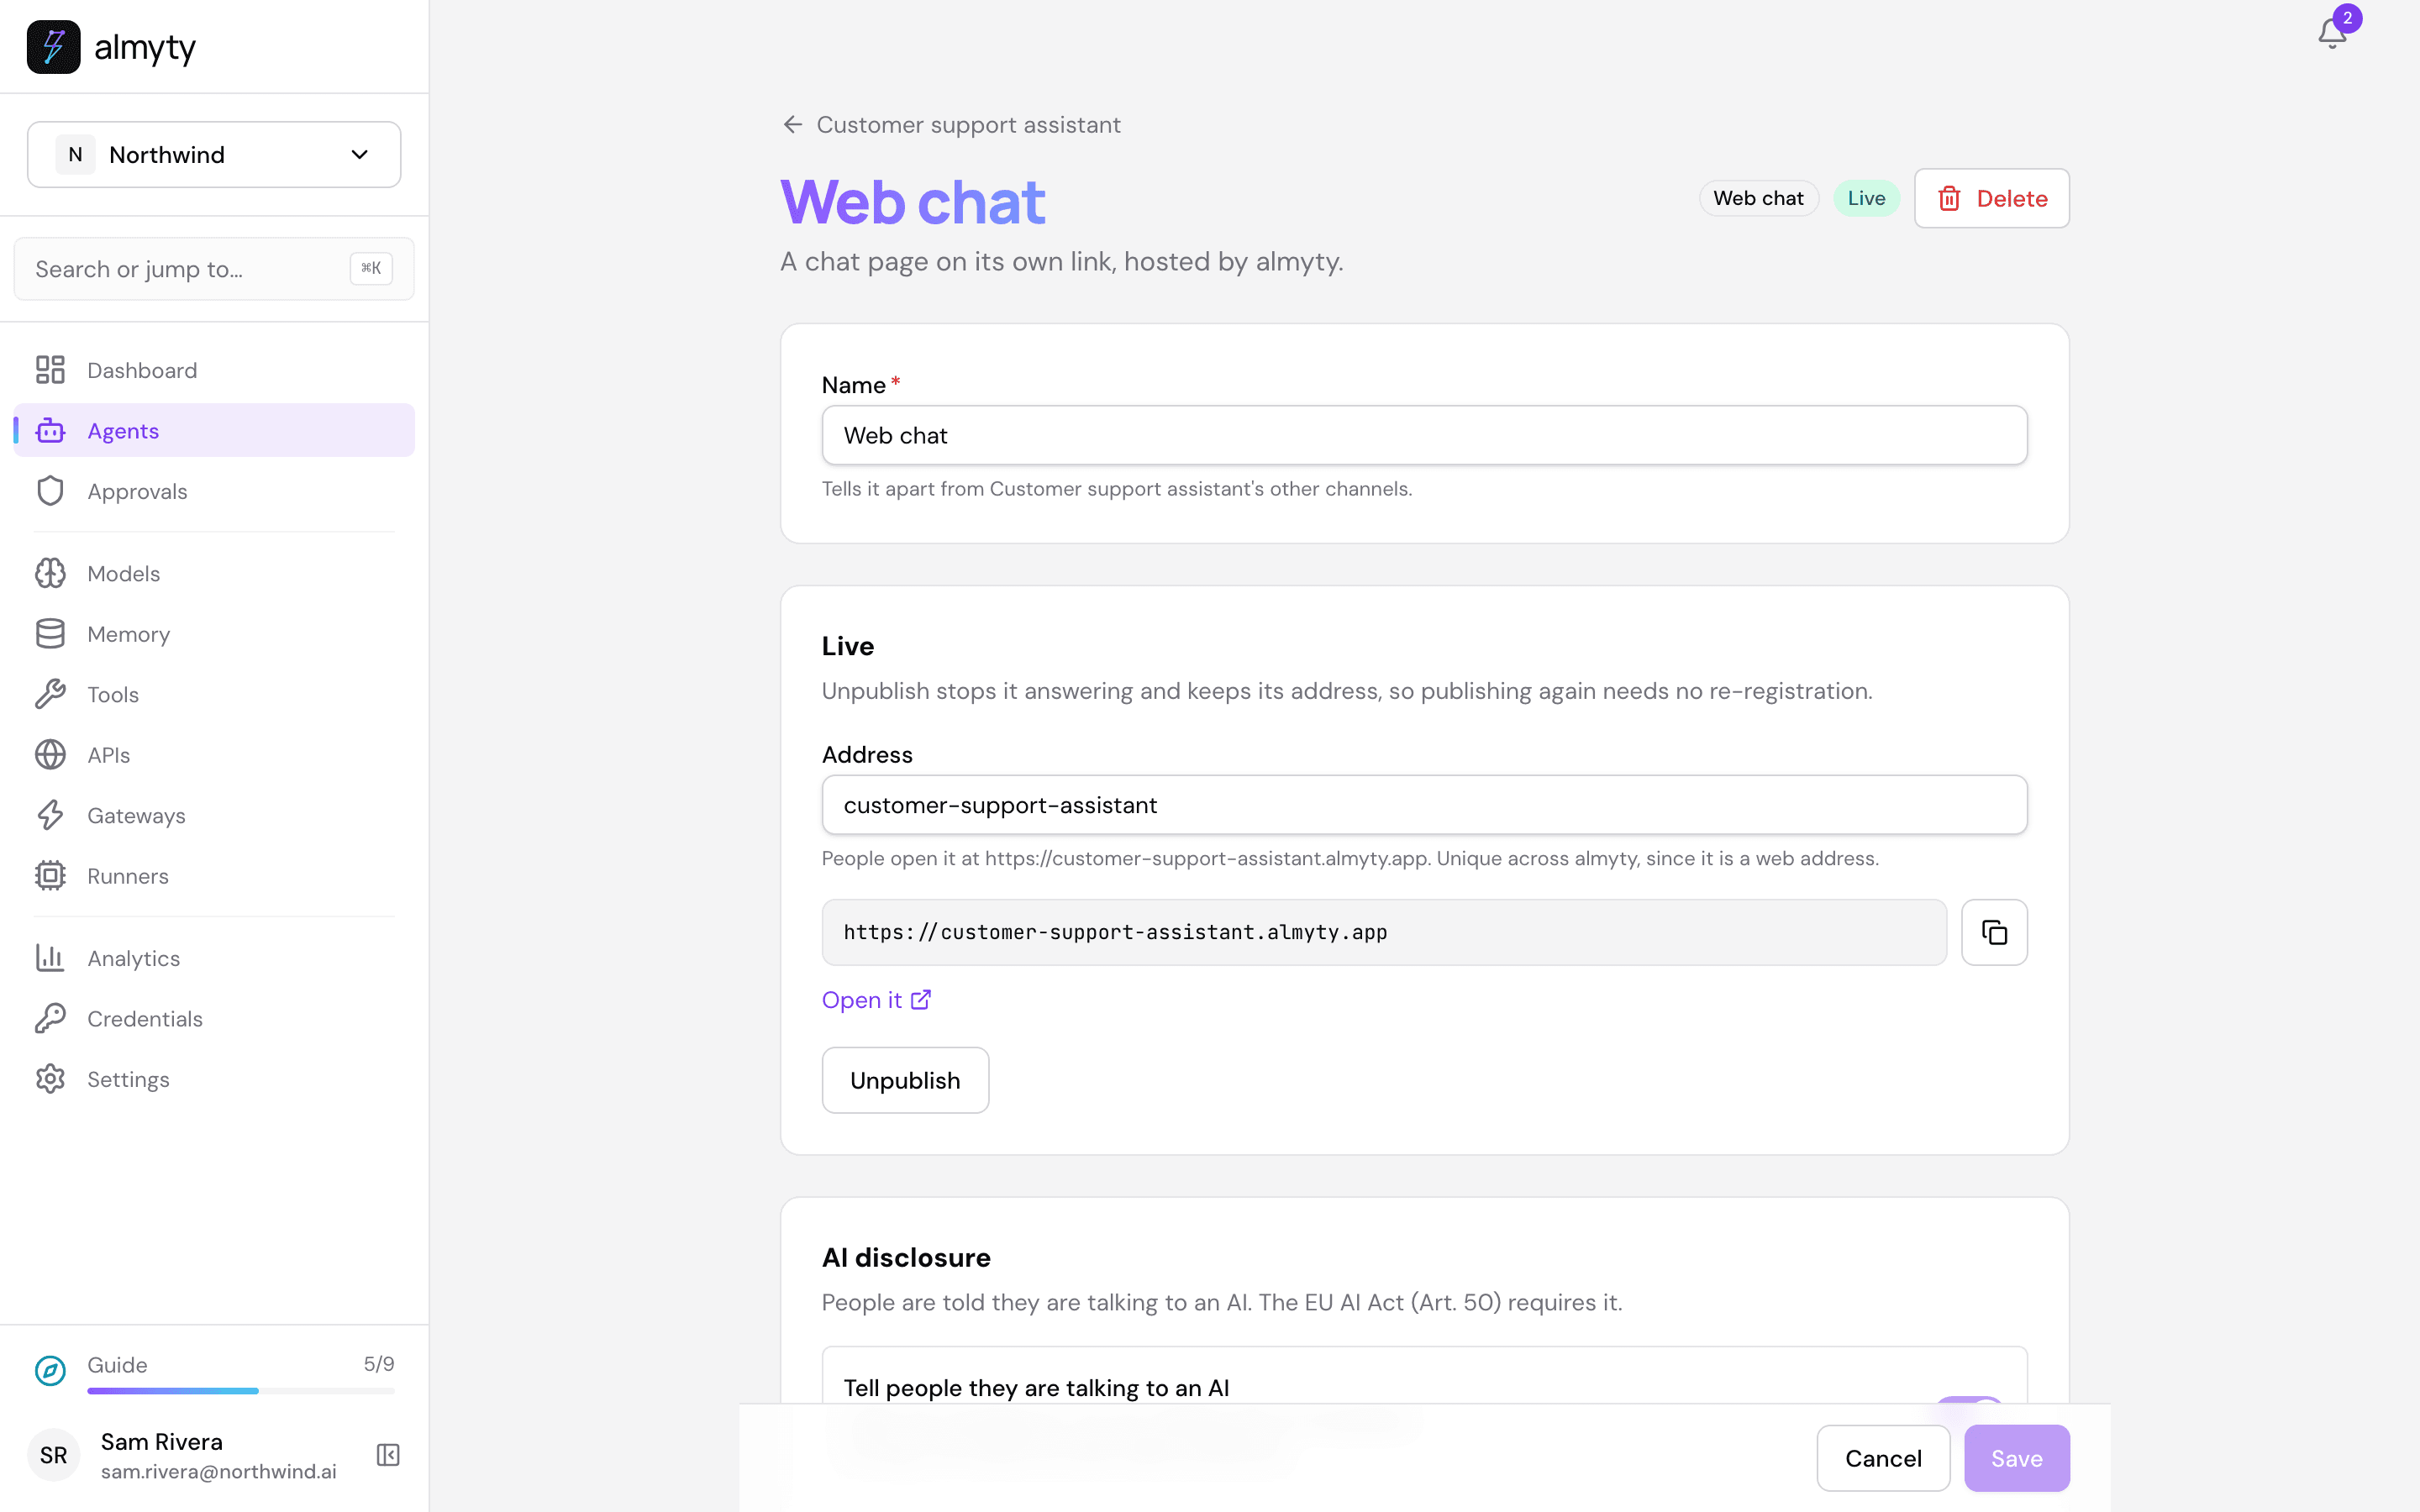
A chat page of its own. Pick Web chat and click Publish. The page shows the link people open, like customer-support-assistant.almyty.app, and Open it to see it yourself. You can also put it on your own domain from this page.
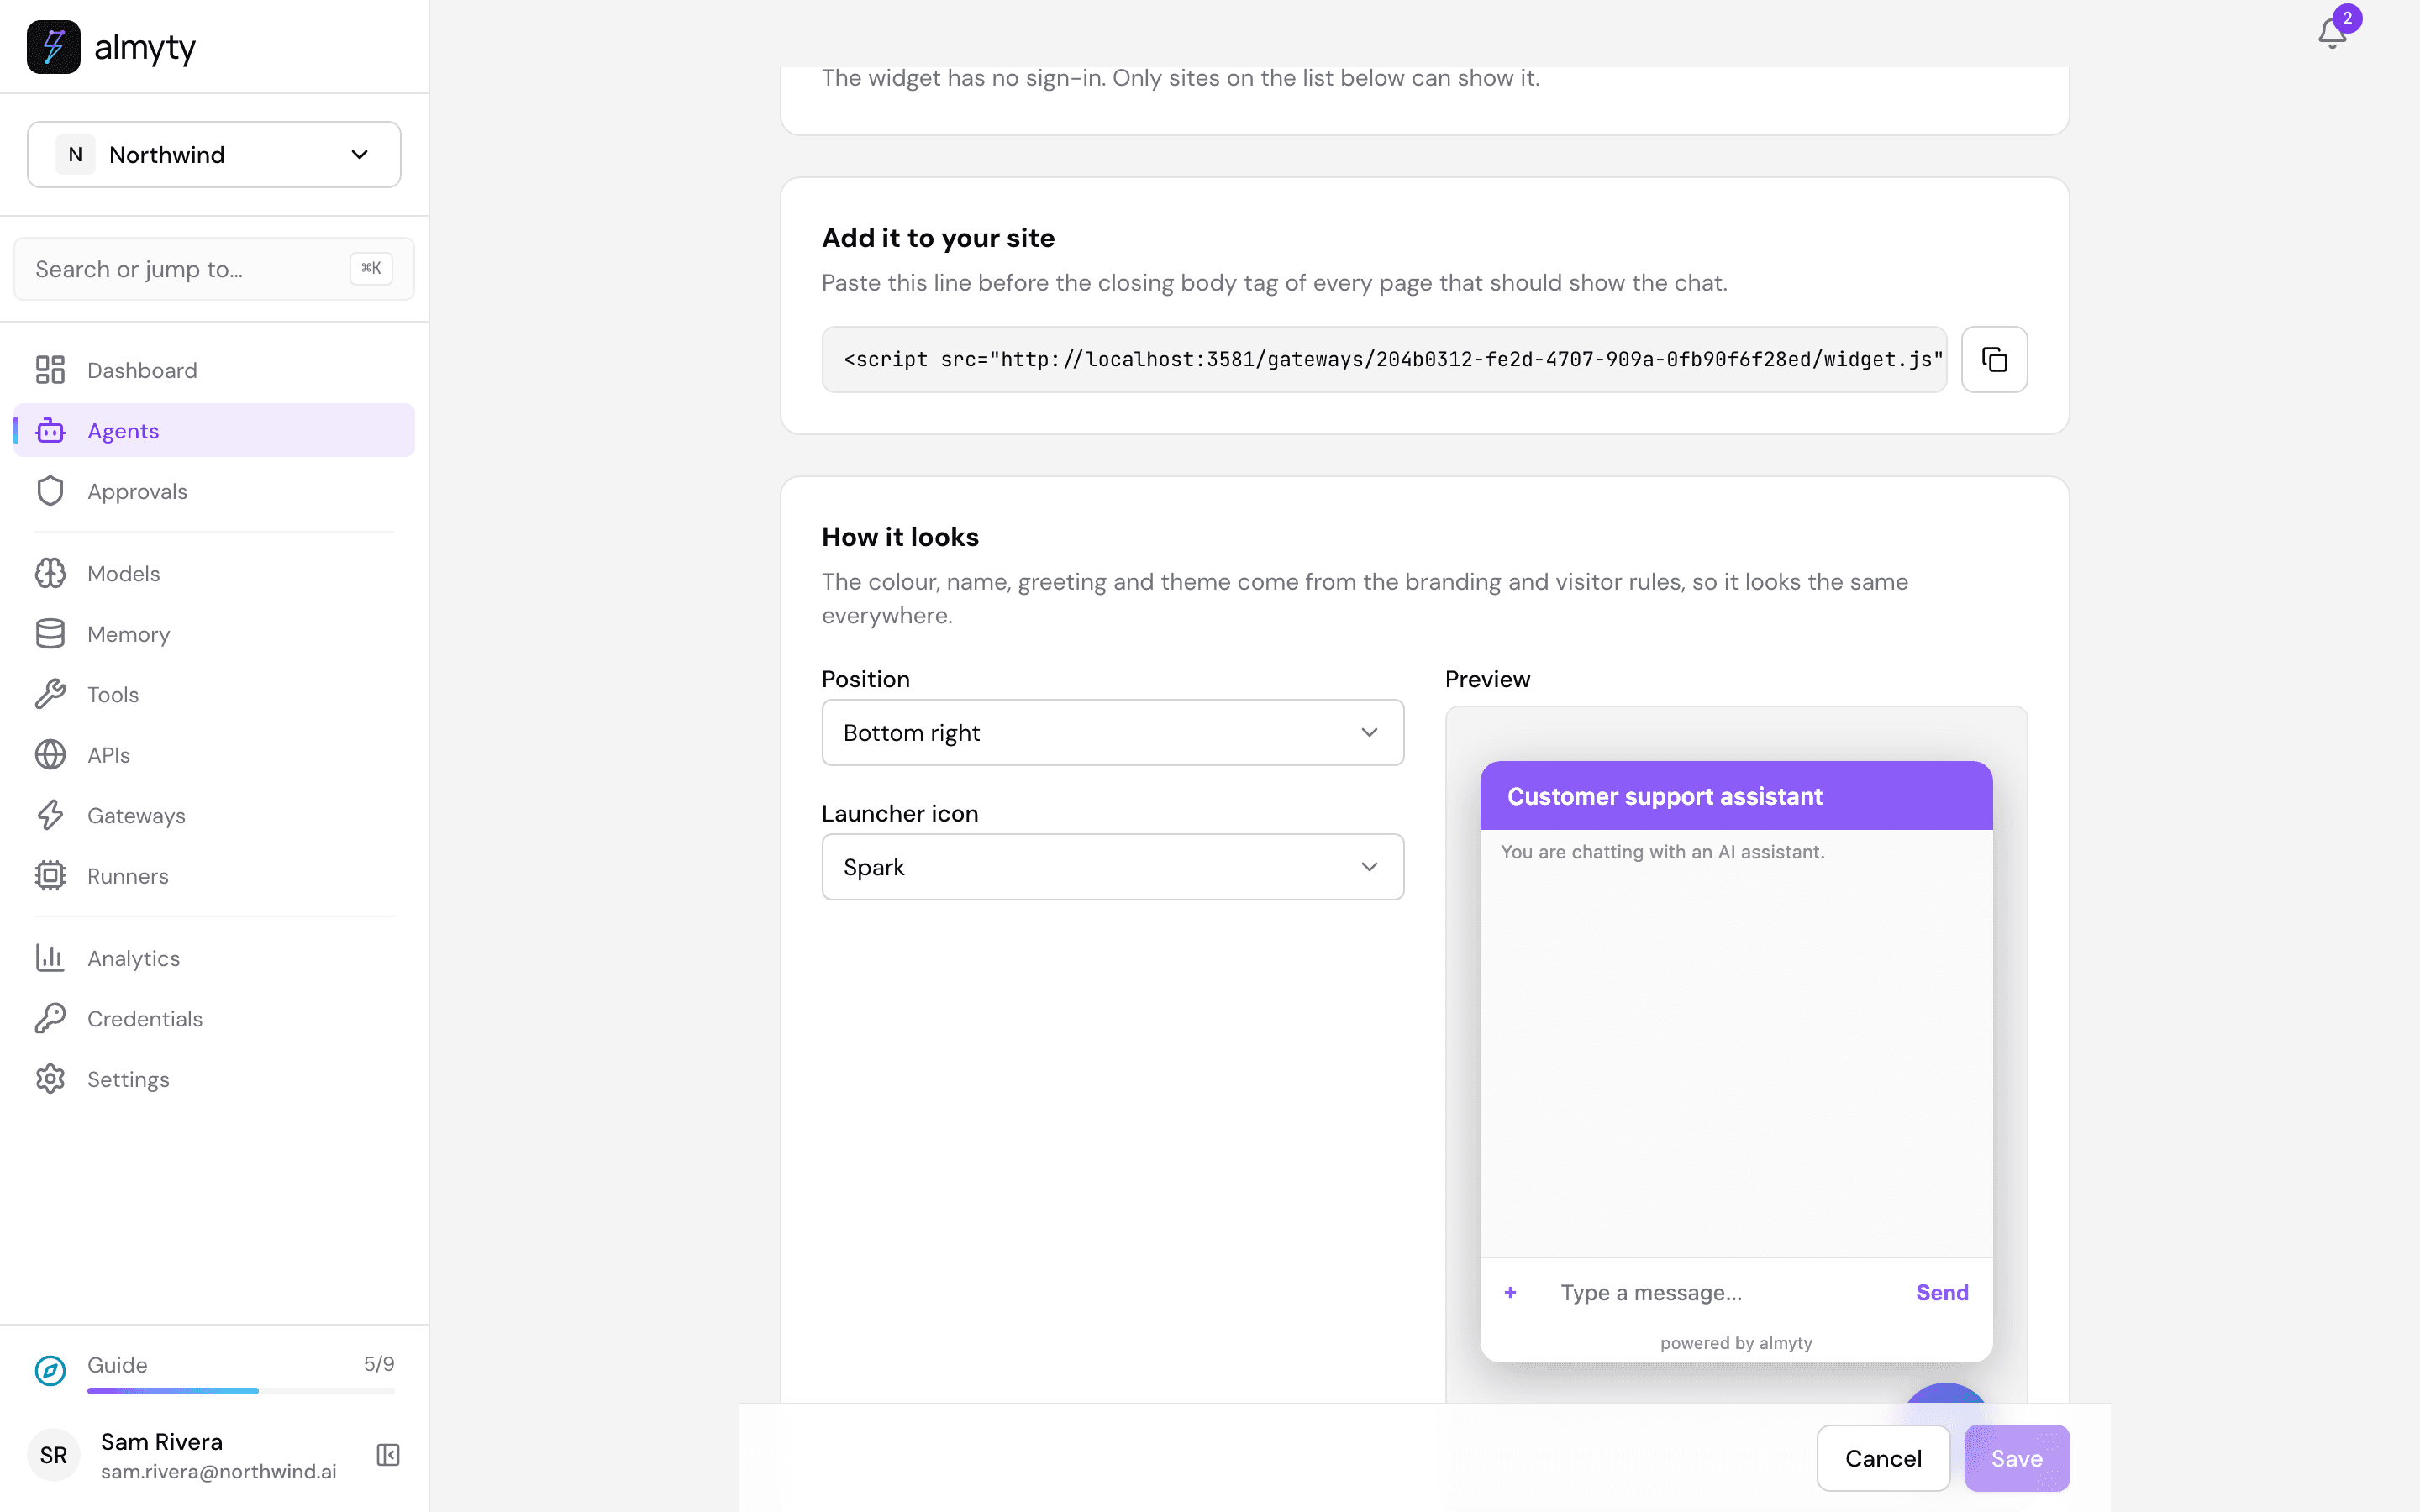
A chat bubble on your website. Back on Channels, click Add channel, pick Website widget and click Publish. Under Add it to your site you get one line to copy (the copy button is next to it). Send it to whoever looks after your website: it goes on every page that should show the chat. Under Allowed sites, add your website’s address so only your site can show it. You also choose where the bubble sits and see a preview.
8. Add WhatsApp and email
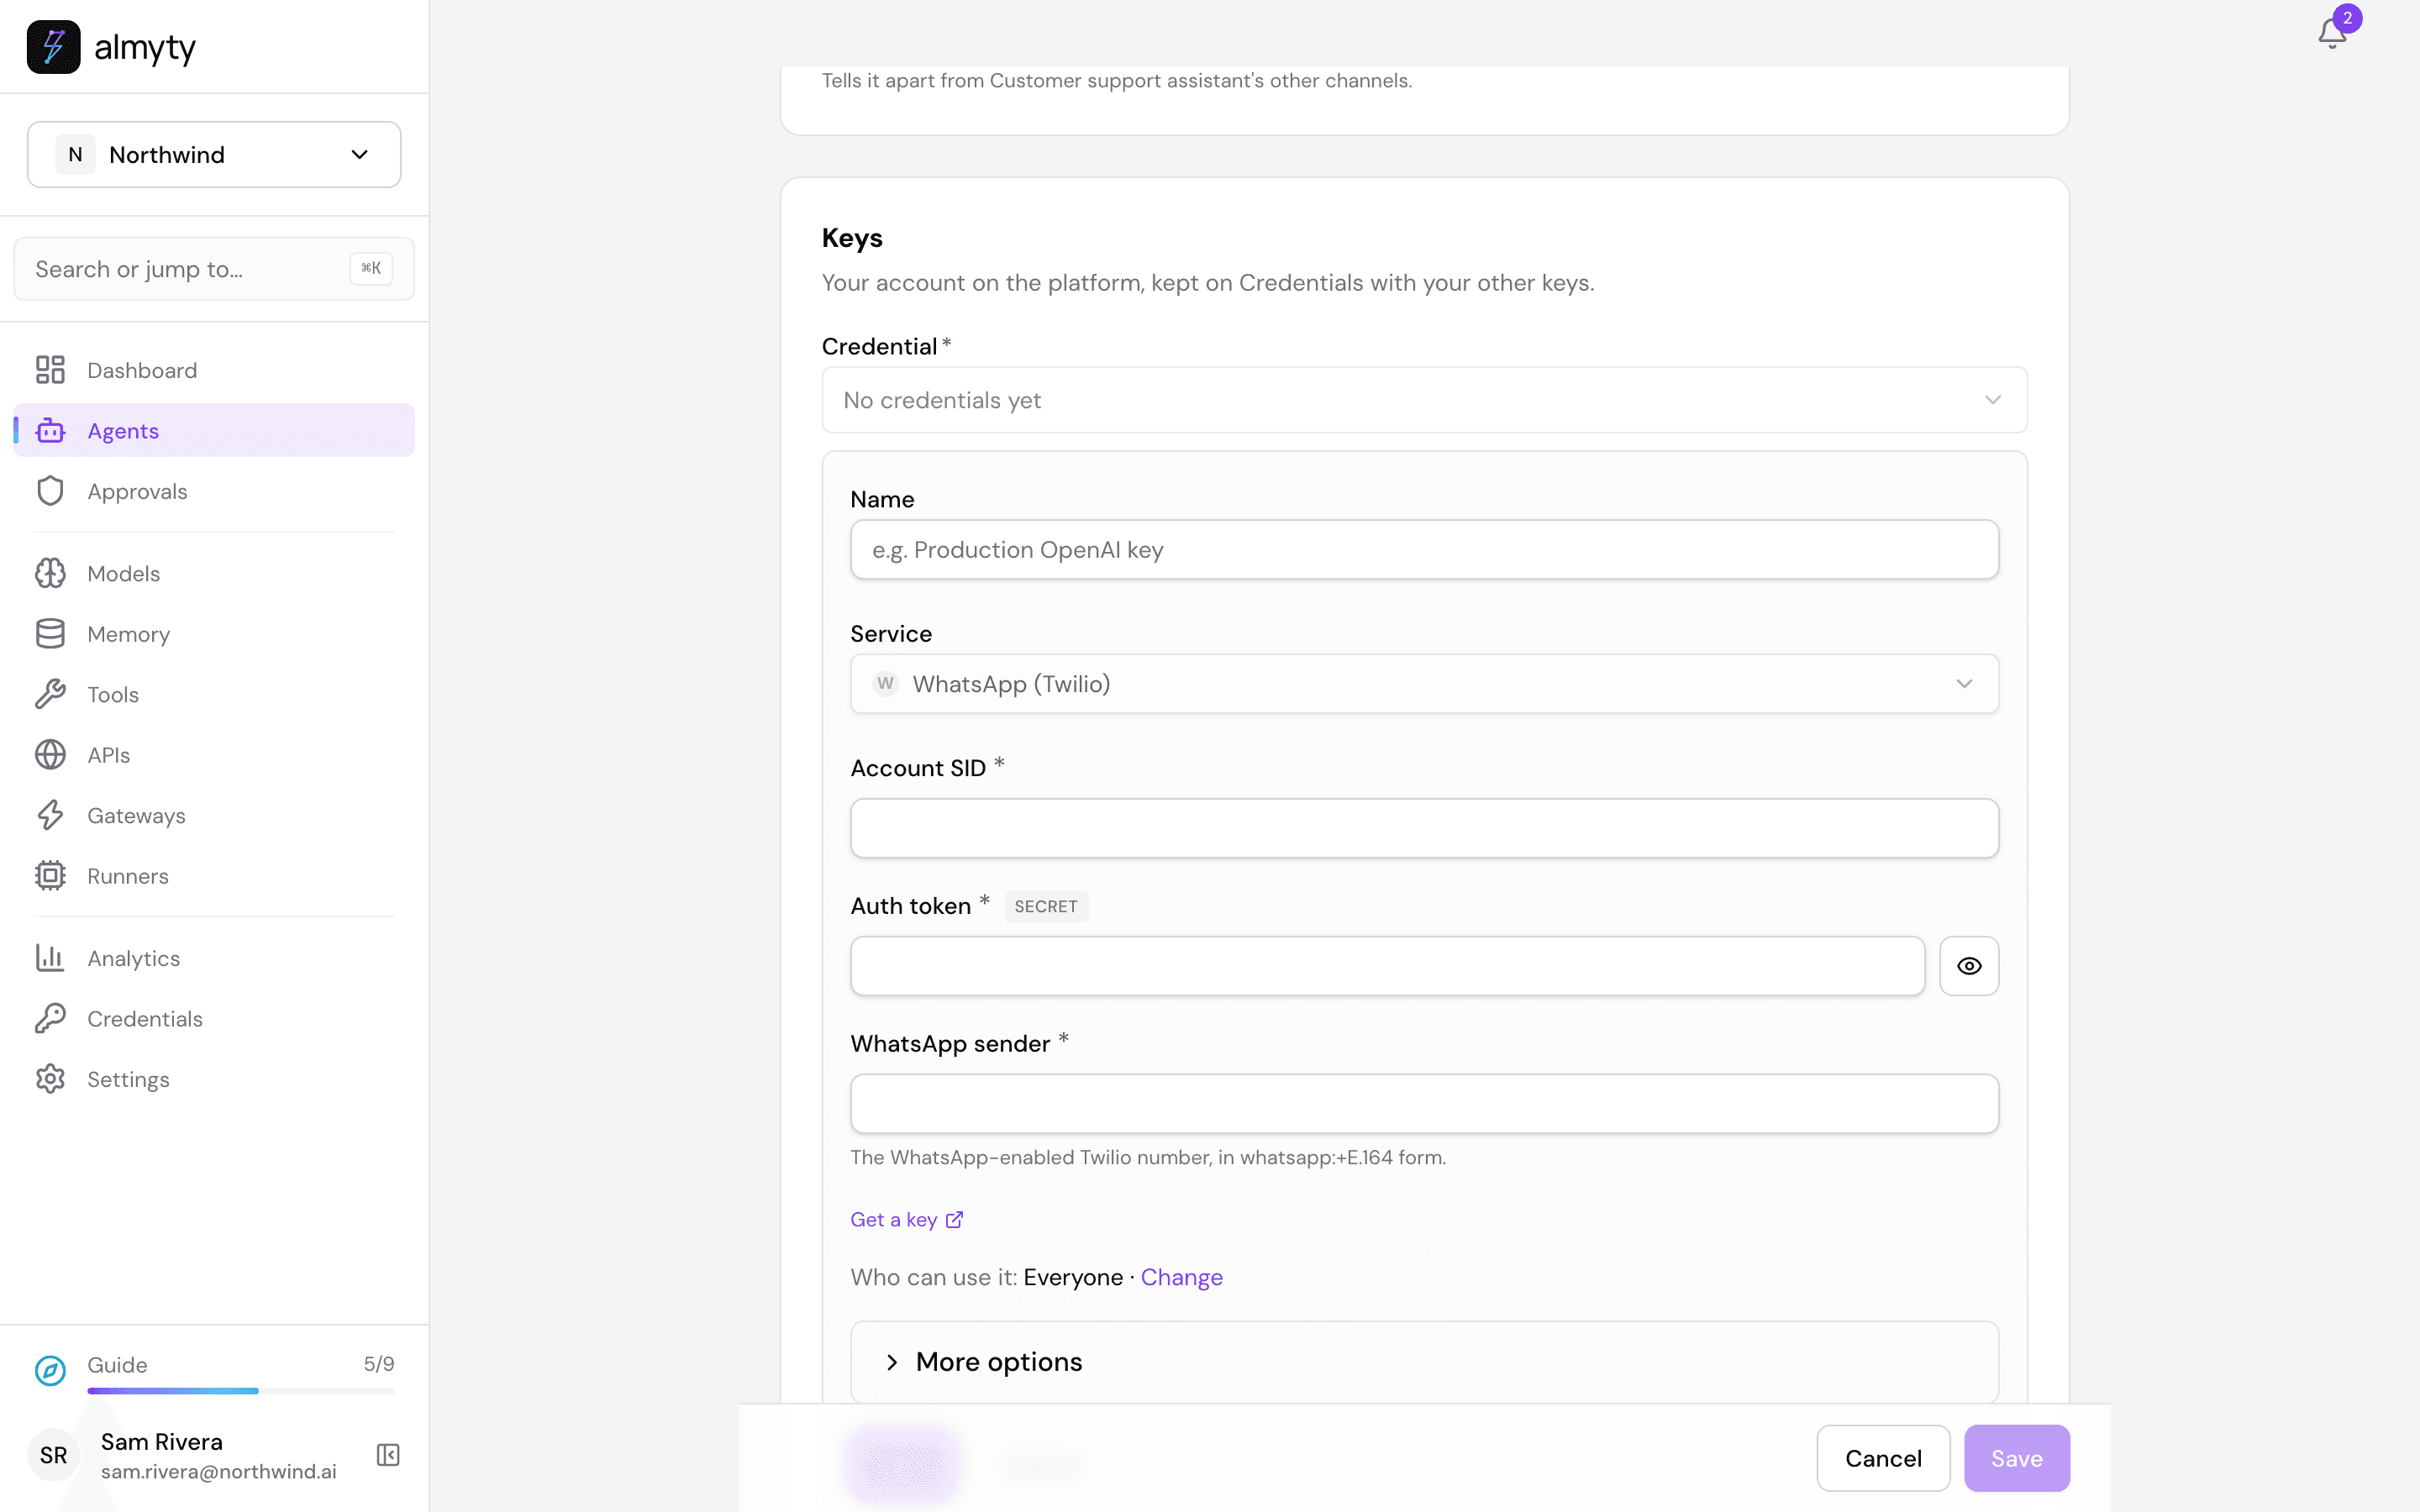
WhatsApp. On Channels, click Add channel and pick WhatsApp (Via Twilio). Under Keys, click Create one here and fill in three things from your Twilio account: the Account SID, the Auth token and your WhatsApp sender number (written like whatsapp:+15551234567). Get a key opens the right page at Twilio. Click Save, then Publish. almyty tells Twilio where to send your WhatsApp messages for you. If you use Meta’s WhatsApp directly instead of Twilio, pick WhatsApp (Via Meta Cloud).
Email. Pick Email on Add channel. Under Keys, click Create one here and paste your Resend API key. Then, in your Resend account, add the Callback URL shown on this page as a webhook for received email (Resend → Webhooks → Add endpoint). Click Save, then Publish. Mail sent to your receiving address is now answered by the assistant.
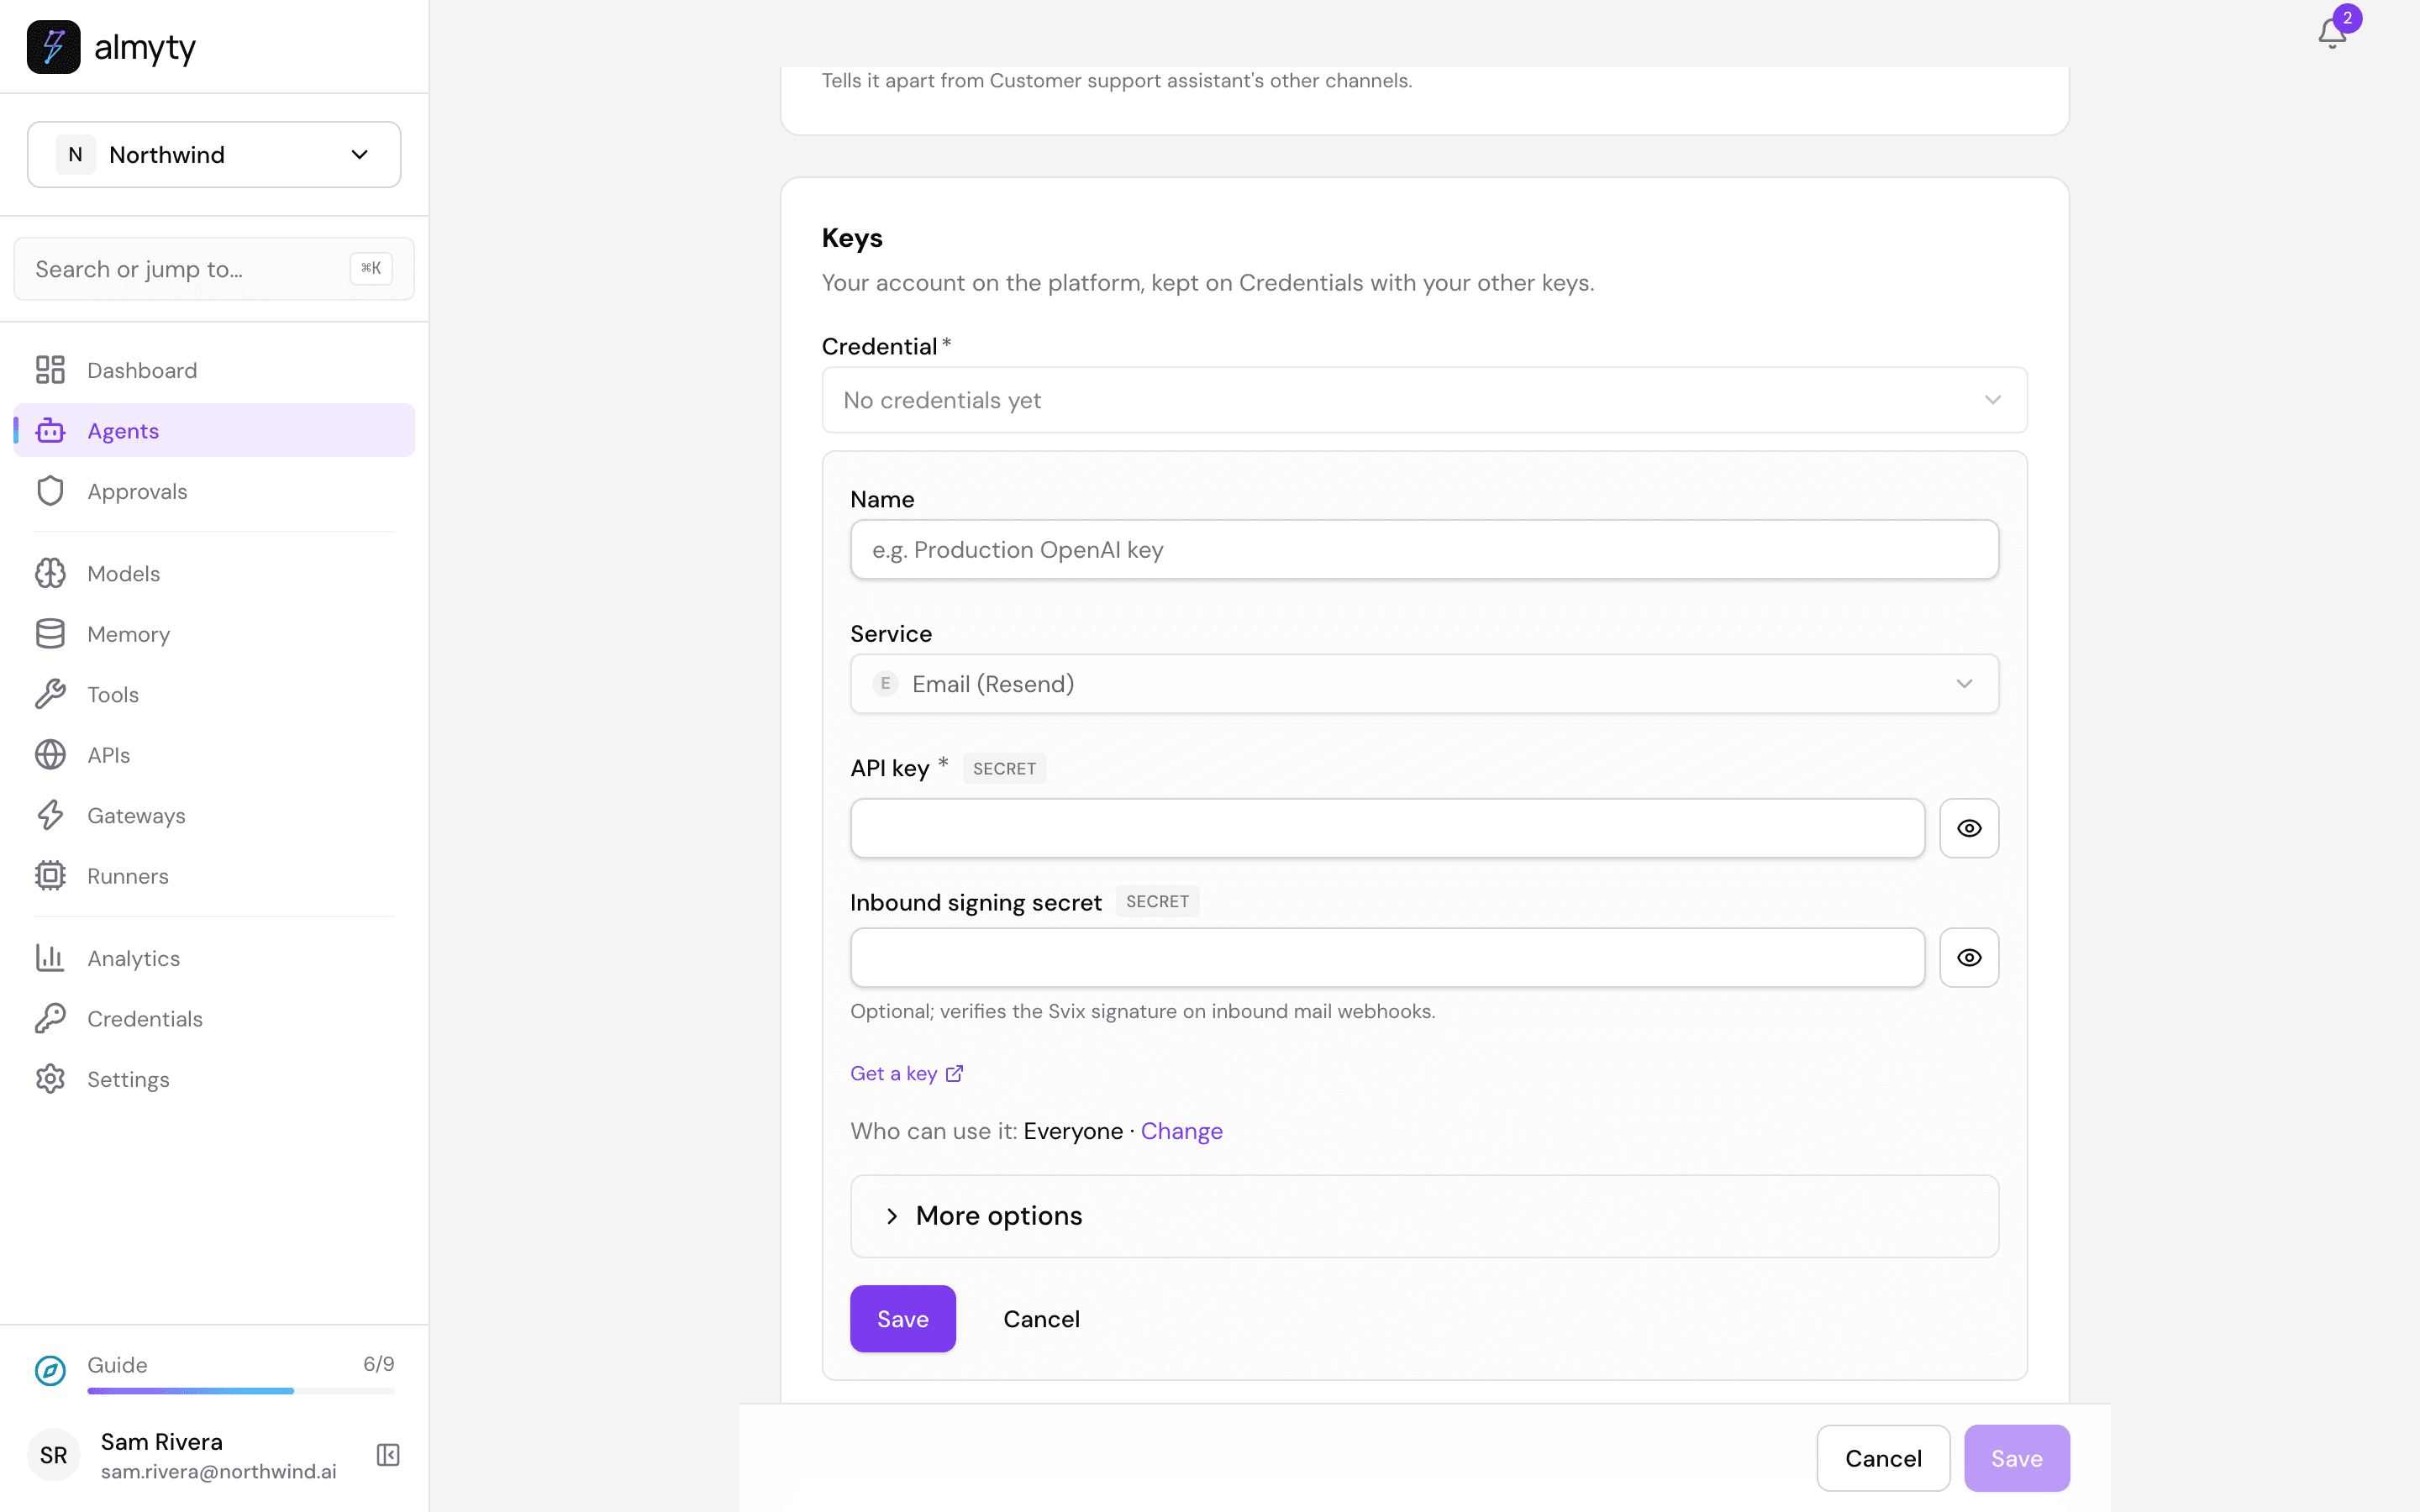
Every key you add here is kept on Credentials with your other keys, locked away. You can see who may use each one and replace it there.
9. Name, greeting and spending limits
On the Channels tab, click Branding and visitor rules. What you set here applies to every channel of the assistant:
- Name people see (for example
Northwind Help), Brand color, Greeting and up to four Suggested prompts, like “Where is my order?”. - Who can use it: Anyone with the link suits a public support chat.
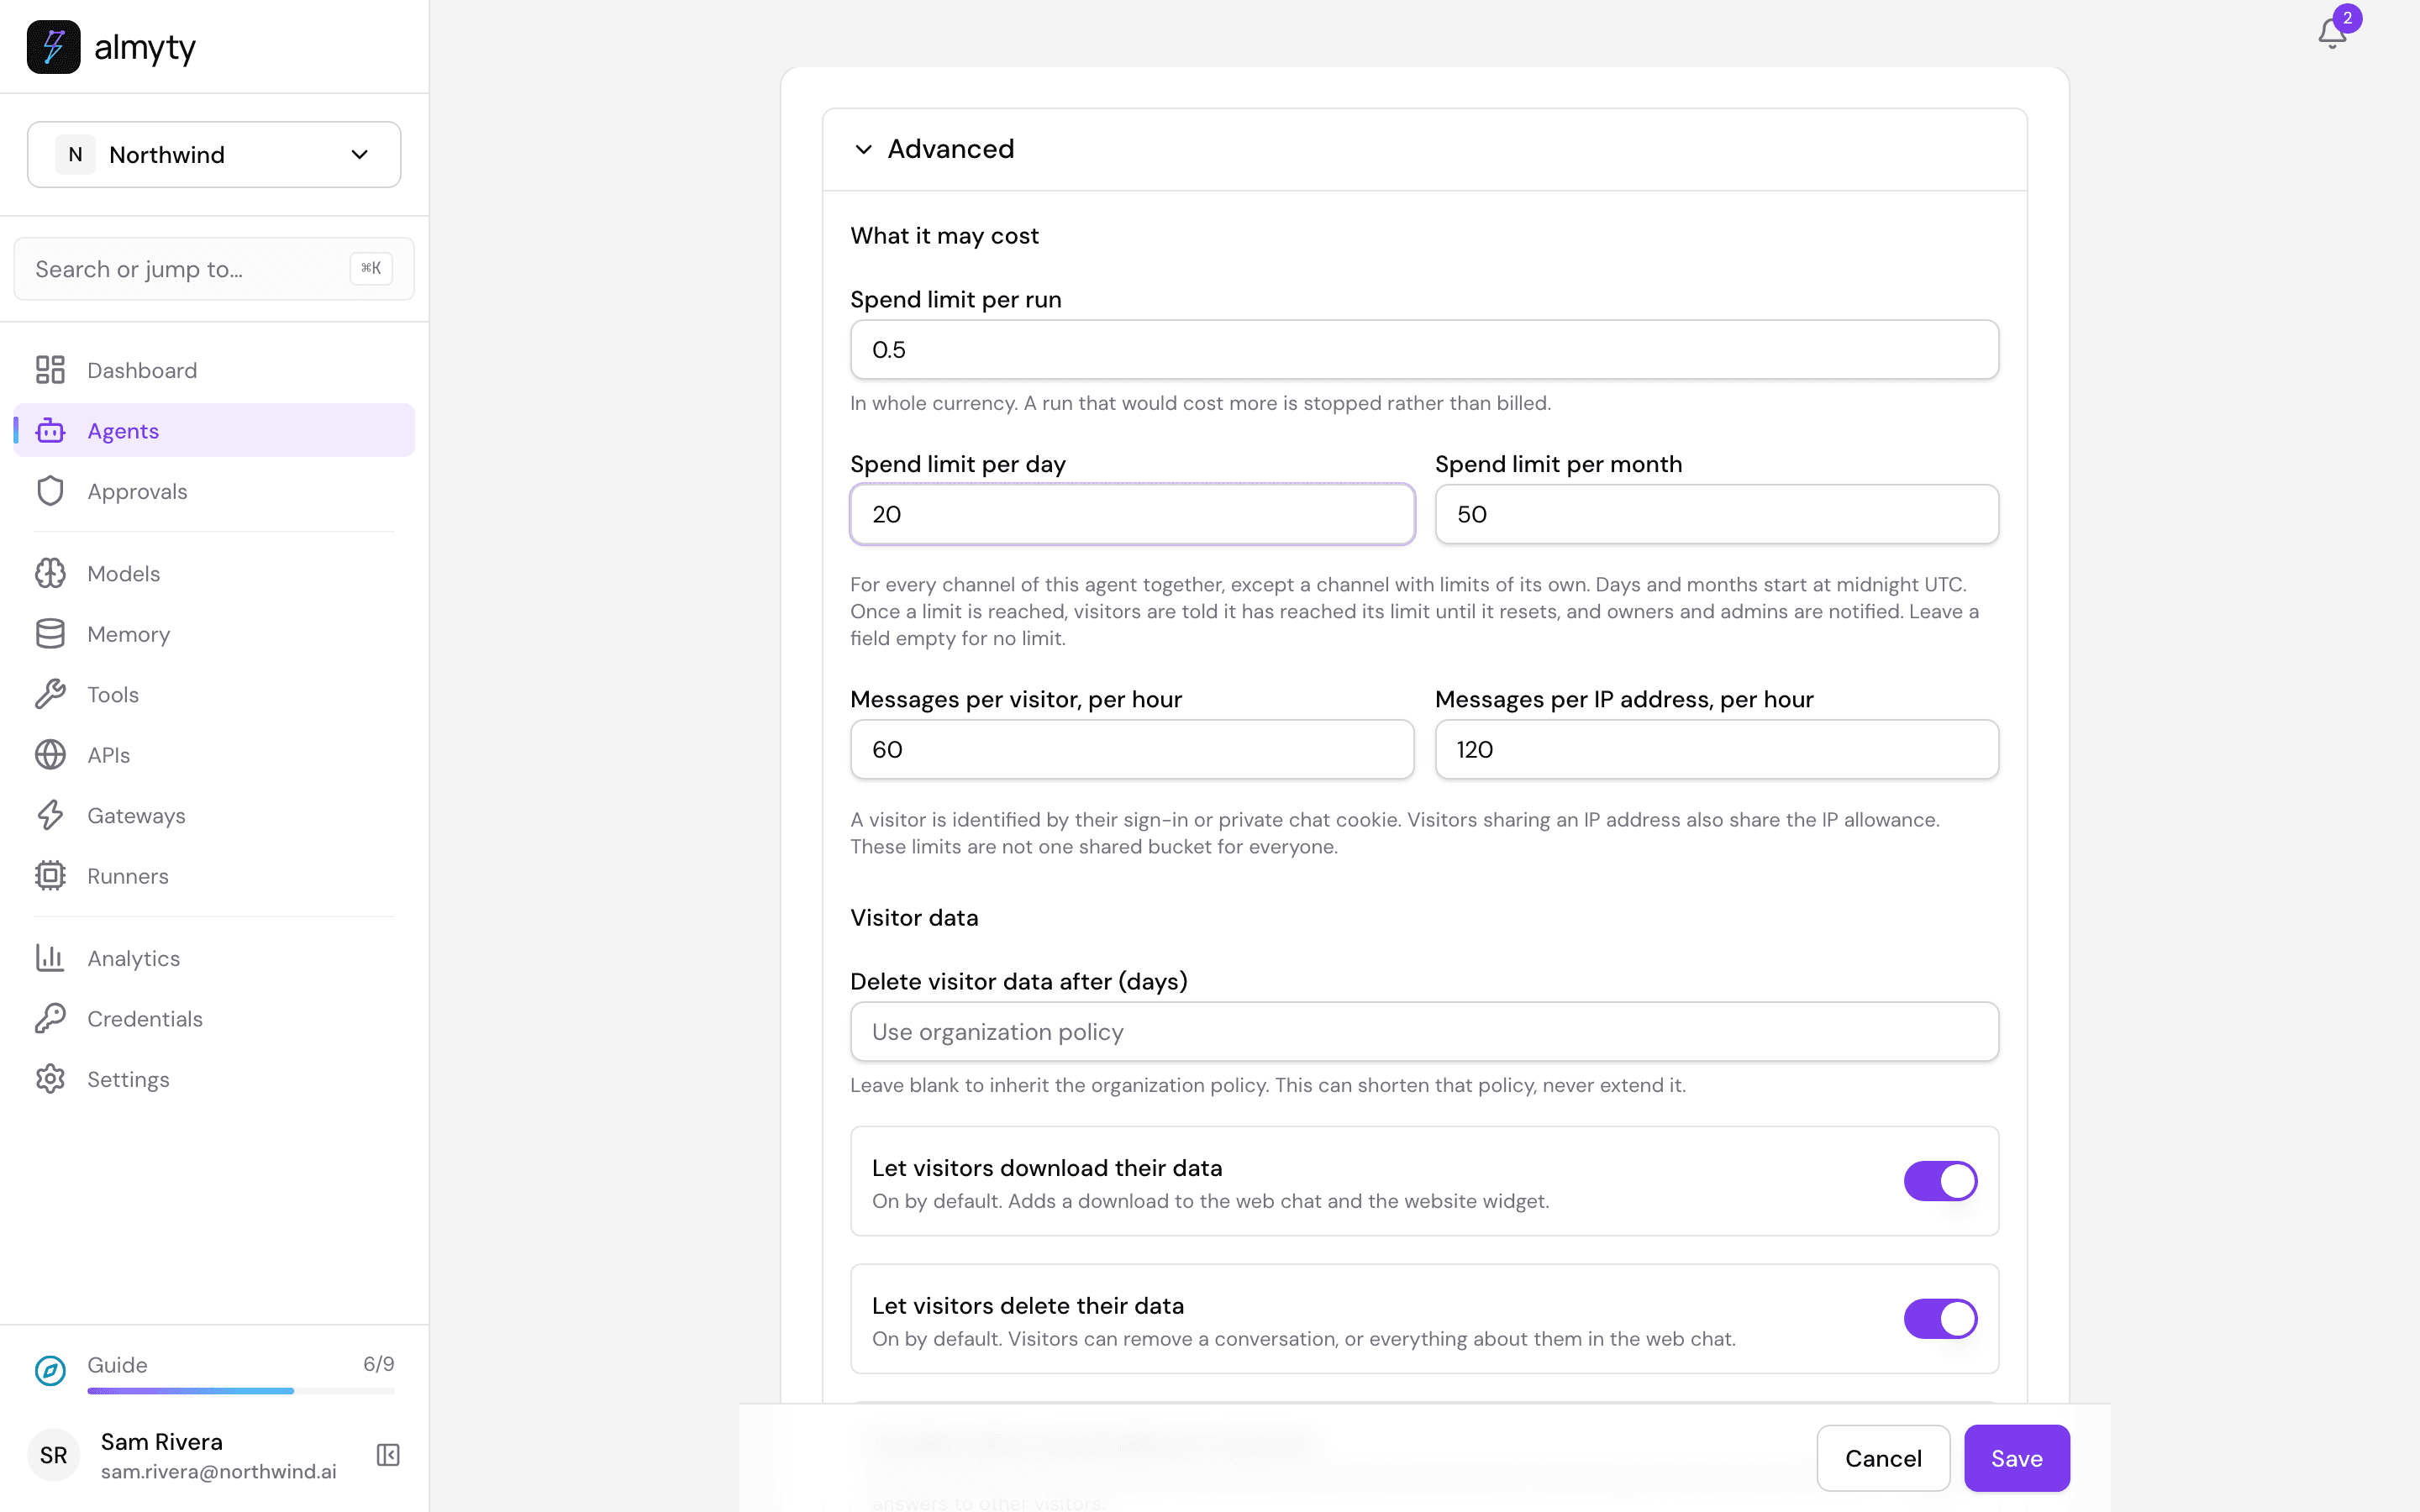
- Under Advanced, What it may cost: a spend limit for each answer (Spend limit per run), per day and per month, and how many messages one visitor, and one internet address, may send an hour. When a limit is reached, visitors are told to come back later, and you are notified. Here the daily limit is set to 20.
- Under Advanced, Visitor data: how many days customers’ chats are kept, and whether customers may download or delete their own chat. Both are on unless you turn them off.
A customer who wrote on WhatsApp or by email, and wants a copy of their data or wants it deleted, asks you. You answer from Visitor data on the Channels tab, next to Branding and visitor rules. See Visitor data requests.
Click Save.
10. What your customers see
Open the web chat’s link. Customers see your name and greeting, ask their question and get an answer from your order system. A line under the message box tells them they are talking to an AI assistant.
Keep an eye on it
- Runs on the assistant shows every answer it gave: what it looked up, what it answered and what it cost.
- Analytics in the sidebar shows usage and spending across all your assistants.
- Approvals shows what is waiting for a person.
- To change what it says, click Edit, change its Instructions and Save. Every change is recorded under Change history on the Overview tab.
For developers
- The walk-through above is automated in
scripts/demo-seed/guides.mjs support, which drives the same clicks on the local demo stack and takes these screenshots. - The refund rule is an amount rule (Settings → Advanced → Approvals,
/approval-rules): almyty checks the tool call’samountbefore it runs, and the autonomous run pauses inwaiting_approvaluntil someone decides. On approve, exactly that call is made once. See Approvals. - The same assistant can be called from your own code through its OpenAI-compatible endpoint, shown under Integration on its Overview tab. See the OpenAI-compatible API.
- Channel keys, callback addresses and what publishing checks: Channels and Chat apps.