Product chat for your website
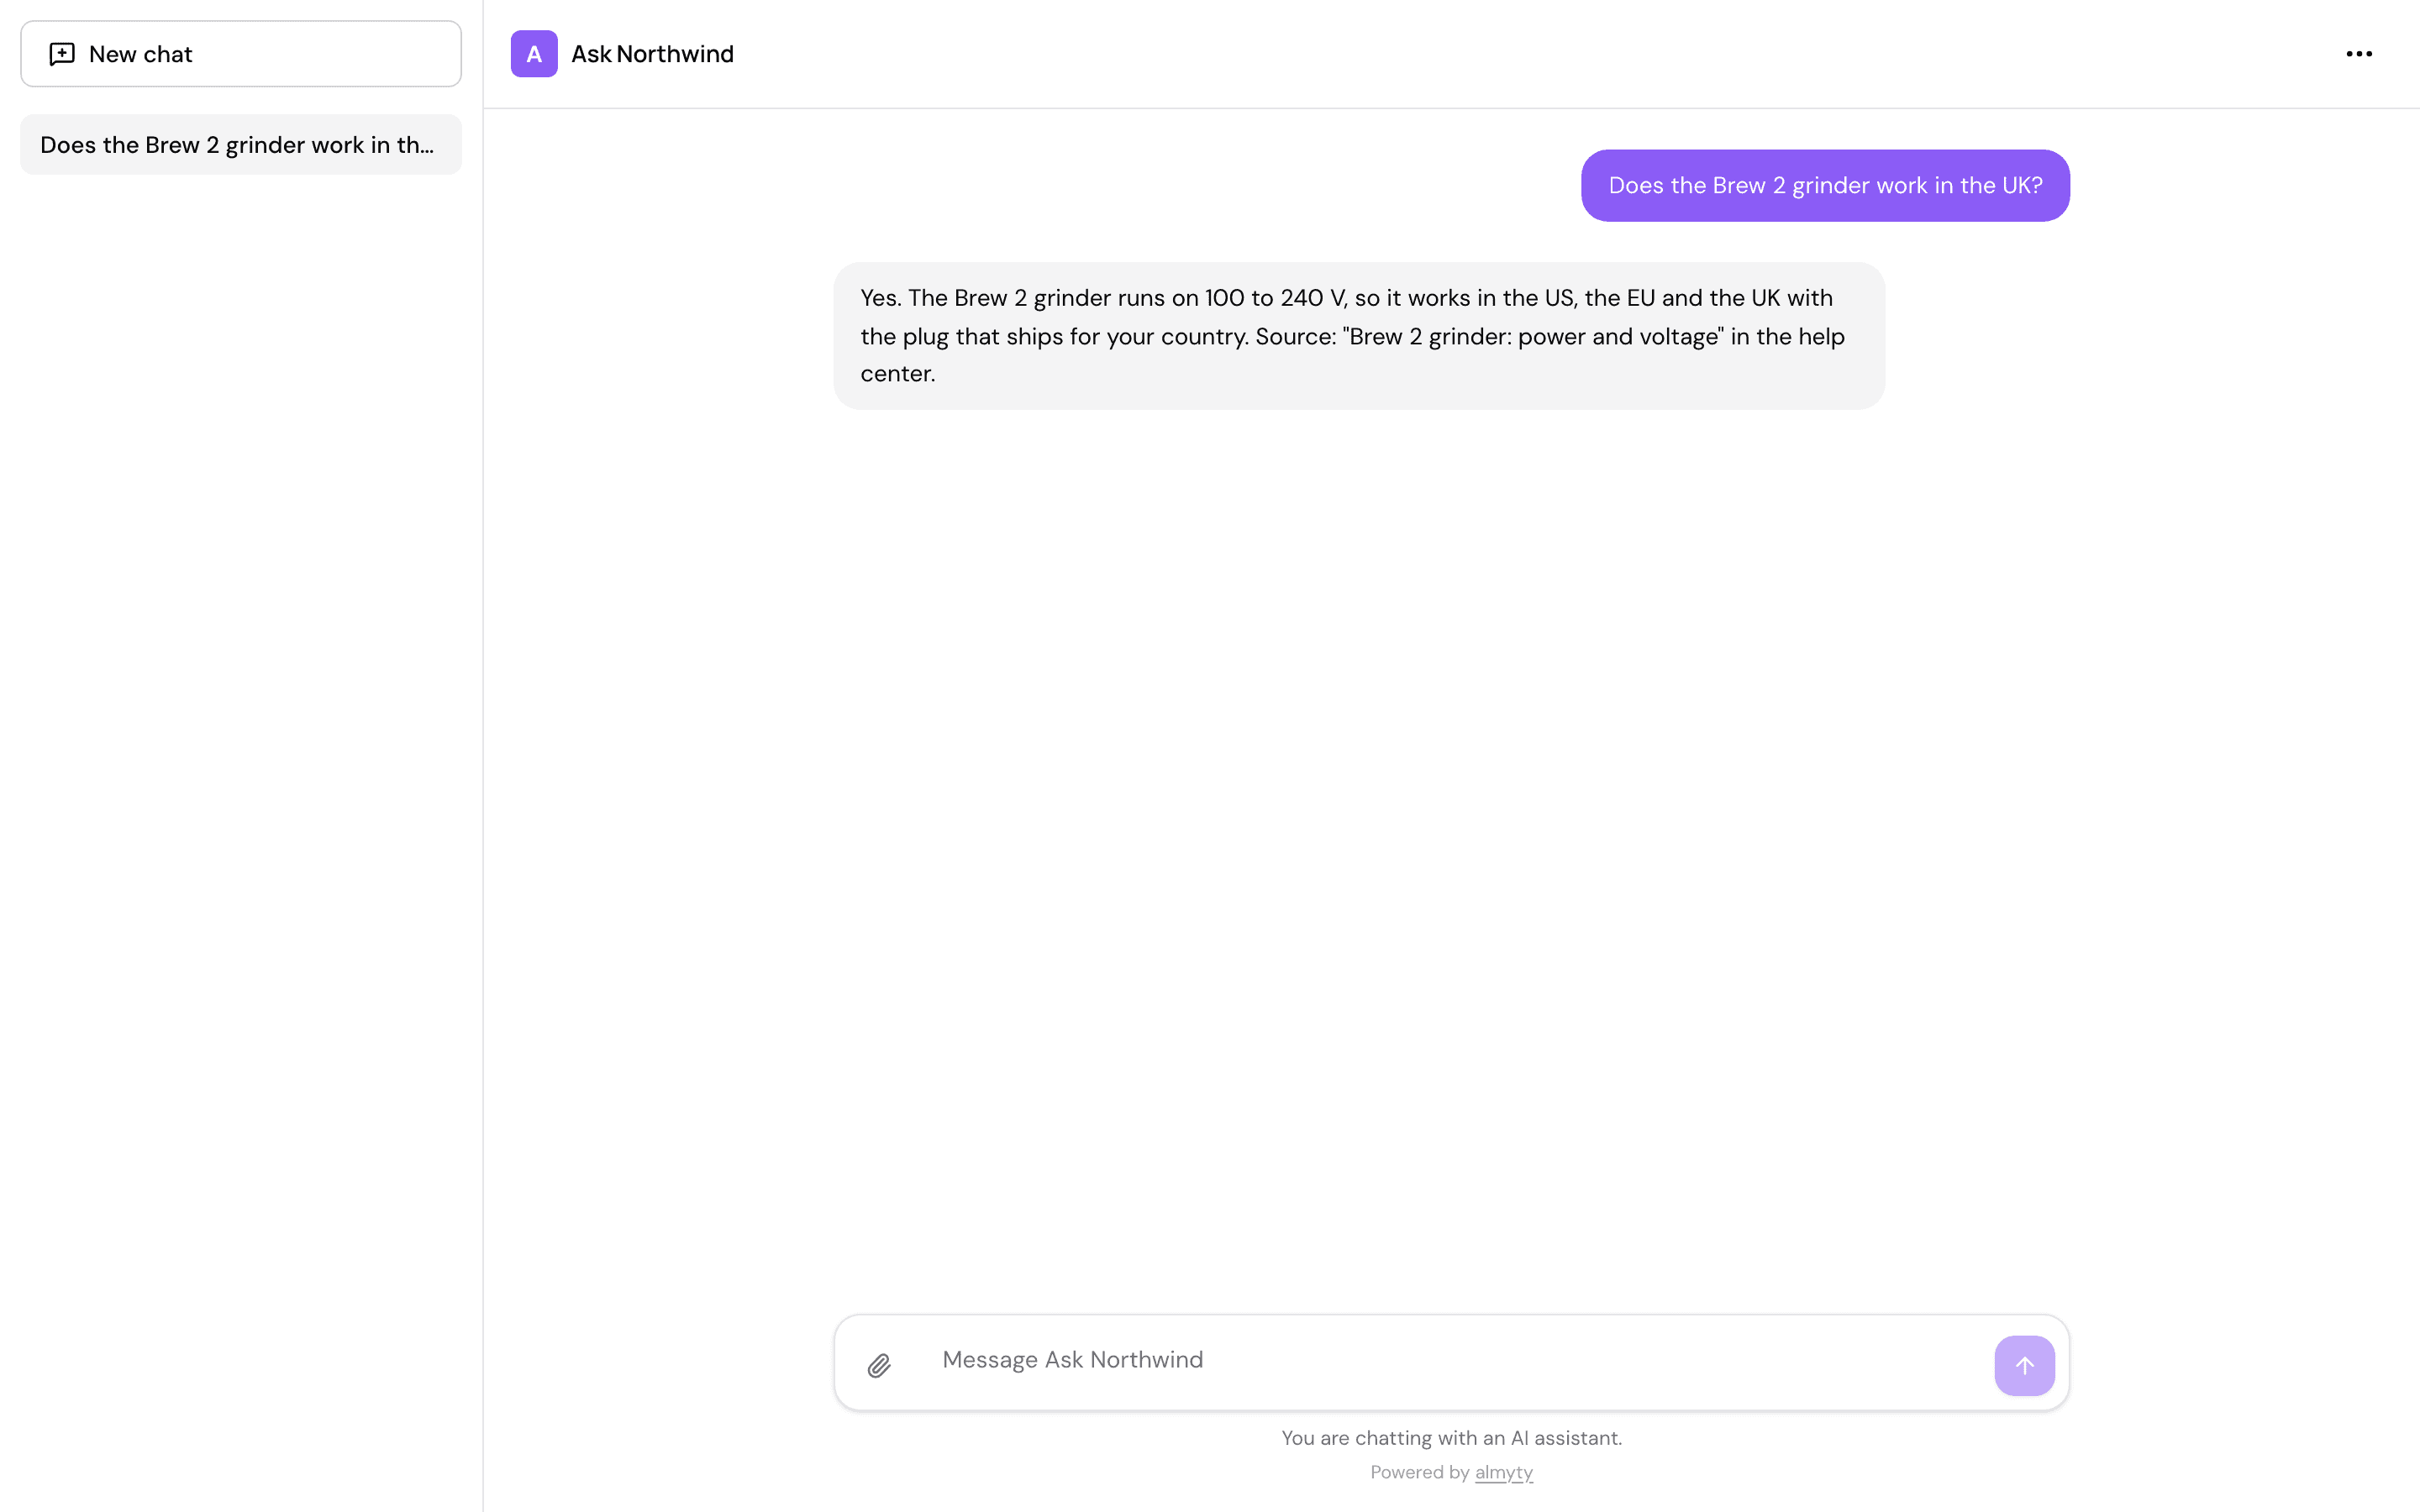
Put a chat on your website and campaign pages that answers product questions from your own documentation. A visitor asks “Does the Brew 2 grinder work in the UK?” and gets an answer taken from your help center, with the article it came from. A daily spending cap makes sure a busy campaign can never run up a surprise bill.
This guide builds it for Northwind’s marketing team. It takes about 15 minutes and needs no code. The only technical part is pasting one line into your website, which whoever runs your site can do in a minute.
What you need
- An almyty account with an AI model connected. If you have not done that yet, follow step 1 of the customer support guide.
- A way for the assistant to read your documentation. Most help-center and documentation tools have an API (a way for software to ask them for articles) with a description file, often called “OpenAPI” or “Swagger”. Ask whoever runs your help center for the link.
1. Connect your help center
In the sidebar, open APIs and click Connect an API. Pick OpenAPI / Swagger, paste the link to your help center’s description on Link (or pick File and upload it), and click Connect API.
almyty works out what your help center can do. Here: search the documentation, and read one article. Each becomes a tool the assistant can use.

2. Create the assistant
Open Agents, click Create agent and pick Autonomous at the top.
- Click the name New agent and call it
Product questions. - Work mode, the first section: open Model and pick a low-cost model, for example gpt-4o-mini. Public chats get a lot of short questions, and the price per answer is shown next to each model.
- Personality & style:
Warm and clear. Short answers, plain words. - Instructions: tell it to stay within your docs.
You answer questions from visitors to the Northwind website about our coffee equipment. Answer only from the help center: search it first, and name the article you used. If the help center does not answer the question, say so and suggest the contact page. Never promise prices, discounts or delivery dates.
Then scroll to Capabilities → Tools and APIs and tick All tools next to your help center.
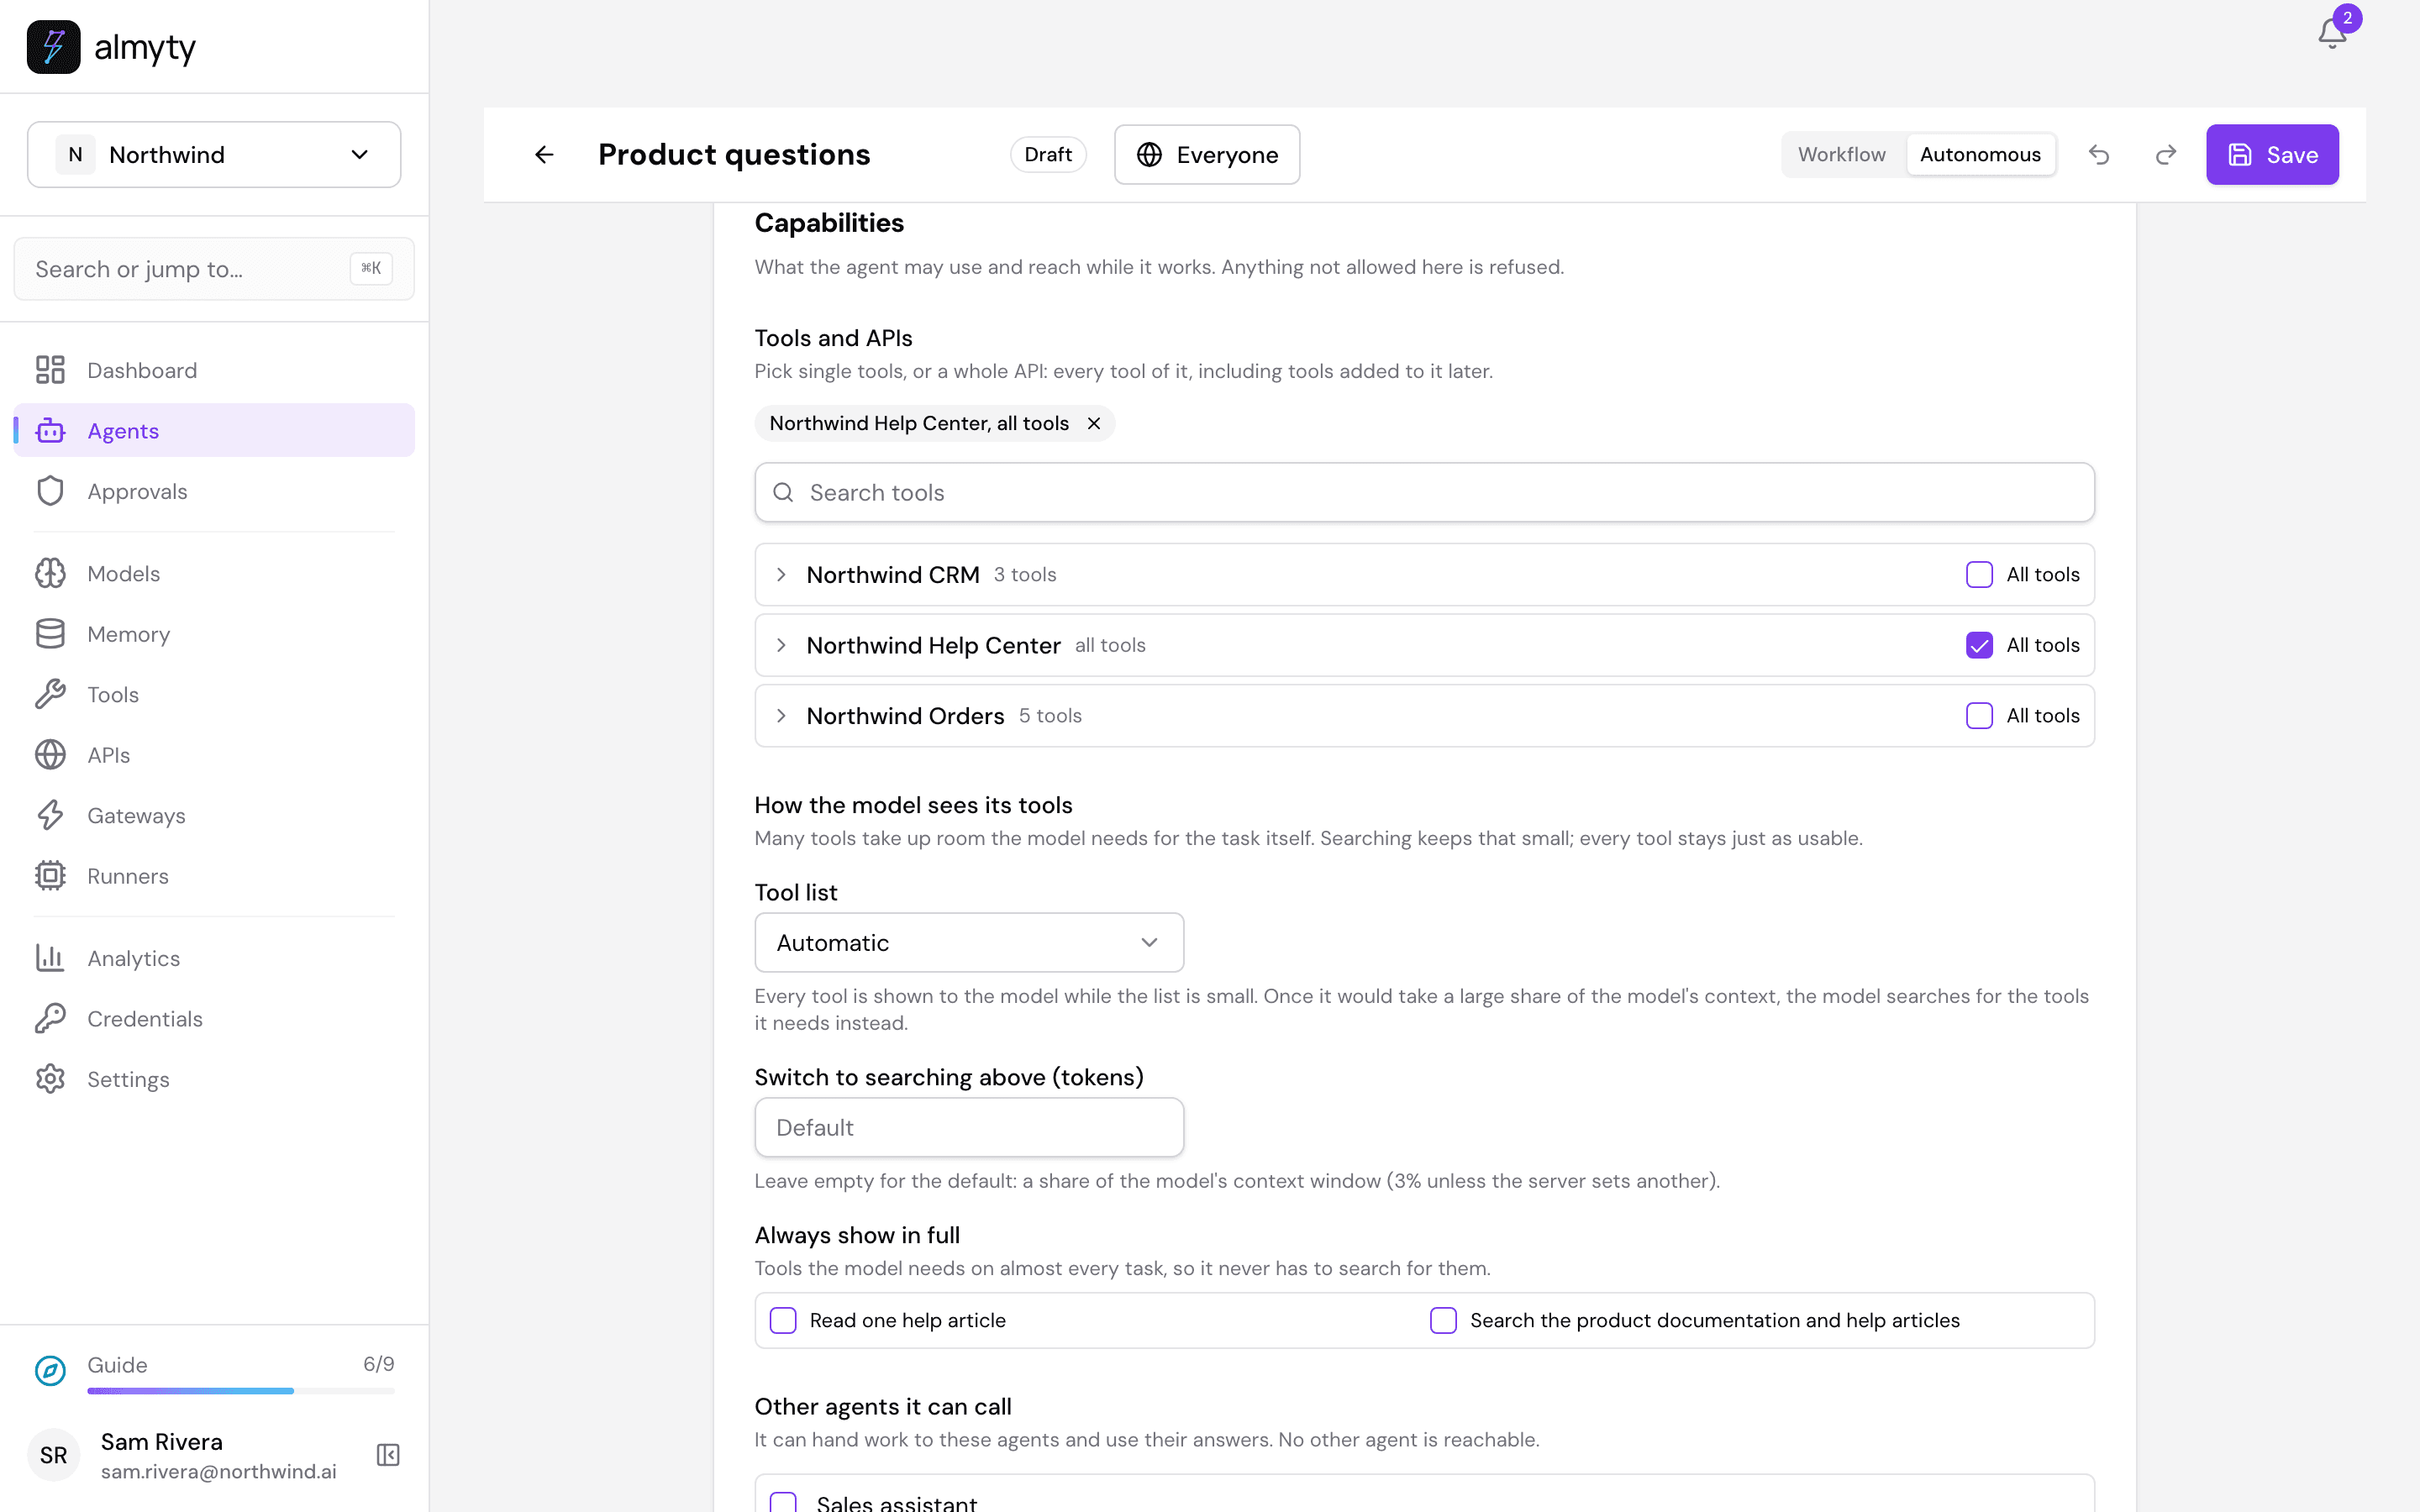
Click Save, go back to Agents, open Product questions and click Activate.
3. Try a question
On the Overview tab, under Try it, ask what a visitor would: Does the Brew 2 grinder work in the UK?
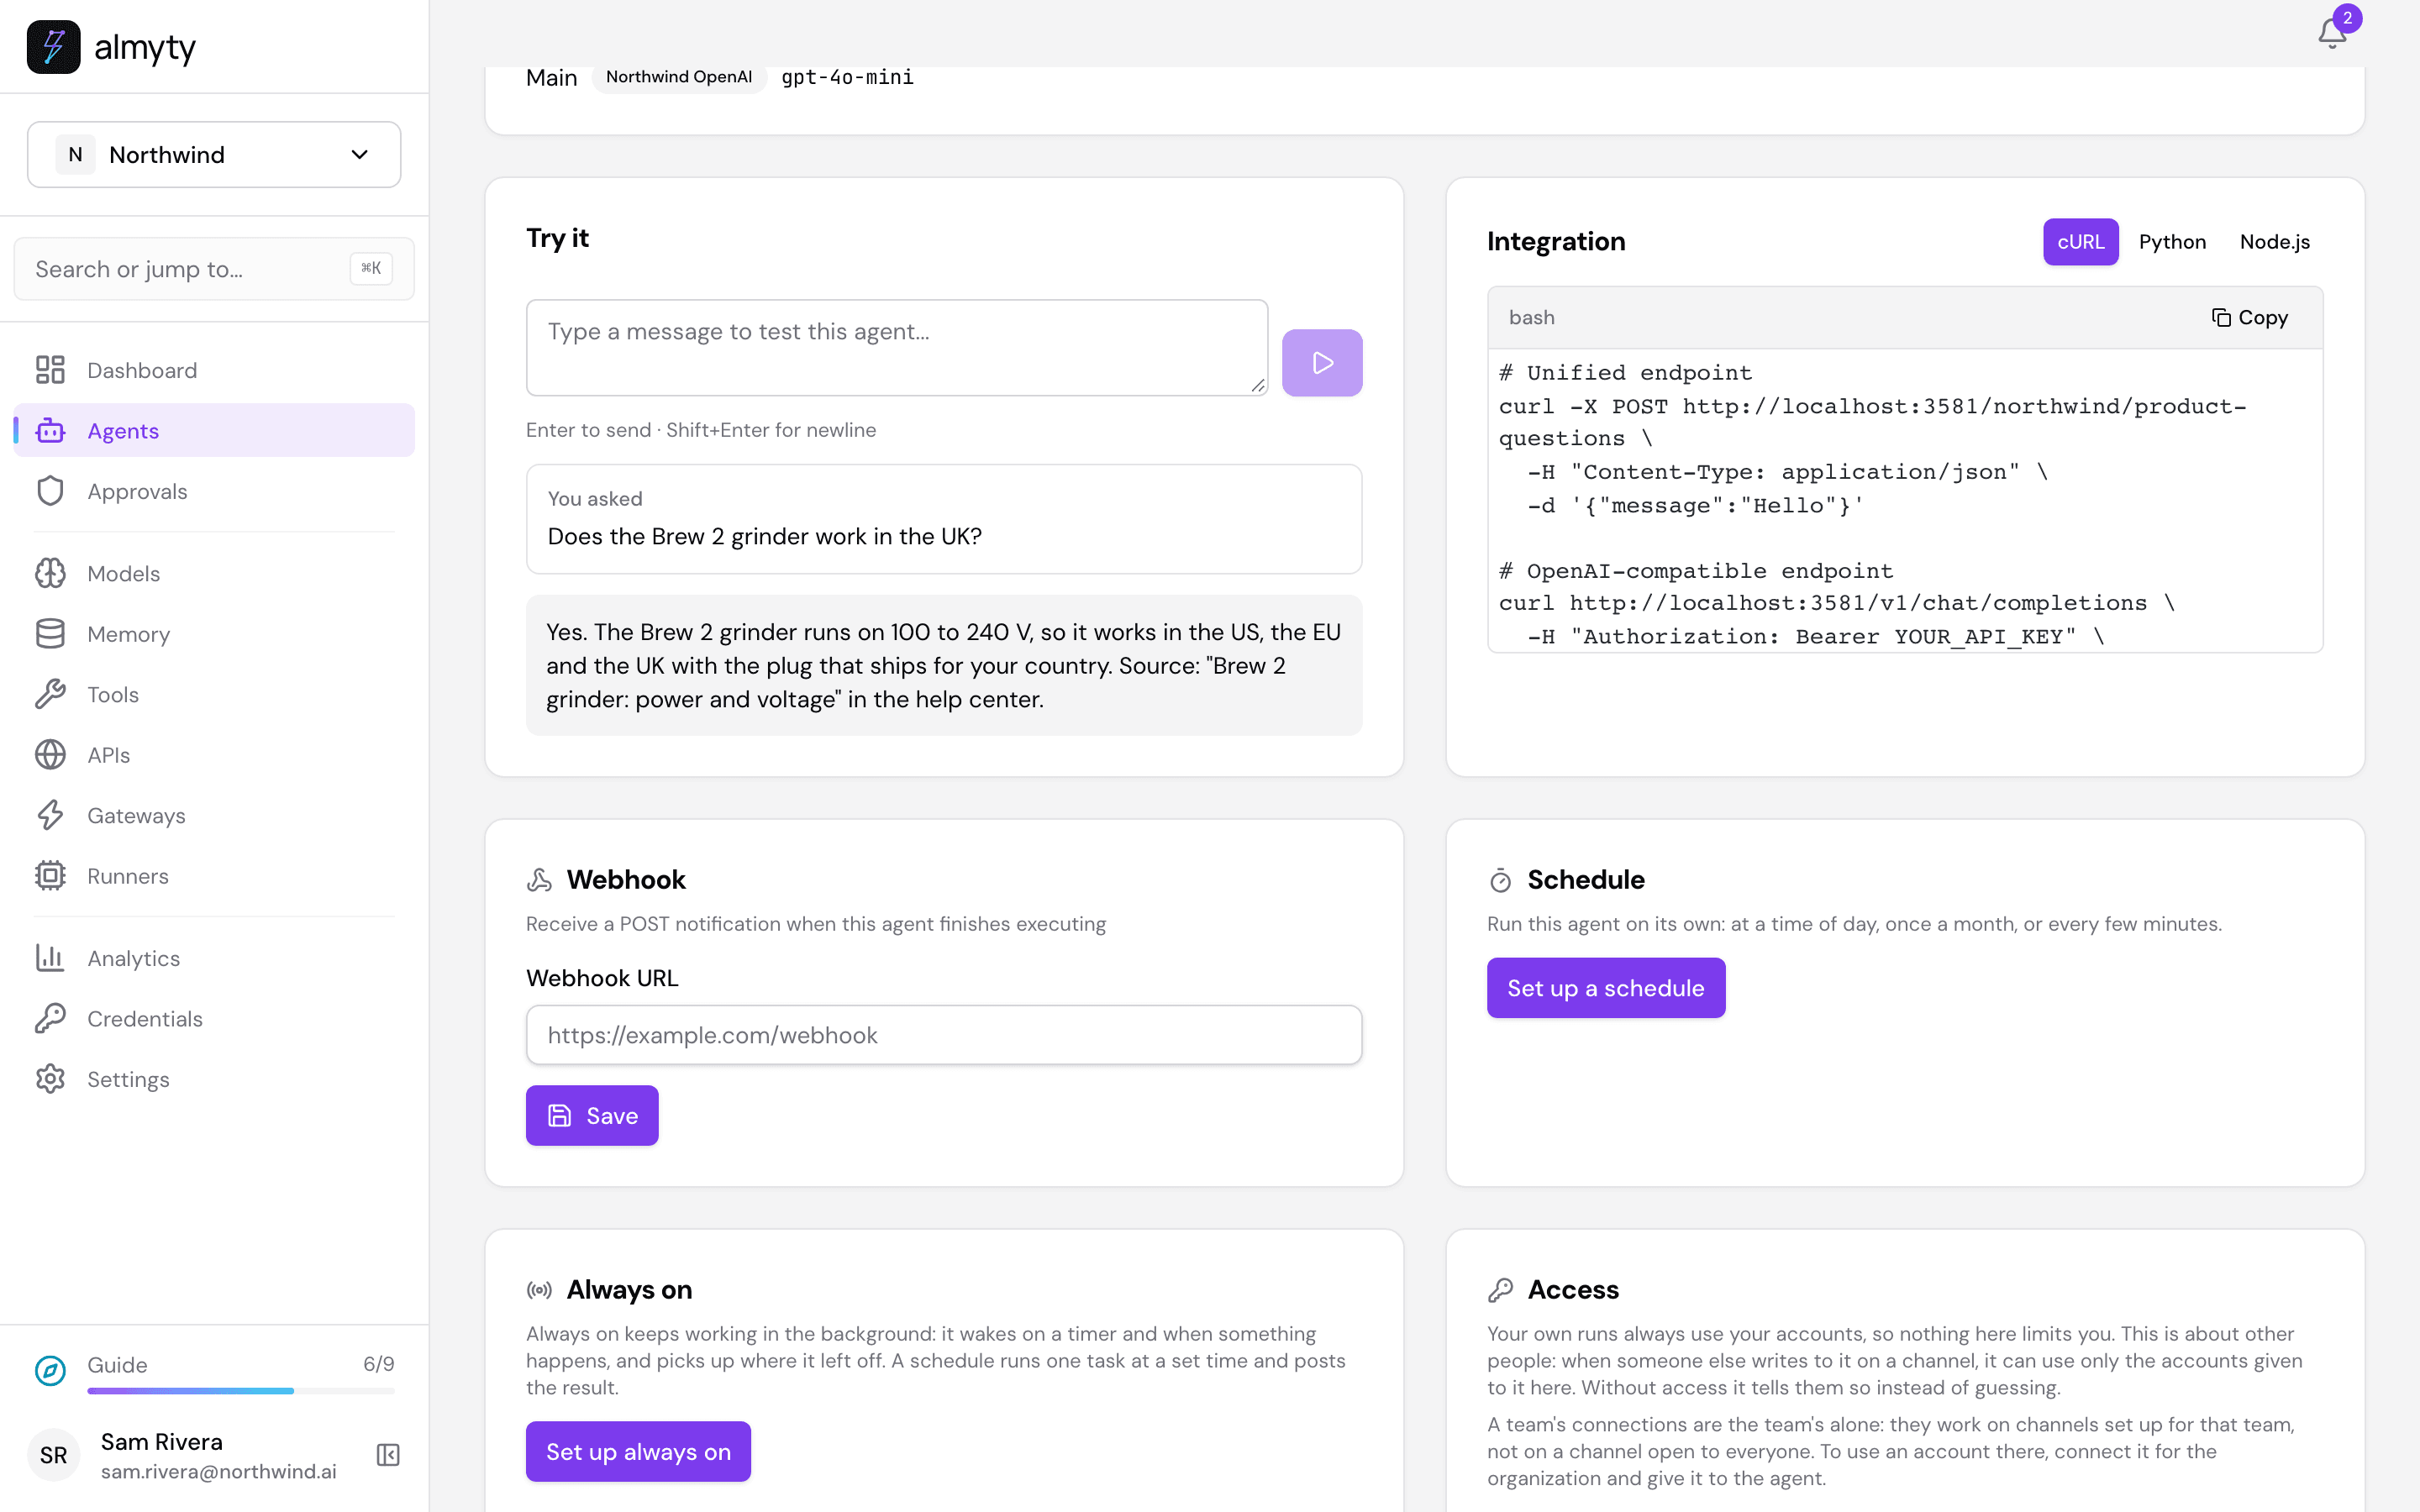
The assistant searched the help center, found the article on power and voltage, and answered from it, naming the article. If your docs do not cover a question, it says so instead of guessing, because your instructions tell it to.
4. Set a daily spending cap
Open the Channels tab and click Branding and visitor rules. Everything here applies to every place you put the chat.
- Look: Name people see (
Ask Northwind), Brand color, a Greeting, and Suggested prompts such as “Which grinder is right for me?”. - Who can use it: Anyone with the link, since it is for website visitors.
- Open Advanced. Under What it may cost:
- Spend limit per run: the most a single answer may cost, here
0.10. - Spend limit per day: here
10. Once visitors have used that much today, the chat tells them it has reached its limit until tomorrow (midnight UTC), and owners and admins get a notification. - Spend limit per month: here
200. - Messages per visitor, per hour: here
20, so one person cannot use up the day’s allowance for everyone. Messages per IP address, per hour does the same for visitors sharing a connection.
- Spend limit per run: the most a single answer may cost, here
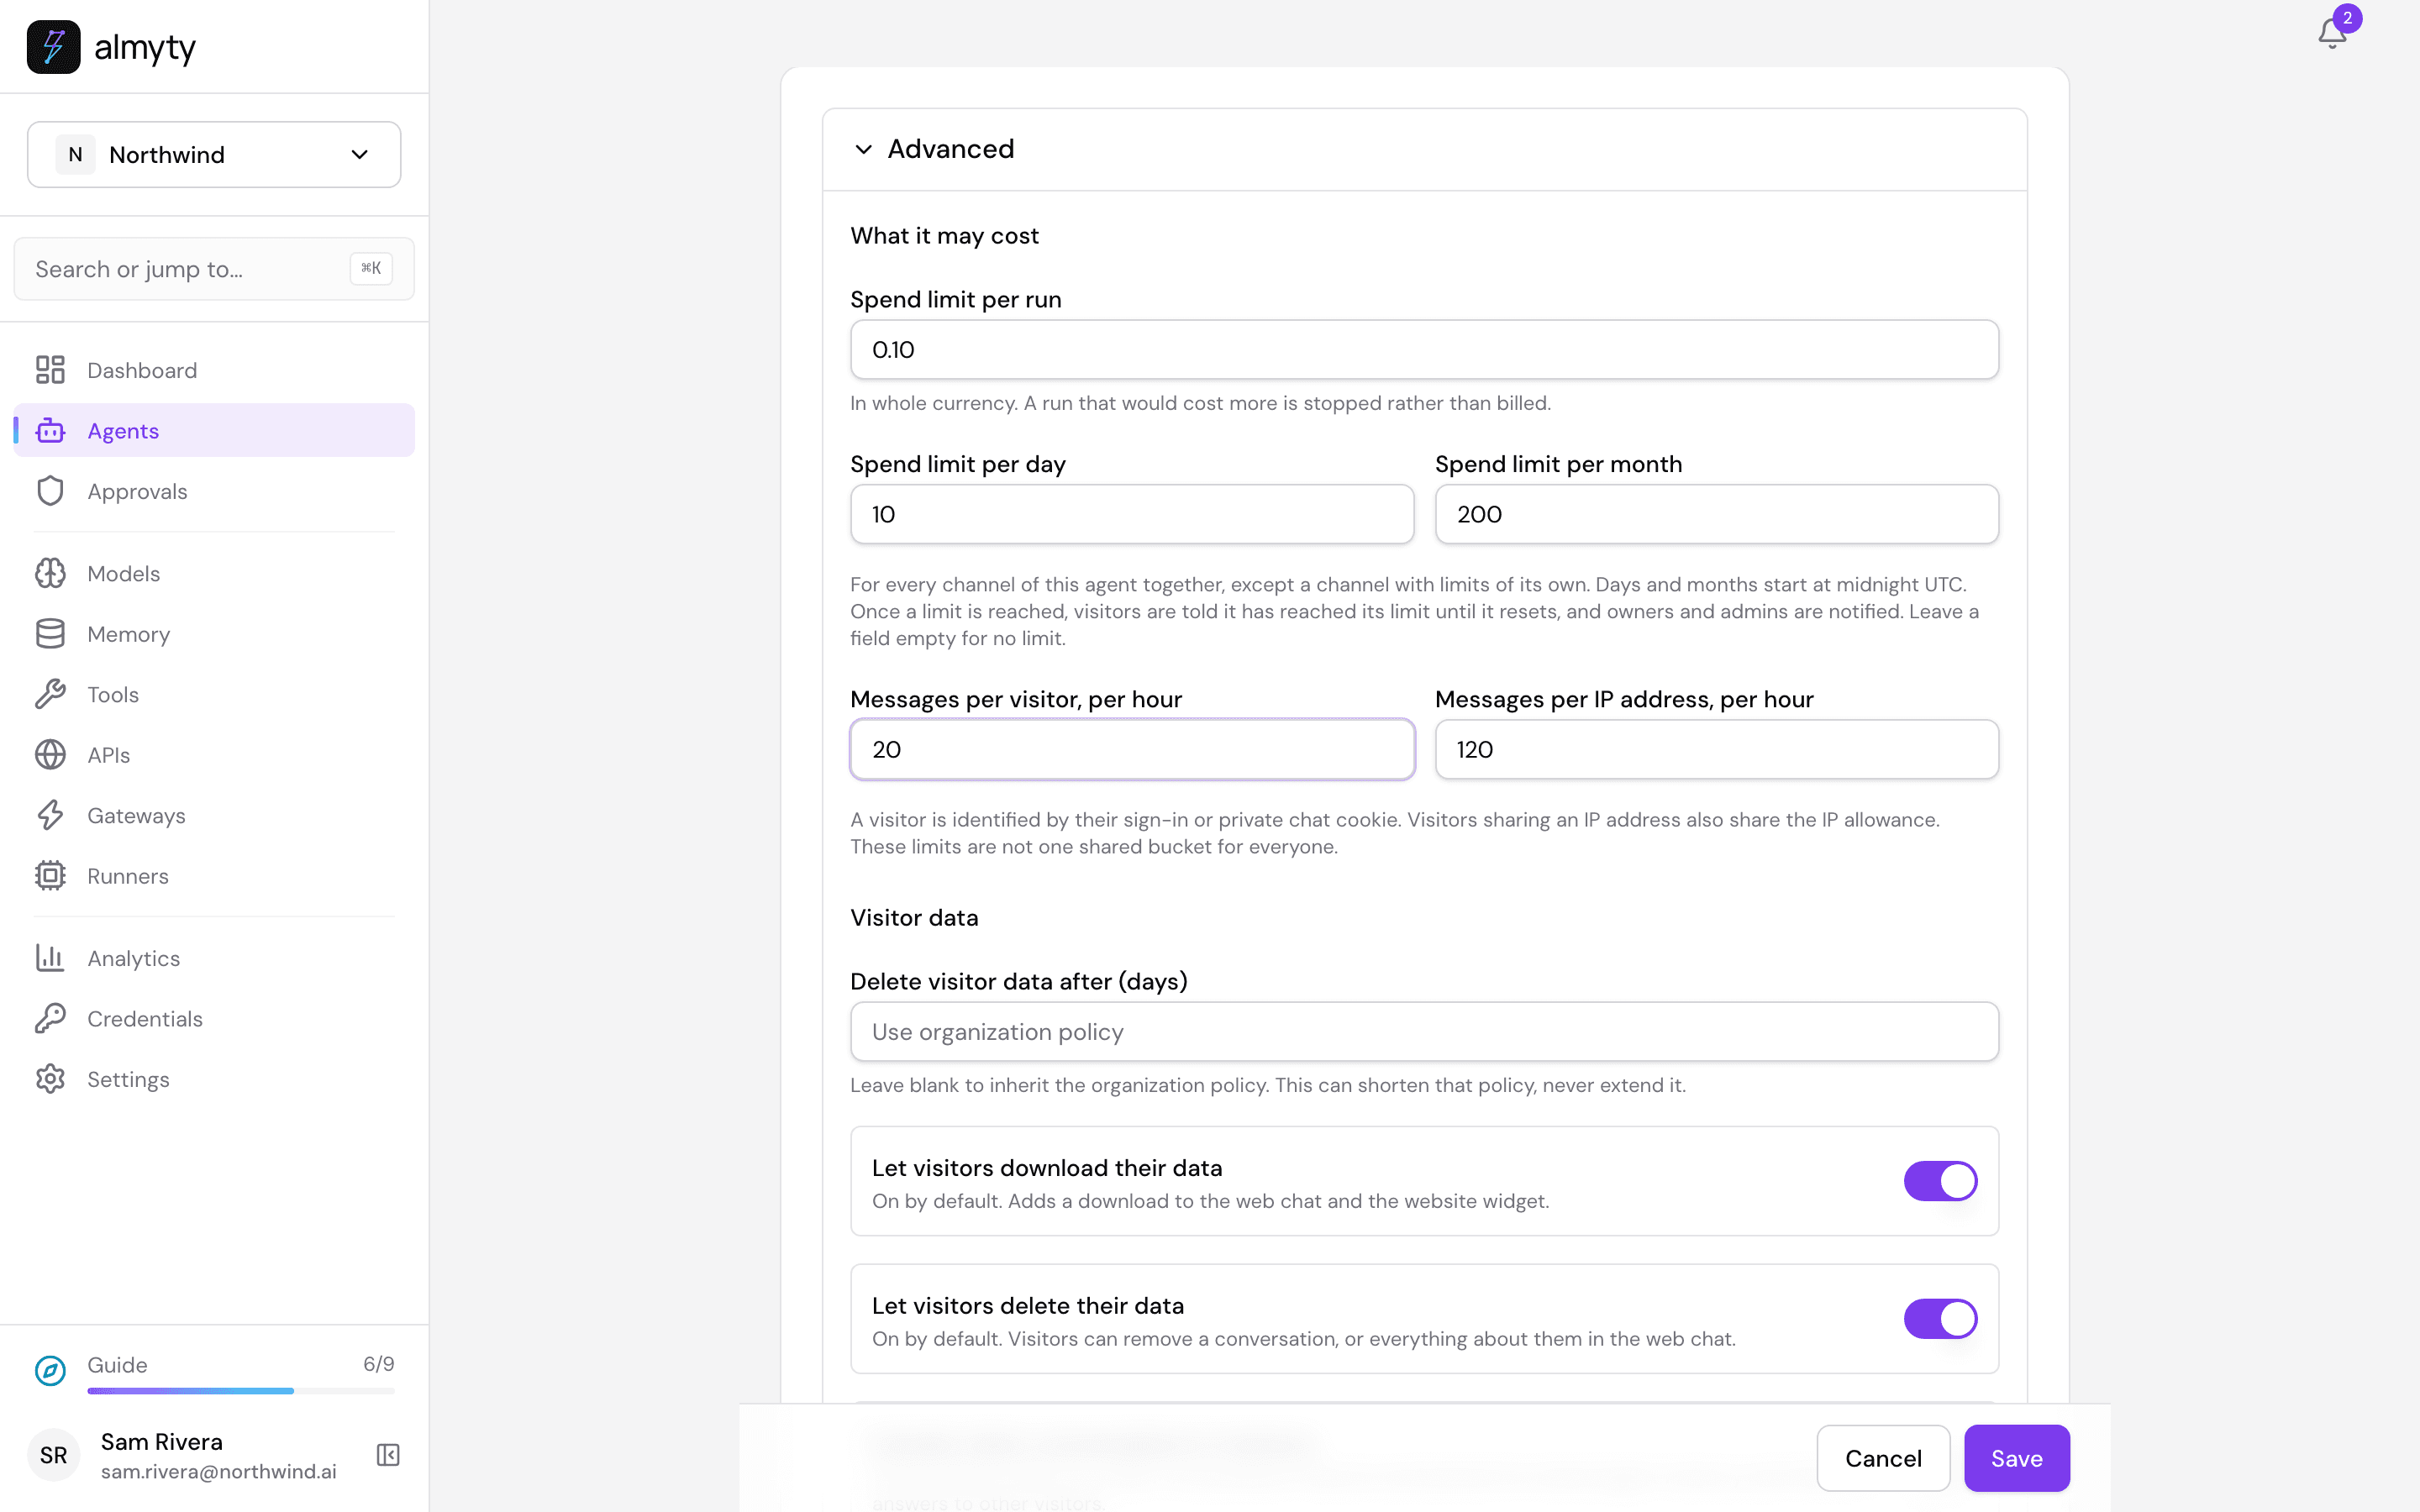
Click Save. The top of this page always shows what has been spent today and this month against your caps.
5. Put the chat bubble on your website
Back on the Channels tab, click Add channel, pick Website widget and click Publish.
- Under Add it to your site, copy the line with the copy button and send it to whoever runs your website. It goes on every page that should show the chat, including campaign landing pages.
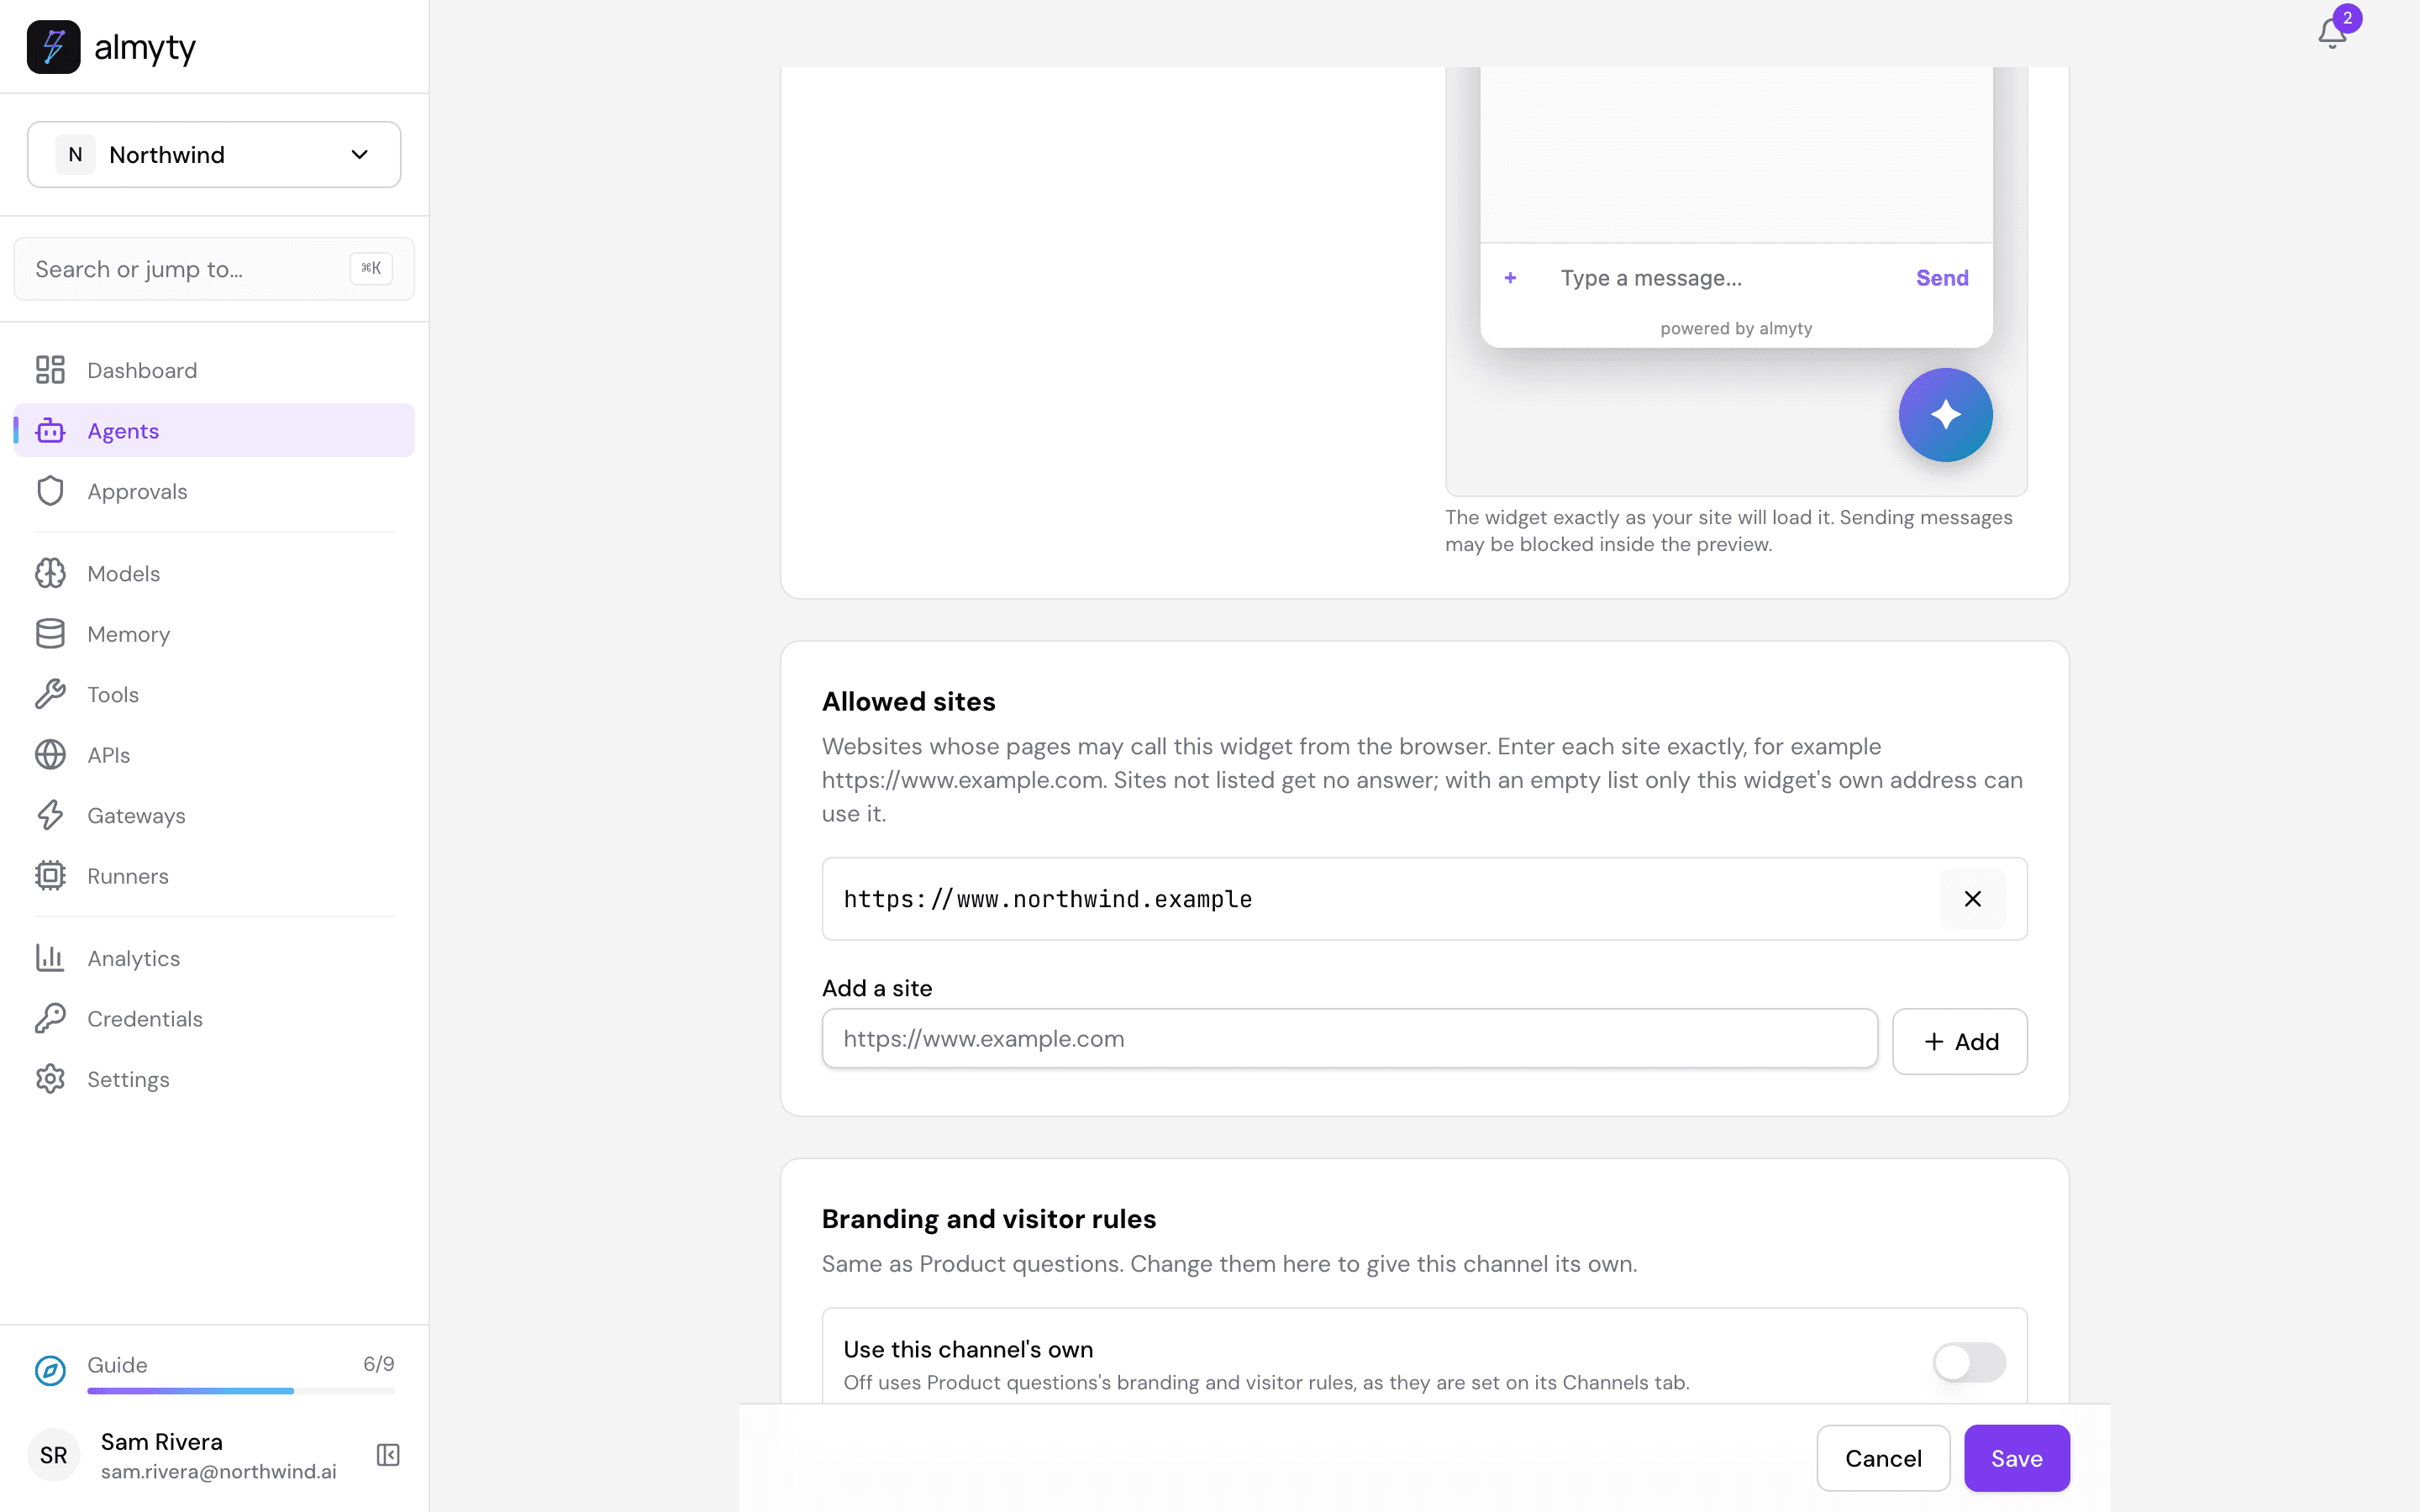
- Under Allowed sites, type your website’s address (for example
https://www.northwind.example) and click Add. Only the sites on this list can show the chat, so nobody can put your assistant, and your spending, on their own site. - Choose where the bubble sits and its icon under How it looks; the preview shows it with your name and greeting.
Click Save.
6. A link for emails, ads and social posts
For places where you cannot add code (an email, an ad, a social post), add a Web chat too: Add channel, Web chat, Publish. It is a chat page with its own link, with the same look, the same limits and the same answers.
Keep an eye on it
- Runs on the assistant shows every question and answer, and what each cost.
- Analytics in the sidebar shows usage and spending over time.
- If an answer is off, fix the article in your help center: the assistant reads it fresh every time. To change how it answers, edit its Instructions.
- Visitors can download or delete their own chat, and chats are deleted after the period you set under Visitor data. See Hosted chat.
For developers
- This walk-through is automated in
scripts/demo-seed/guides.mjs marketingon the local demo stack, which serves a small fake help center. - The widget is one
<script>tag served from almyty; it has no sign-in, so publishing refuses it on a channel that requires one. See Publishing a channel. - If your documentation has no API, a developer can connect any search endpoint as an HTTP tool: HTTP tools.